Candidate management
Last updated on • Disponible en Français
Select an item from the list:
Managing tests and candidates
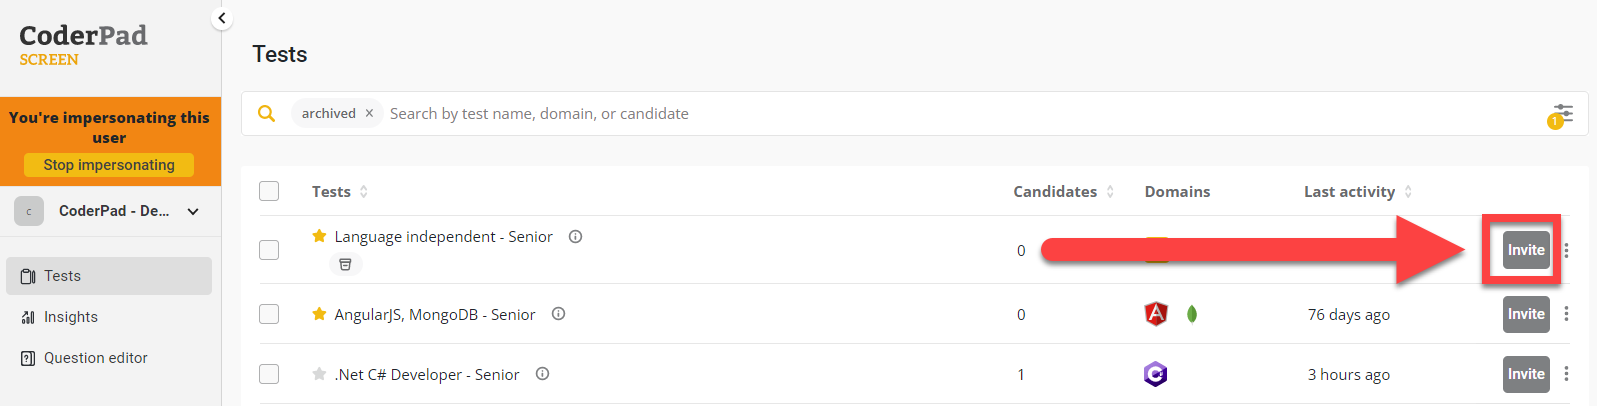
To invite a candidate to a test, click on the Tests option in the left navigation menu, and click on the person icon Invite button to the right of the test title.
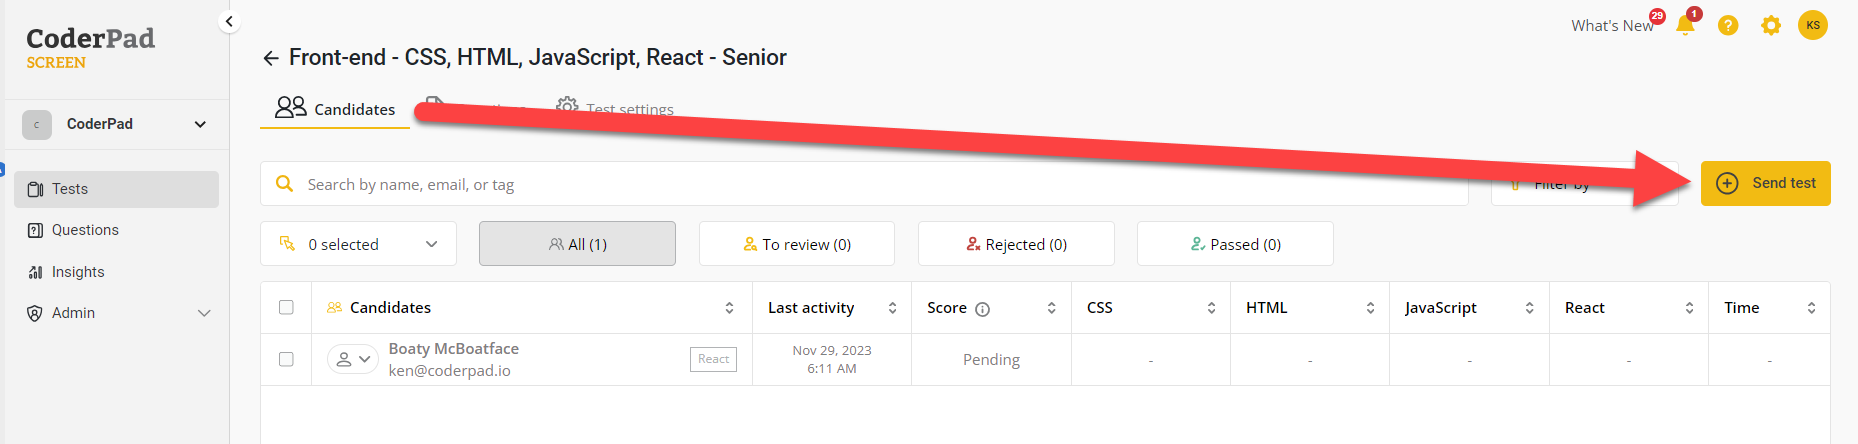
Alternatively if you’re already in the test, you can navigate to the Candidates tab and click the Send test button.
You can invite candidates in one of two ways:
- Enter in individual candidate details
- Send out a public URL
1. Input candidate details
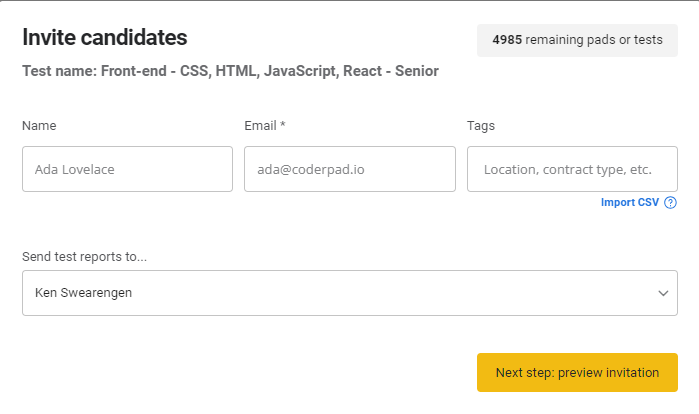
Input the candidate’s first name, last name, and email address. You can also import a .CSV file with multiple candidates.
✅ An API integration to import candidates is available to Enterprise customers.
Use tags to sort and track candidates. Tags remain invisible to candidates.
You’ll then select who will receive the test report for the candidate(s) and click on Next step: email setup to finish setting up the email template that will go out to the candidates with a link to the test.
⚠️Users who receive reports must be set up in the Users section and given the relevant access permission by admins. If this hasn’t happened, you may not see this option.
2. Send out a public URL
Sometimes, inviting candidates individually via email isn’t the most efficient. For example, if you want to:
- Conduct university recruitment sessions, where you don’t know in advance who will take the test
- Have recruiters who do not have access to Screen
- Include your test link in your online job posting or social media post
In these cases, you can use a public link, allowing candidates to take a test without an email invitation.
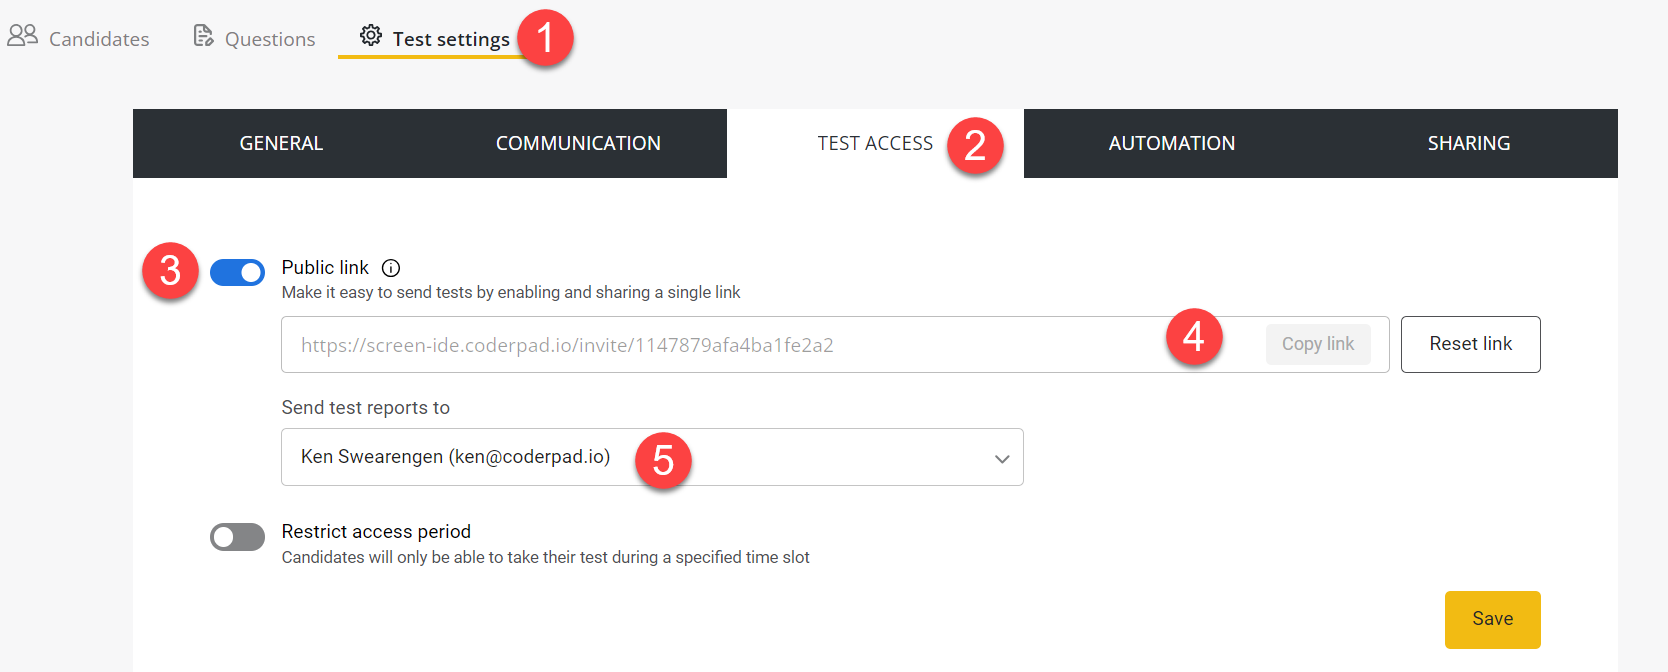
Once your test has been created, simply click navigate to the Test settings for your test (1) and then open the Test Access tab (2). You’ll need to enable the link by clicking on the toggle (3); you can disable the test link at anytime by switching the toggle back off. You can then copy the link (4) as well as select which of your team members should receive the test reports from the public test (5).
In your Tests dashboard, tests with a public link will be identified by a link icon:
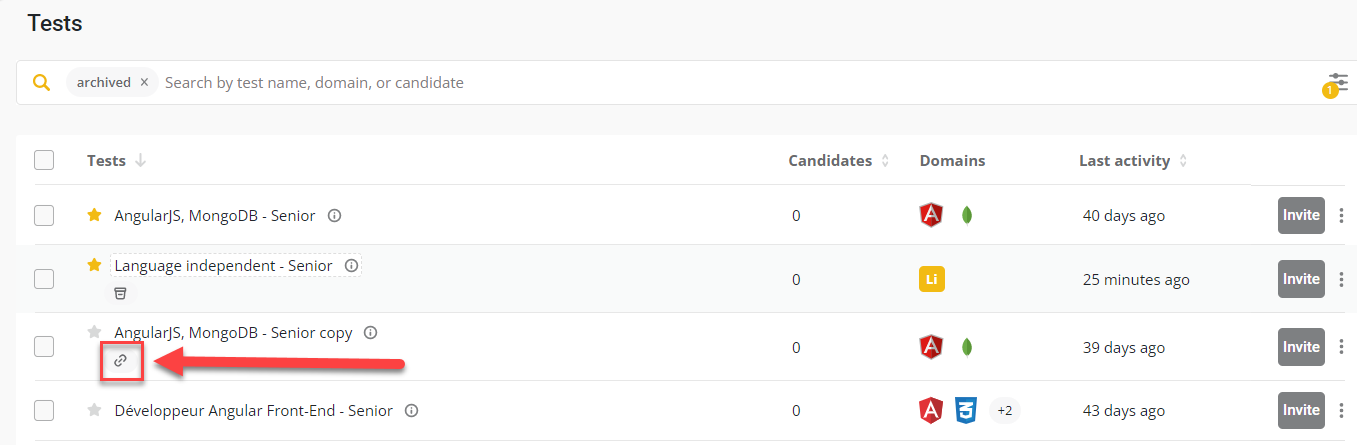
Similarly, candidates invited via a public link will have the same icon next to their name.
Setup invitation email
✅ The default language depends on the language you set up the test in. If you chose French/Spanish and English, the email automatically shows in English.
In the Preview invitation email window, click Edit email to customize the test invitation.
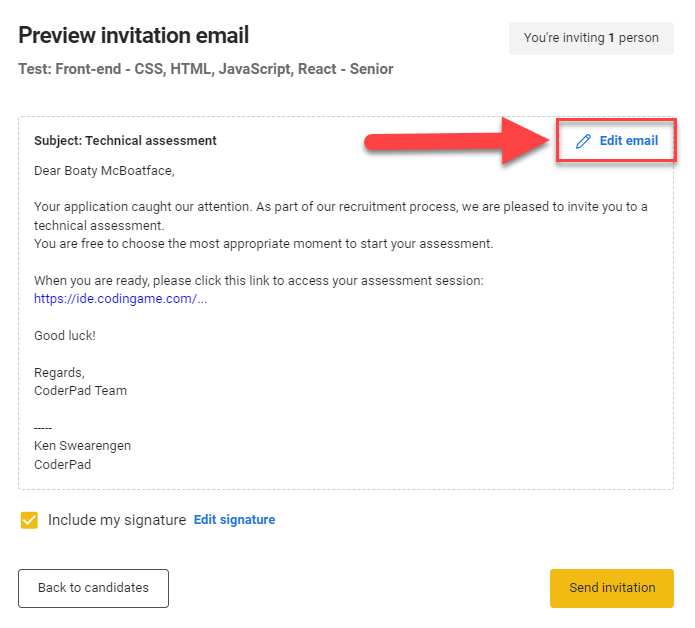
This will open the email editor:
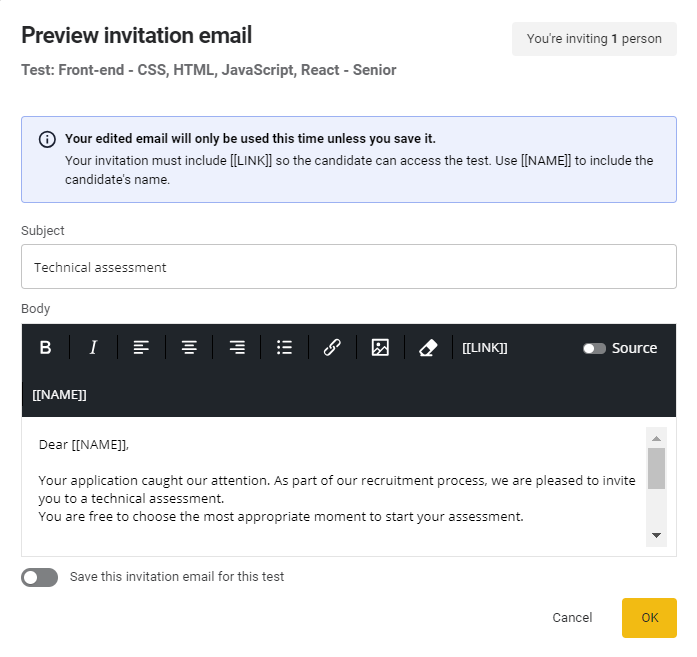
⚠️ The system inserts the candidate’s name at the [[NAME]] tag, and the invitation link at the [[LINK]] tag. Do not remove these tags.
Once you’ve finished customizing the email, click OK. Then click Send invitation to have the email distributed to the test takers.
The candidate will receive an invitation from your company containing the link to start the test and their name appears in the list of candidates who have been invited to this test.
Tracking candidates with statuses
At the top of the candidate list, you can see at a glance which candidates are waiting to be reviewed, as well as which ones you have rejected or passed on to the next step:

Candidates whose tests are no longer in progress will automatically appear in the To review category. From here, you can decide which category a candidate should be moved to.
You can change the status of a candidate in three ways:
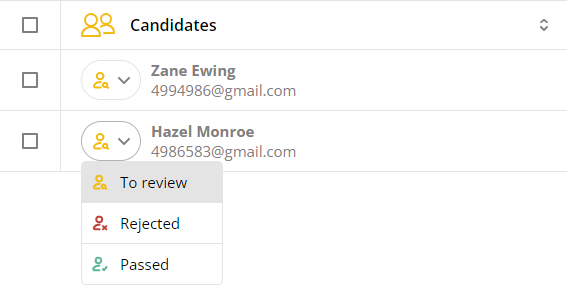
1. Simply click on the status icon of a candidate in the list and select an option from the drop-down menu:
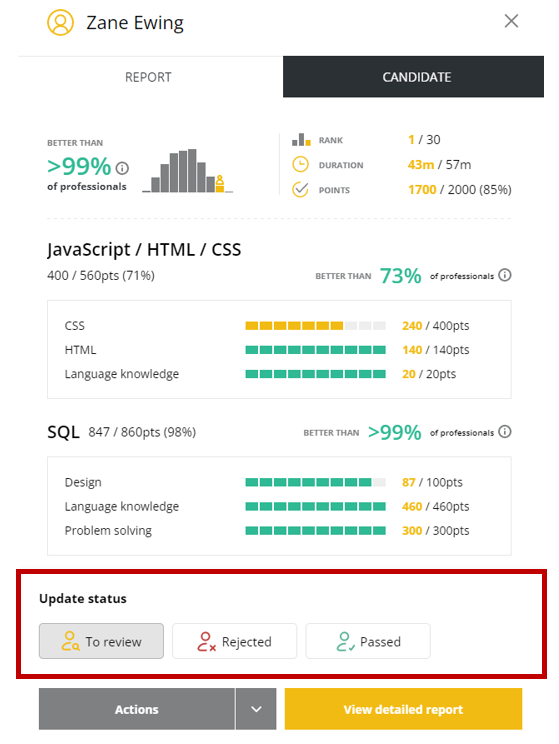
2. Click on a candidate to open their report and select the desired status at the bottom of the screen:
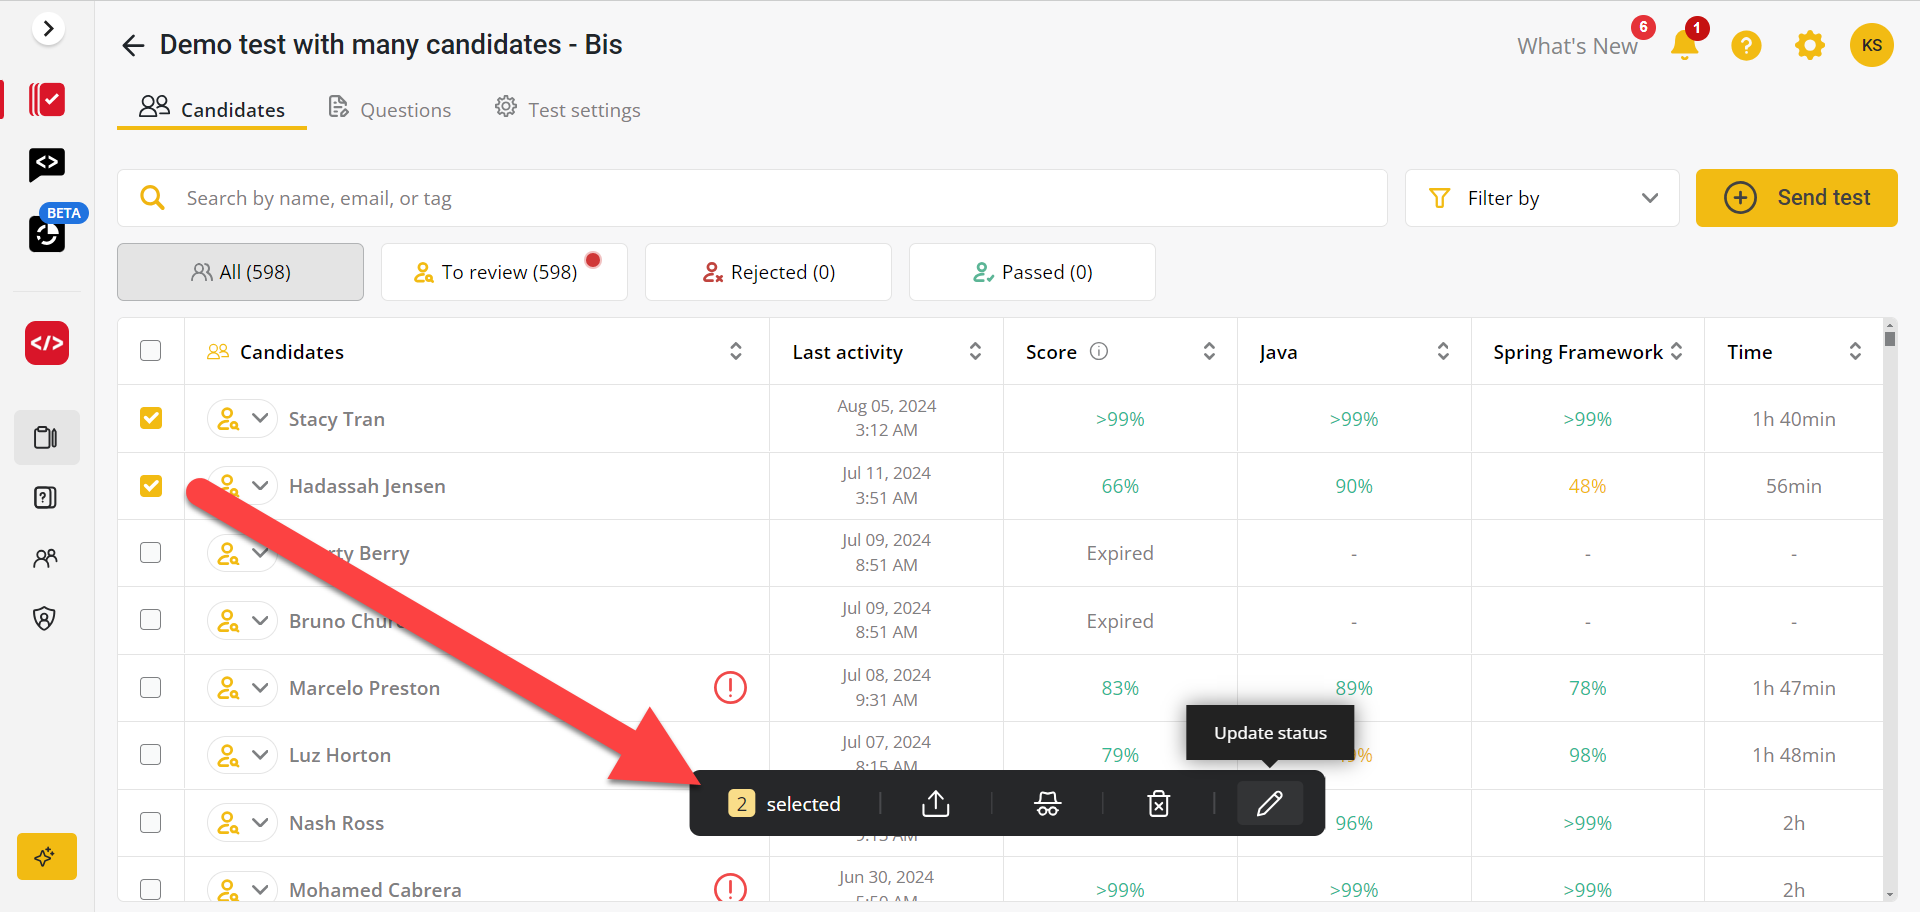
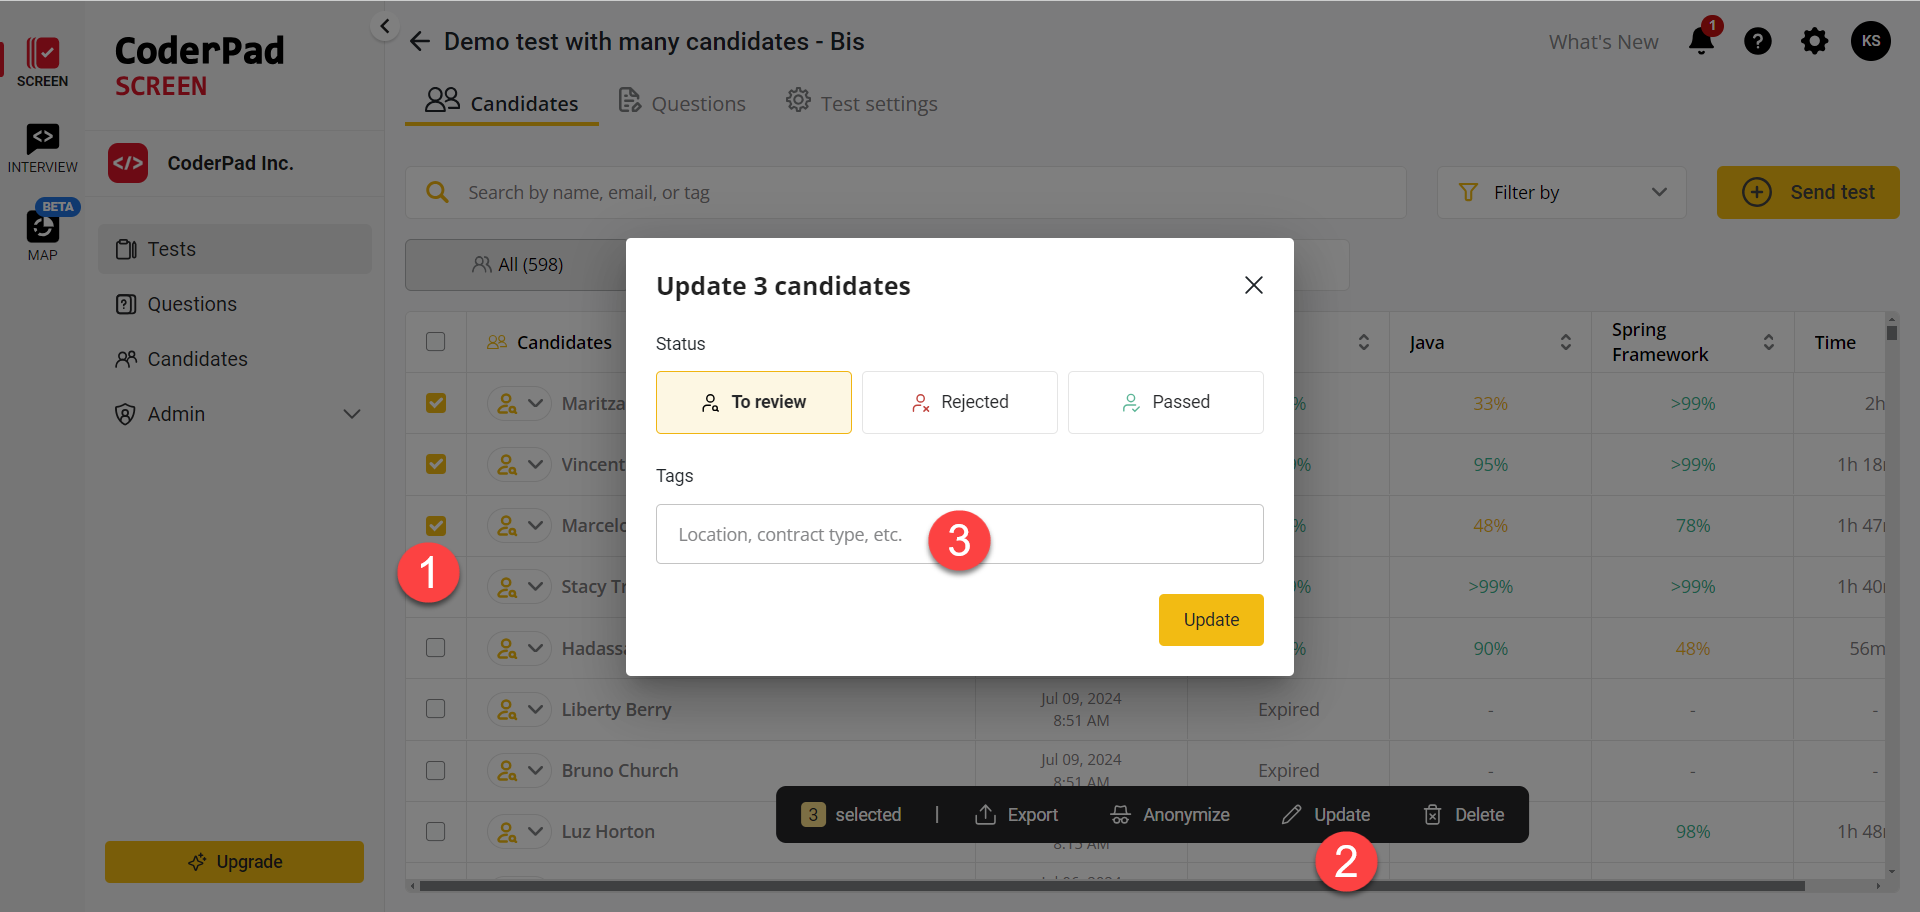
3. Select several candidates, open the batch action drop-down menu, then click on Update status:
⚠️ You cannot change the status of a candidate whose test is still ongoing.
Automating candidate management
If you want to streamline your hiring process you can create rules to automatically pass, fail, or tag candidates based on their test scores. You can set up these rules either for individual tests by navigating to the Test Settings for each test, or as default rules for all your tests by navigating to the Test Settings for your account.
In either case, you’ll want to first select the Automation tab. Below that, you’ll see a rule box (1) and two smaller boxes inside that, one to set the condition of the rule (2) and another to set the action (3).

You can set multiple conditions and actions by simply clicking on the + Add condition and/or + Add action buttons as needed. You can also set multiple rules by clicking the Add rule button.
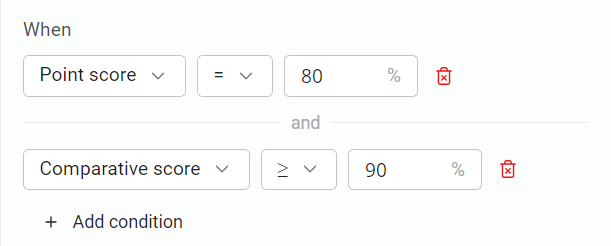
Conditions
In the conditions drop down, you’ll be able to select one of two options:
- Comparative score: A score computed by analyzing how the candidate did compared to other candidates who took similar tests.
- Point score: The candidate’s raw score as a percentage of the questions they got correct.

Once you select the score type you want to automate on, you’ll then select a conditional operator ( =, ≤, or , ≥`) and set the score threshold for when the rule will trigger.
Actions
In the actions box, you can set a standardized status (Passed or Rejected) and/or customized tags depending on how you want your candidates to be categorized.
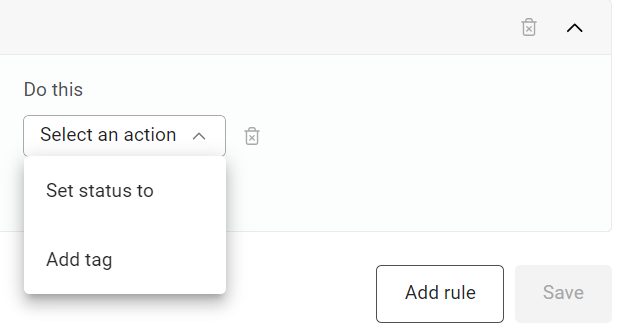
You can set multiple tags, but only one status per action.

Once you’re done setting your rules, click Save to complete the process.

✅The rules will automatically be applied as soon as future candidates complete their test. No retroactive impact on existing candidates.
Assess invited candidates
To access your candidate list and view their scores, click on any test in your tests list and you’ll be taken to the candidate screen (as long as at least one candidate has been invited).
By default, candidates are sorted by their global test score. If you test them on several technologies, there is a score per technology.
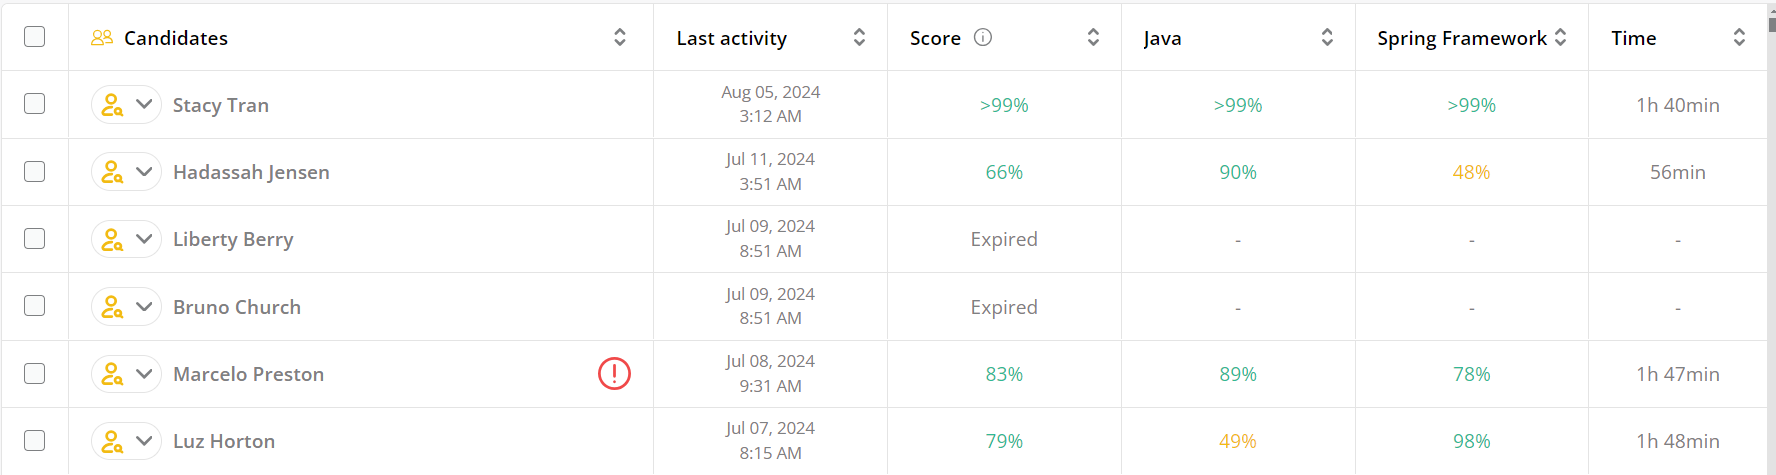
You can also filter candidates based on other criteria by clicking on the filter icon.

The filters include:
- Score (Greater or Less than)
- Test status (Expired, Abandoned, Completed)
- Review status (Not applicable, To review, Rejected, Passed)
- Alert (No alert, Unusual activity alerts, Manual cheating flag)

Click on a candidate’s name. A pop out on the right shows information on candidate score and ranking compared to other candidates tested on the same technology and at the same level.
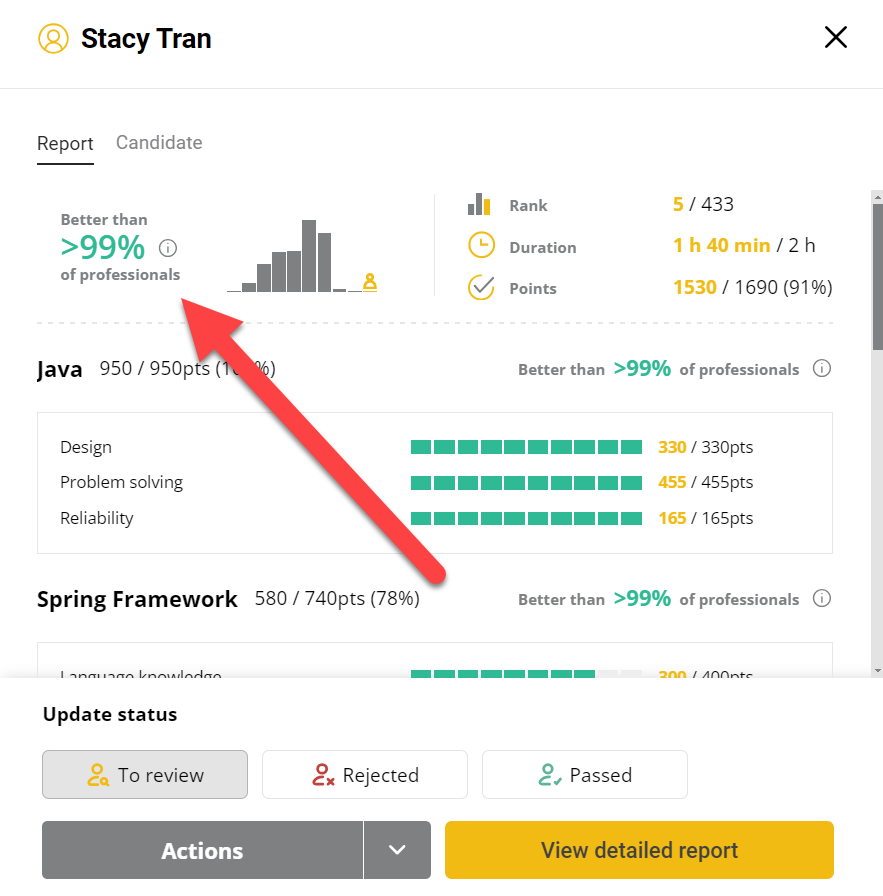
For more information, check out understanding candidate reports.
Add candidate tags
Tags are a handy way to keep track of candidates based on location, team, department, or any other variable that you want to group them by.
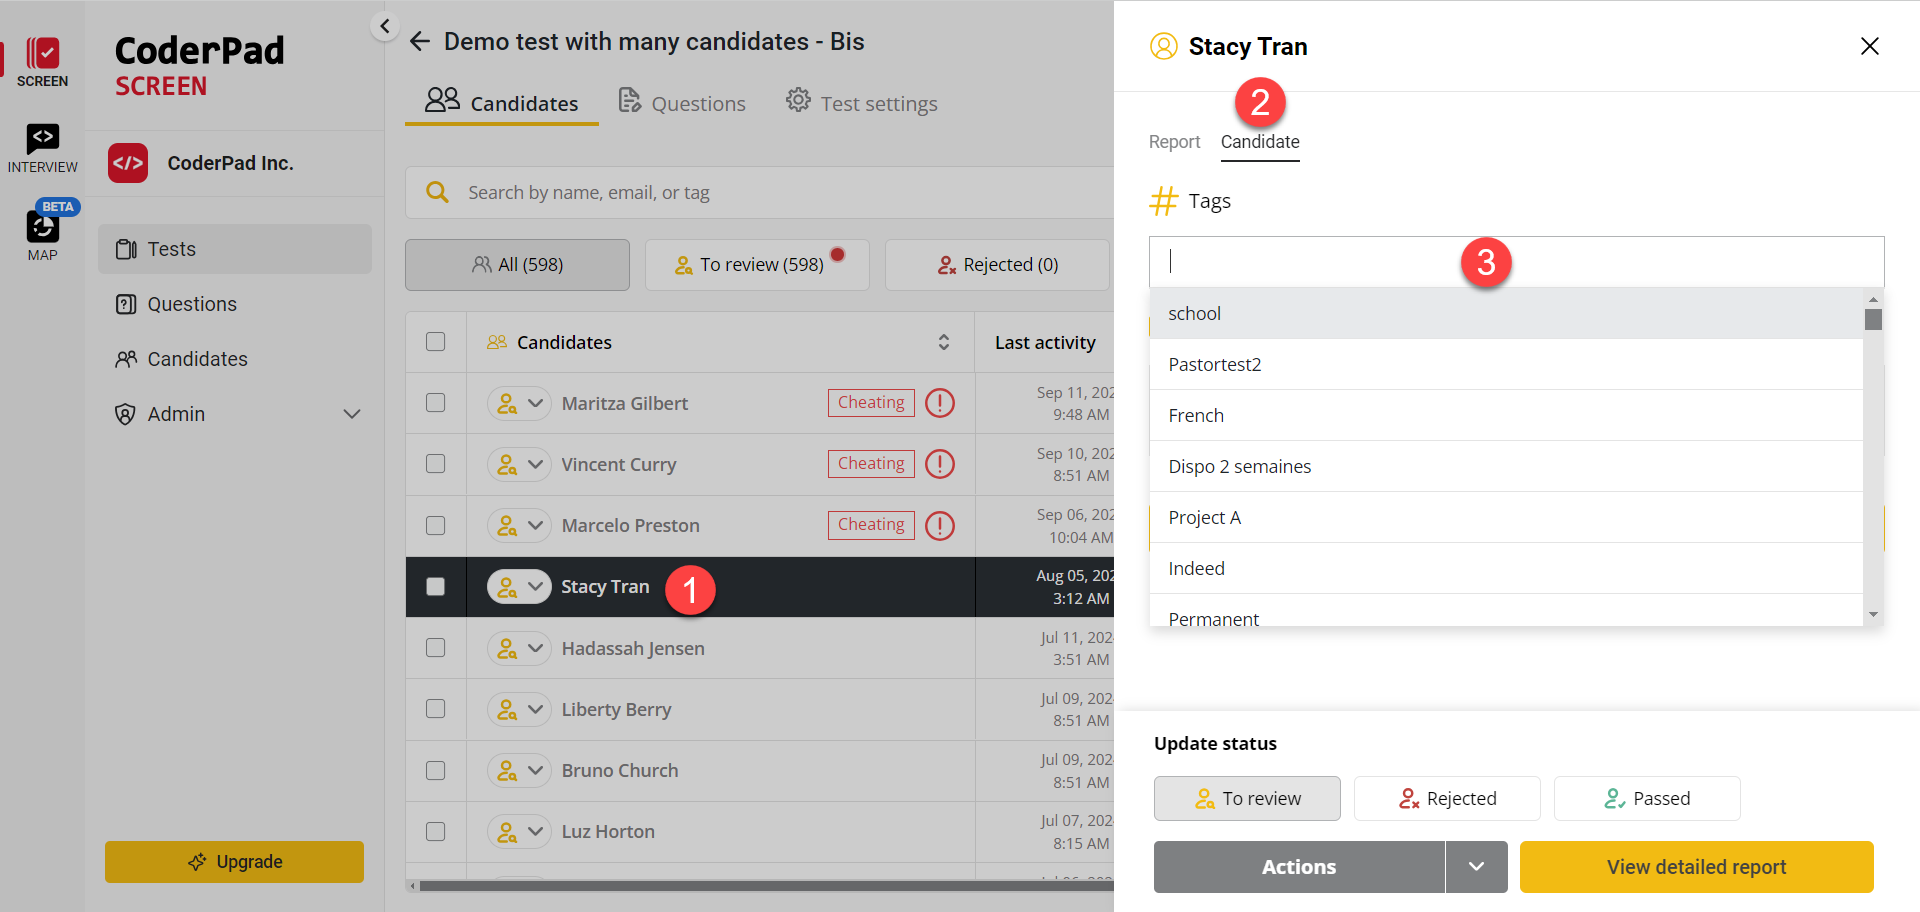
To change individual tags, click on the candidate’s name in the candidates list (1), and then select Candidate (2). You can then select from a list of existing tags, or add a new one (3).
To add a tag to a group of candidates, select the candidates whose tags you’d like to add (1), then click the Update button at the bottom of the page (2). Then add the tags you want all the selected candidates to have (3) and click Update.
Notifications of candidates’ progress
You can choose which events to display in the candidates’ Timeline by updating the Timeline settings. The following events can be tracked in the timeline:
- Candidate is invited to take a test
- Candidate visits the welcome page
- Candidate starts test
- Candidate starts tutorial
- Candidate finishes tutorial
- Candidate’s invitation is cancelled
- Personal data are erased for a candidate
- Candidate abandons test
- Candidate’s invitation expires
- Candidate finishes test
- Candidate’s email is invalid
- Candidate’s status is updated
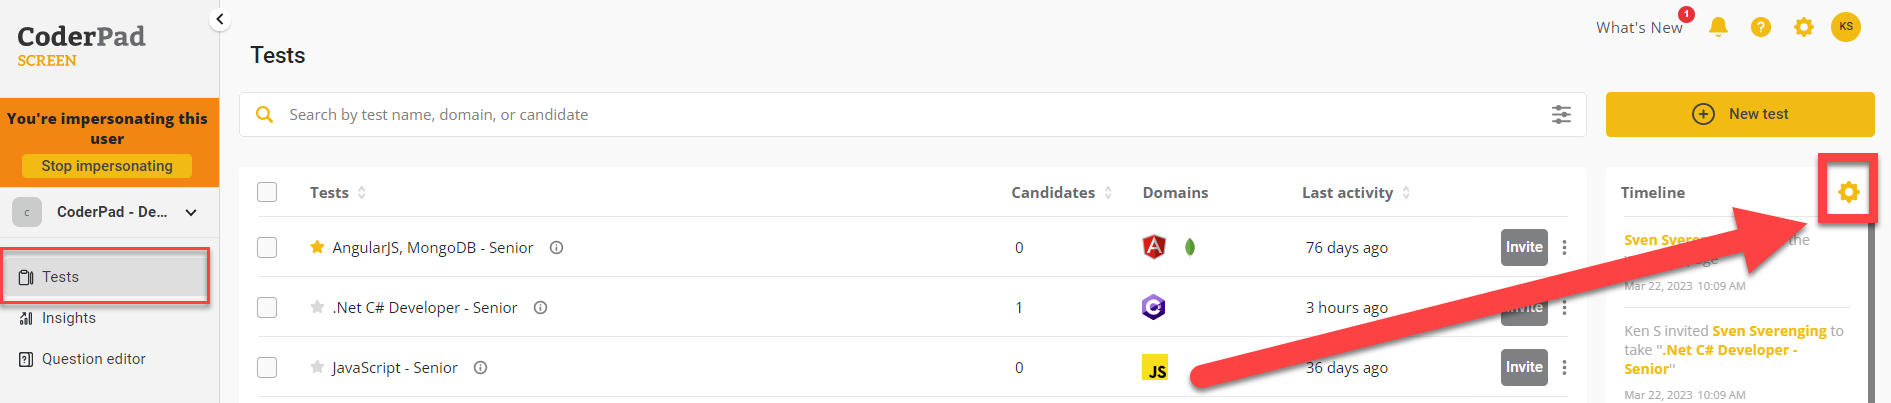
To access the Timeline settings, navigate to your account and click on Tests on the left navigation menu. Then, click the gear wheel icon ⚙️ in the top right of the Timeline window.
A pop up containing Timeline settings will appear. Simply check the events that you want to display and then click Save.

📧 You can also receive an email when the candidate finishes the test by selecting the same checkbox at the bottom of the Timeline settings.
Pending tests and other test statuses
Pending tests are invited tests not yet taken by a candidate.
To see all pending tests, go to My Tests.
Hover over the # for a particular test to see the number of invitations, the number of completed tests, and the number of tests needing review. If the Invited and To review numbers are the same, there are no pending tests. If the numbers are different, there are pending tests.

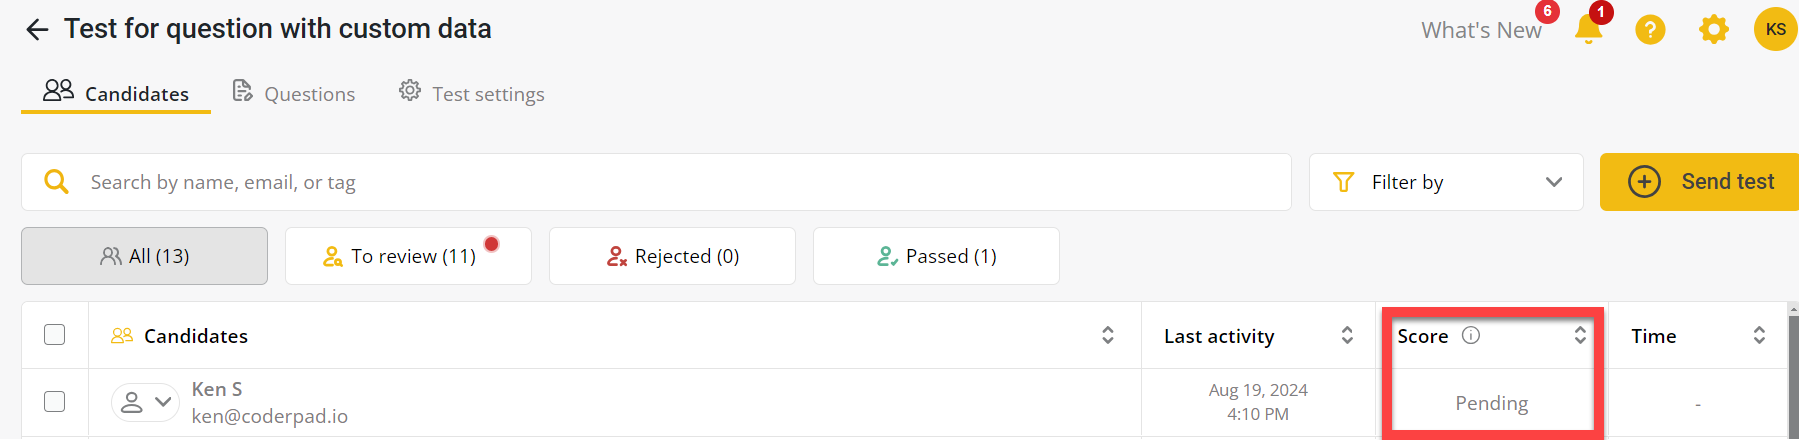
To view pending tests, click on the test to see the candidate list:
- If the test is not yet complete or has not started yet, the score will say Pending.
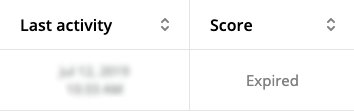
- If the time limit has expired, the status will say Expired.
- If the candidate started the test but stopped while taking it, they have 48 hours to finish it. If they do not finish it within the 48 hours window, the score is based on completed questions and a red exclamation mark notifies you that that test was abandoned by the candidate.

- If the candidate is still within the 48 hours window, the test will be labelled as In progress in the score column.

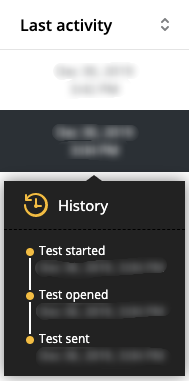
The Last activity column gives a summary of a candidate’s activity.
Candidates who have not yet started their tests receive a reminder email 3 days and 7 days after the the invitation email is sent.