Lever integration guide
Last updated on • Disponible en Français
ℹ️ This integration requires a Professional or Enterprise Lever plan and a CoderPad Enterprise plan. To configure the integration, you must be a Lever Super Admin and CoderPad organization Admin. If you’re on a CoderPad Personal plan, please consider upgrading to access this feature.
The Interview platform integrates with the Lever applicant tracking system to automatically create interview sessions for candidates.
Setting up the integration
In Lever
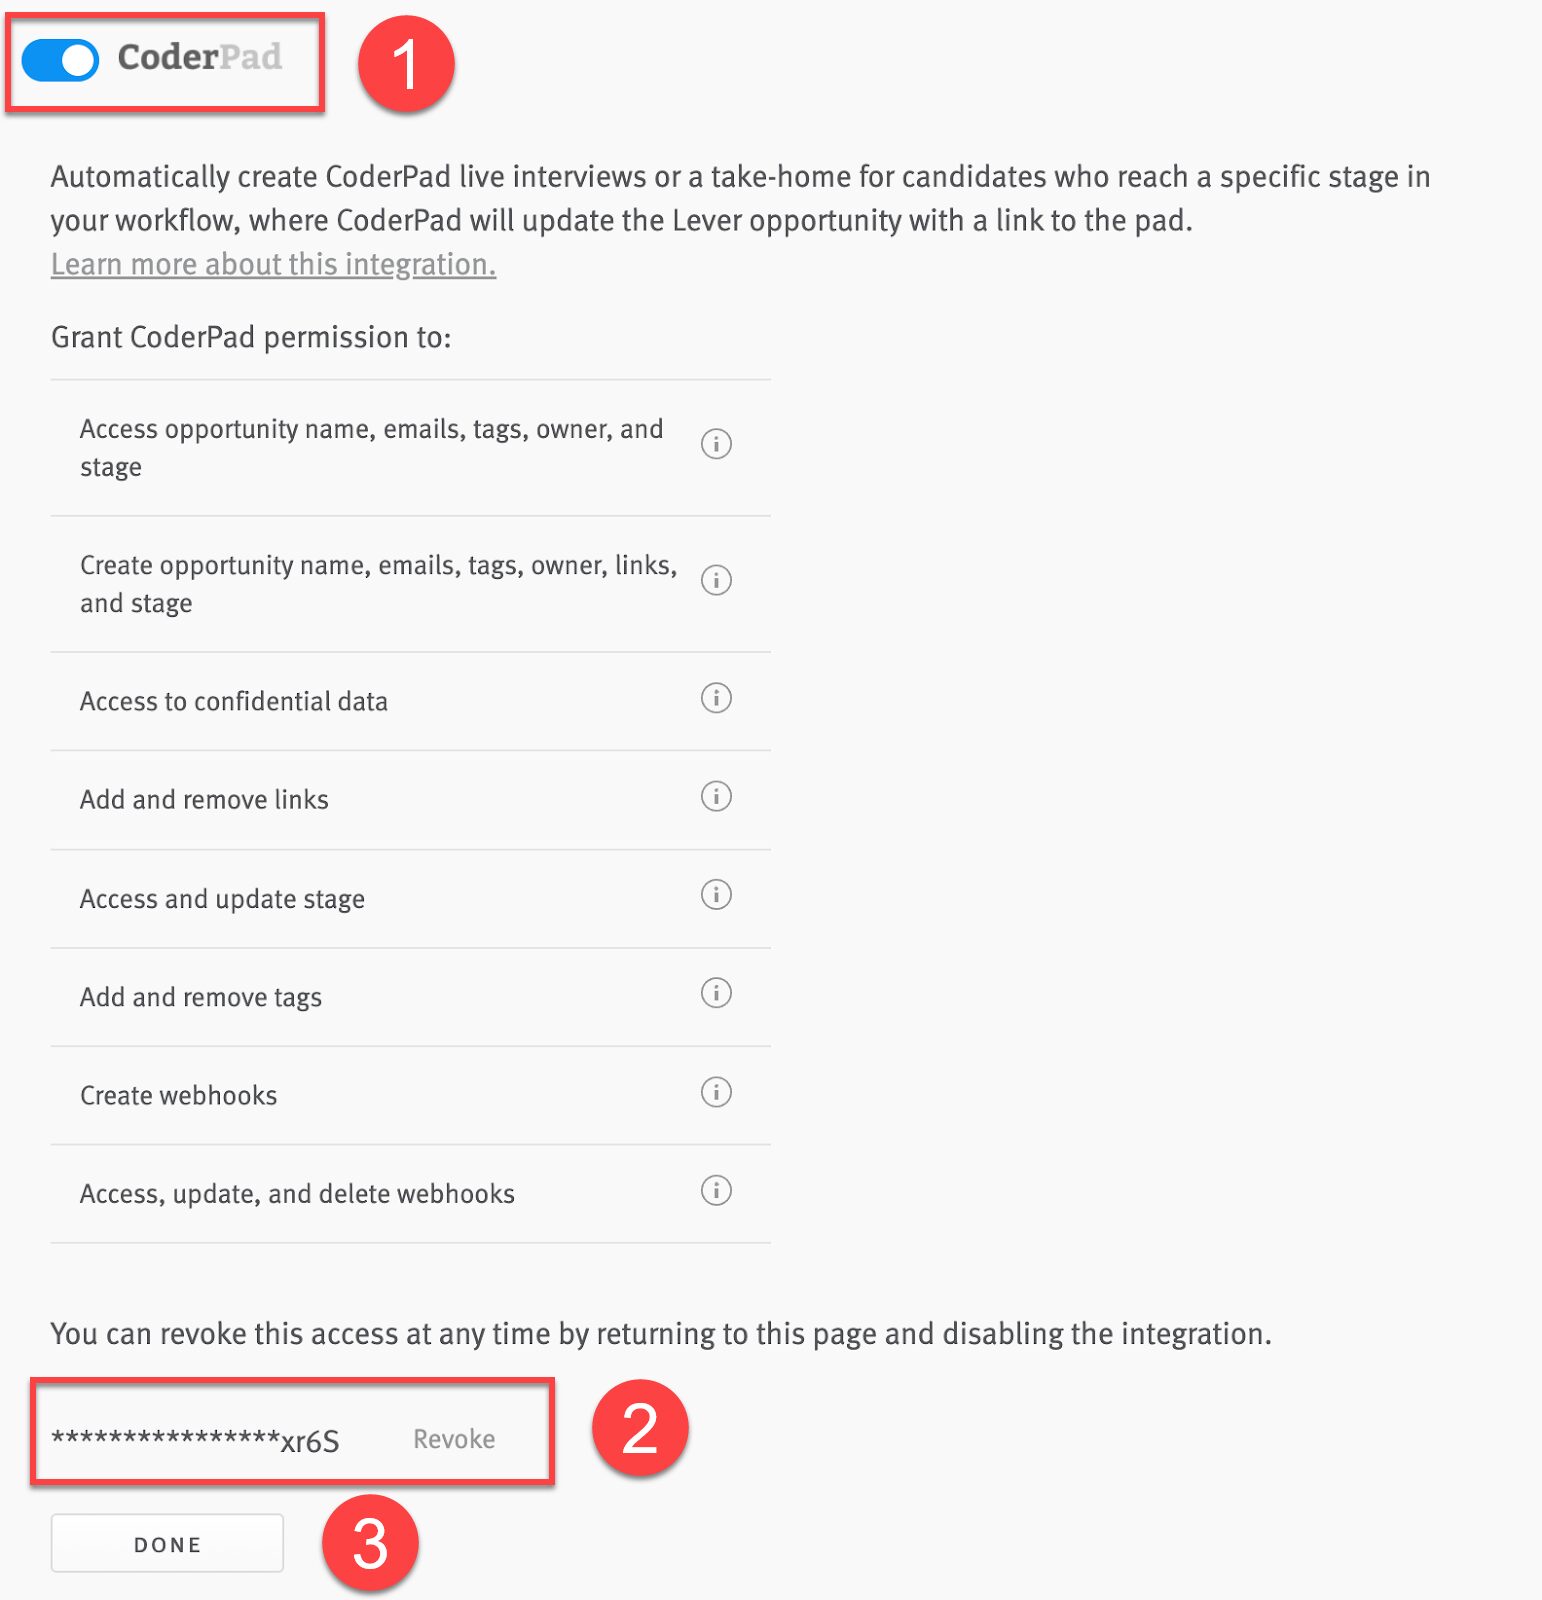
1. On the Lever integrations page, turn on the CoderPad integration (1), copy the API key (2), and then click Done (3).
In CoderPad
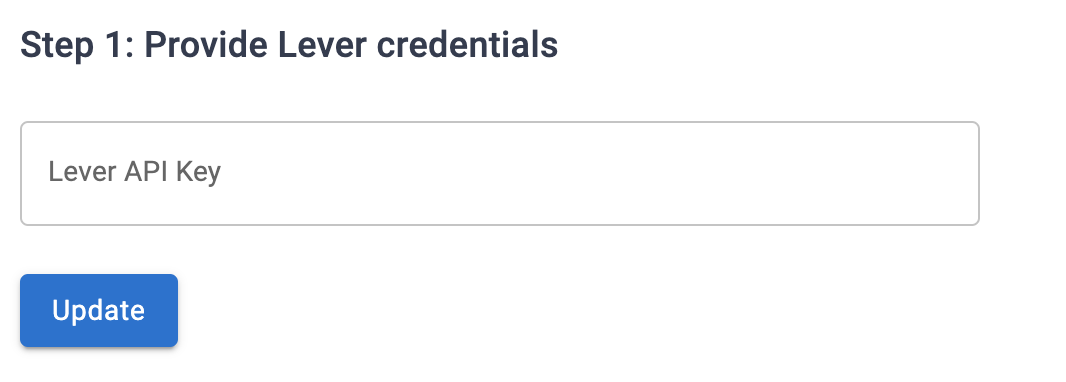
2. Paste the Lever API key into Step 1: Provide Lever credentials. Click Update to save.
3. In Step 2: Select Lever Stages with Pad Creation, select the stages that should generate a pad link when the candidate moves into that stage. Click Update to move to the next step.

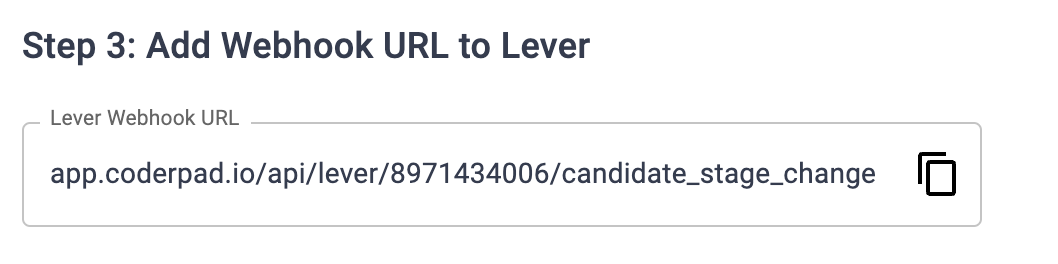
4. On the Step 3: Add Webhook URL to Lever section, copy the webhook URL to paste into Lever.
In Lever
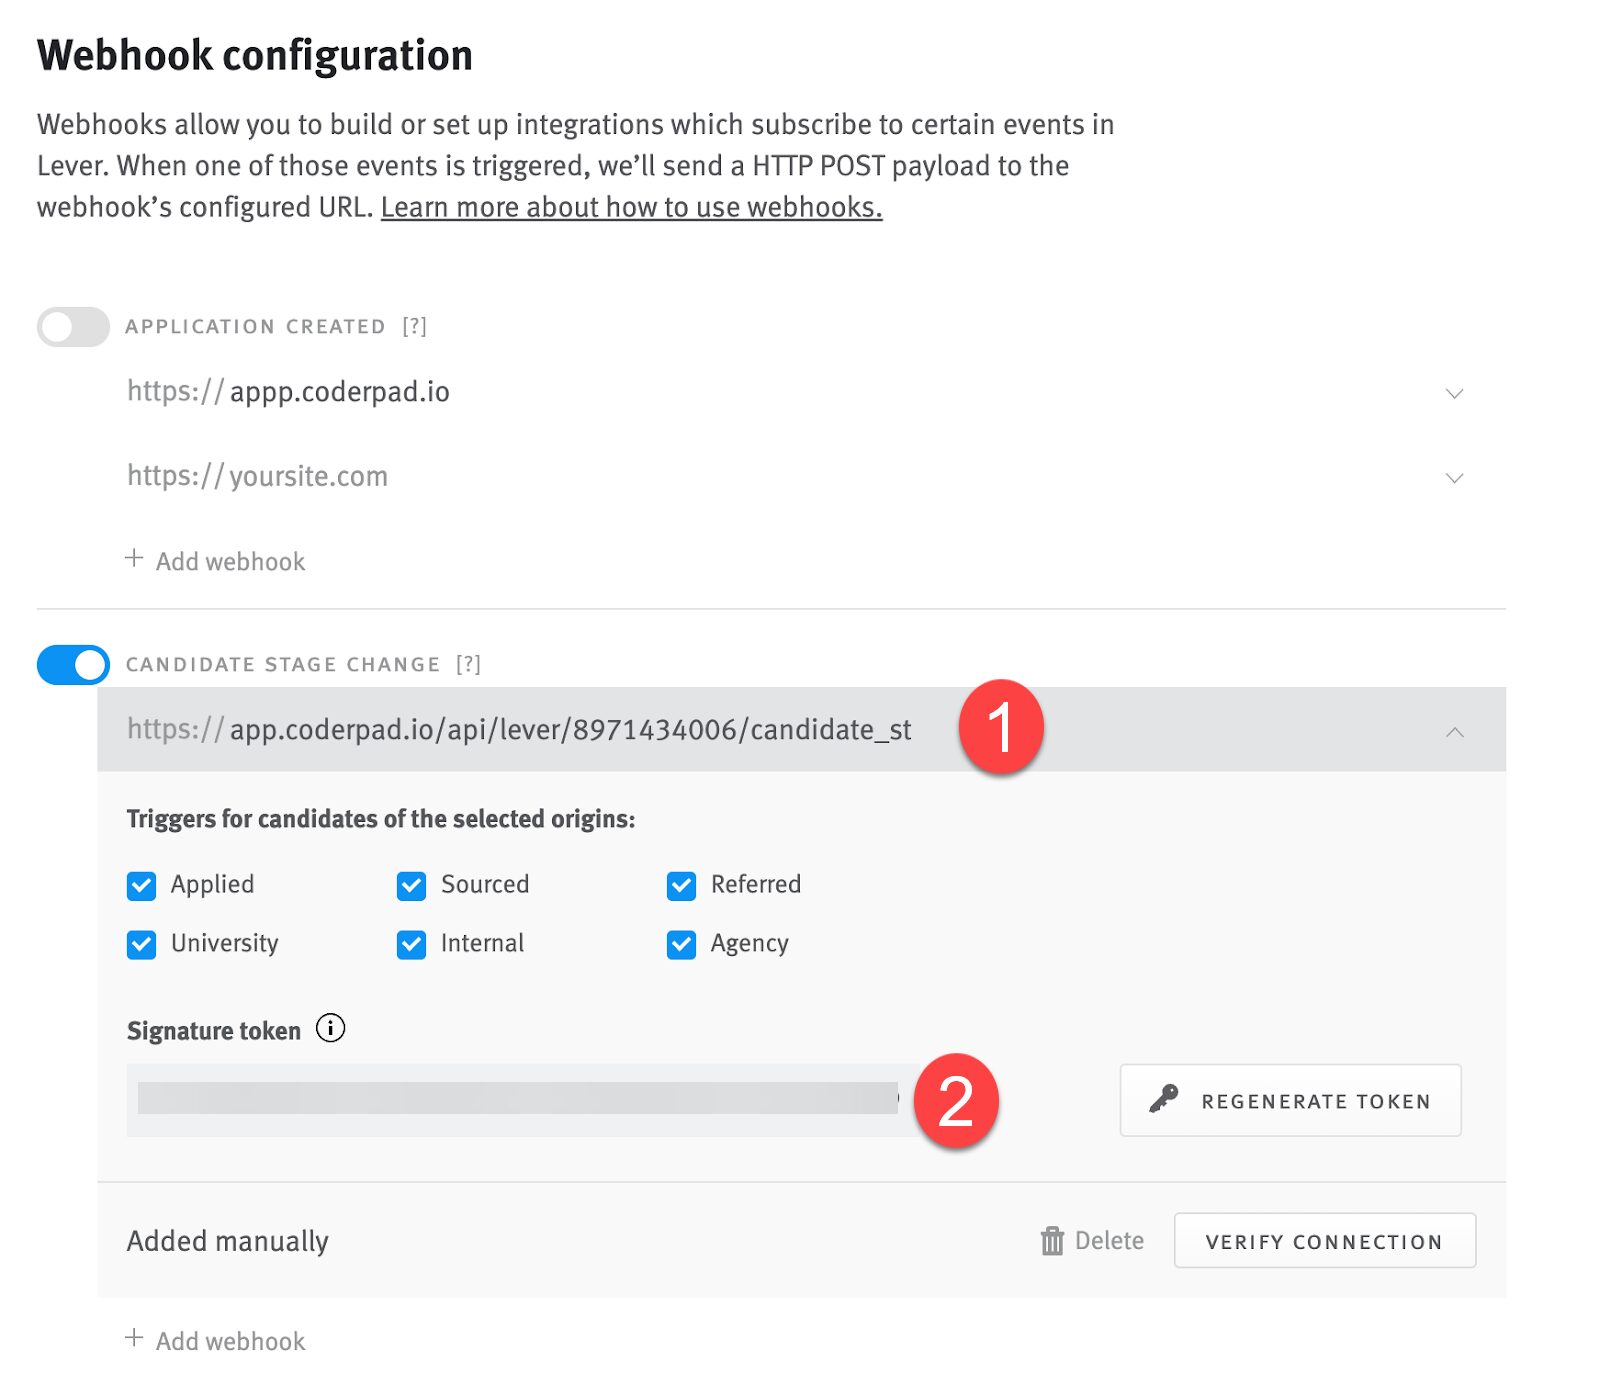
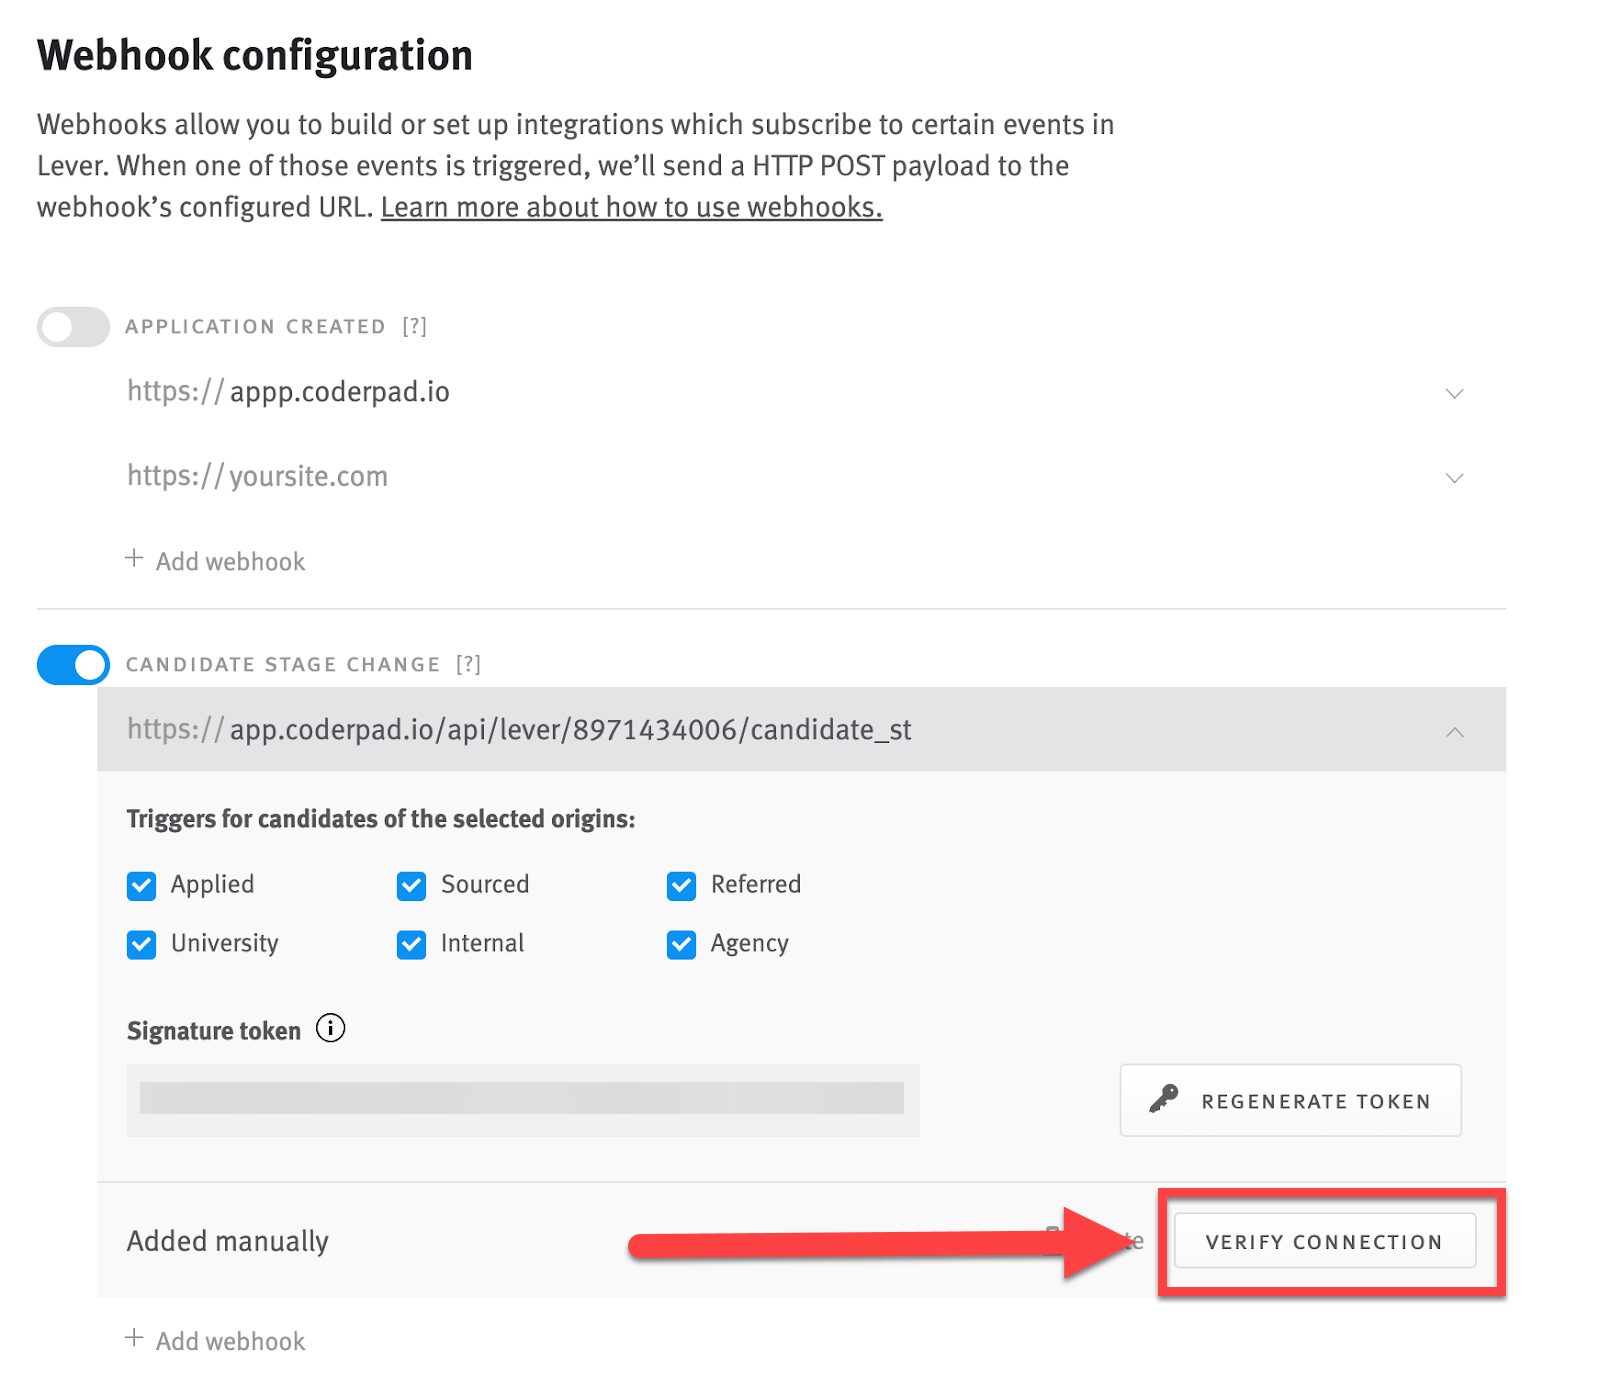
5. Go to the Webhook configuration tab in Lever. You’ll need to do 2 things on this page: Under the Candidate Stage Change section, open a new section and paste in the webhook URL you copied from the last step (1). Then, copy the Signature token (2).
In CoderPad
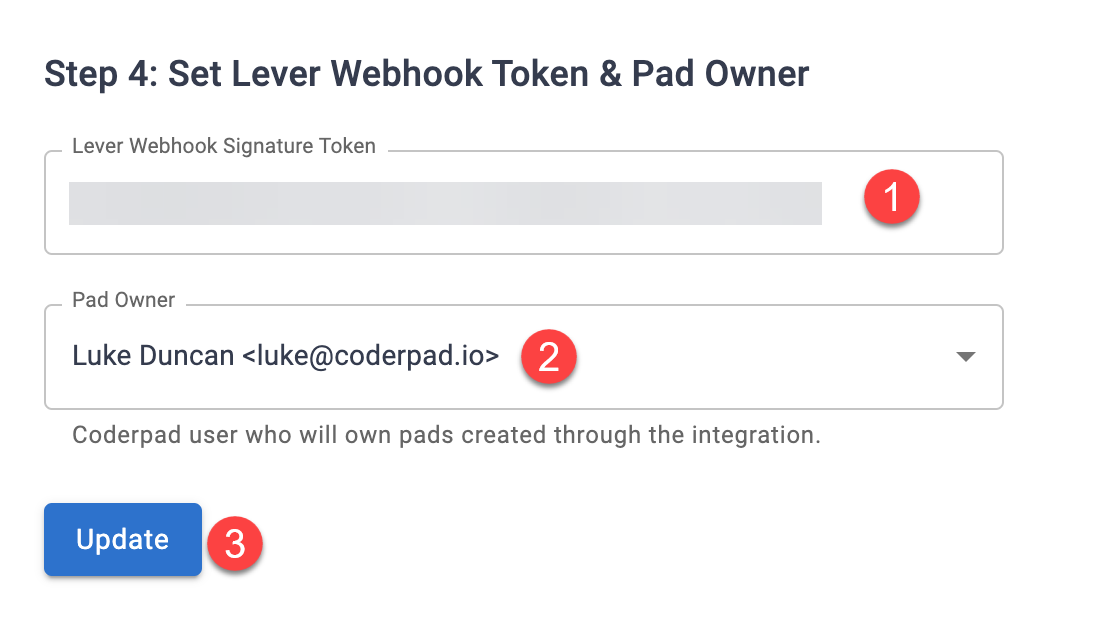
6. Go back to Coderpad and in Step 4: Set Lever Webhook Token & Pad Owner, add the webhook signature (1) and select the user who you would like to own the pads (2). Then click Update (3).
In Lever
7. Go back to Lever and under the webhook – click verify the connection.
Using the integration
Apply the "coderpad" tag to jobs or candidates in Lever to automatically create pads. When a tagged candidate reaches the first designated Lever stage, Interview creates a pad and updates the Lever candidate profile with the interview link:
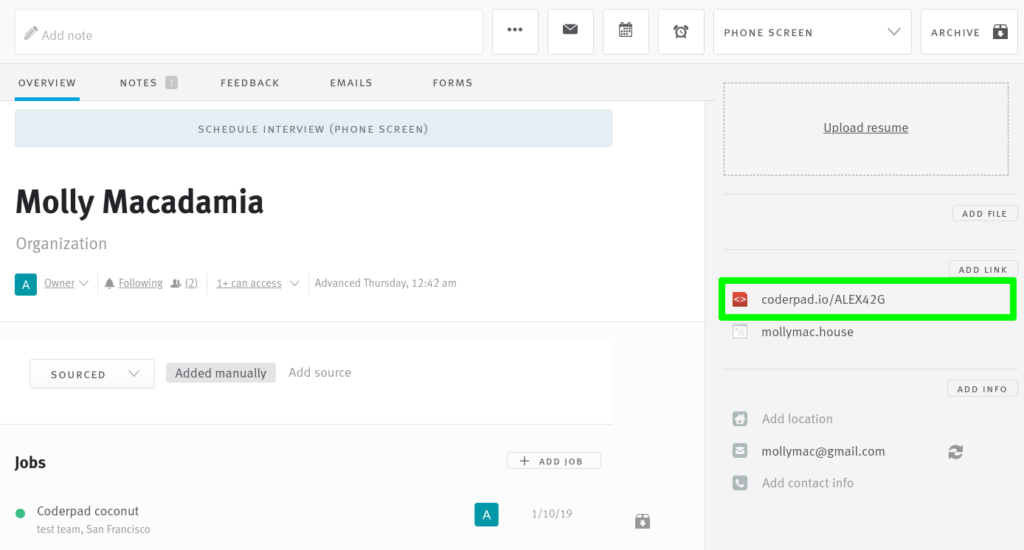
You then copy this link and send it to the candidate (and interviewer).
View results
When the Interview session ends, you may wish to view the results in Lever. The same Interview link we added to the candidate page also serves as a record of the interview. Click that link to play back the history of the interview session. You can also copy code from the interview into a candidate note or feedback.