Creating and editing questions
Last updated on • Disponible en Français
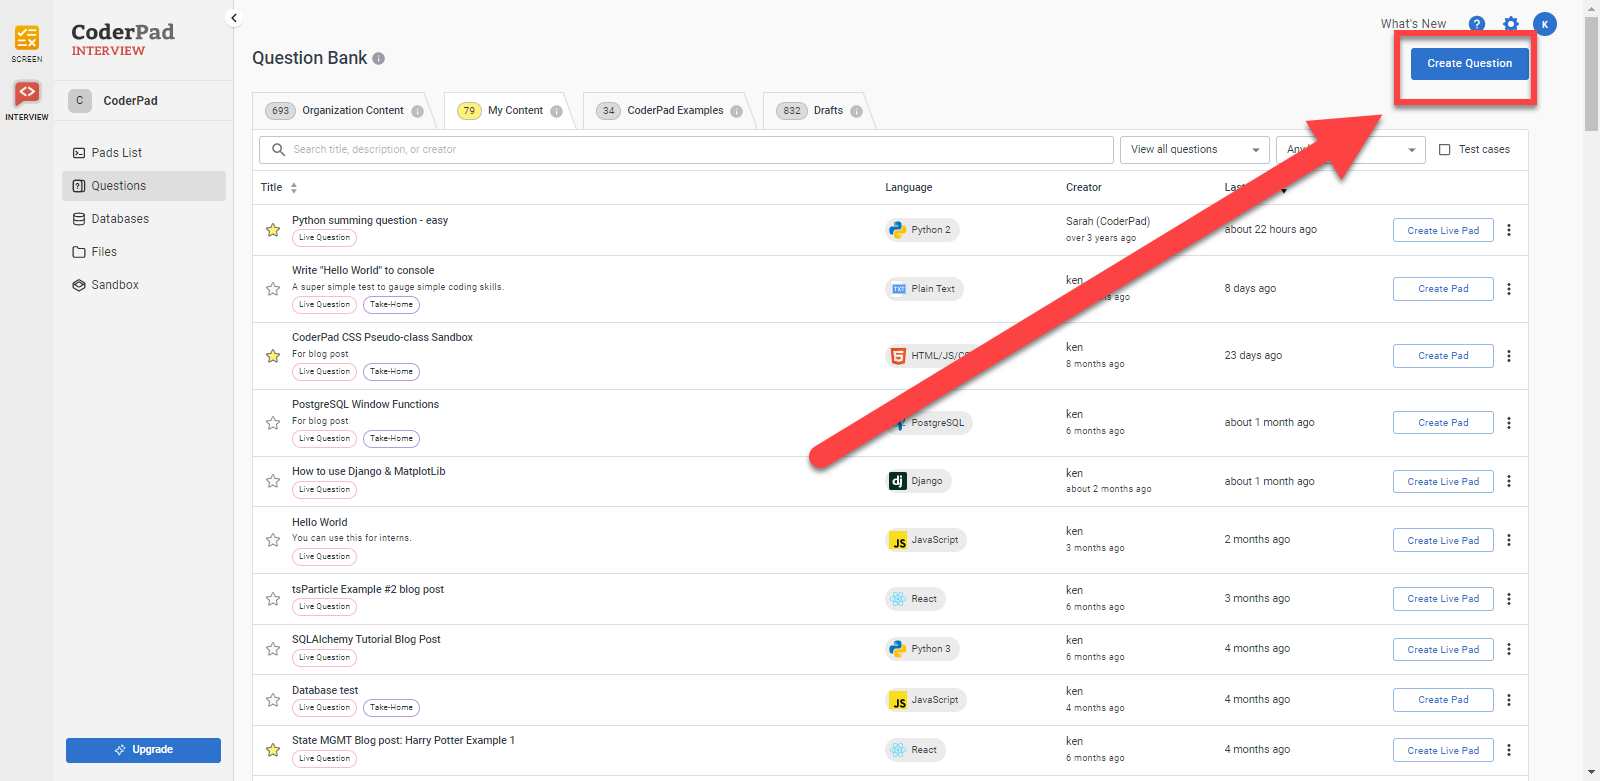
To add a new question to Interview’s Question Bank, start on the Question Bank page and click the Create Question button at the top right of the screen.

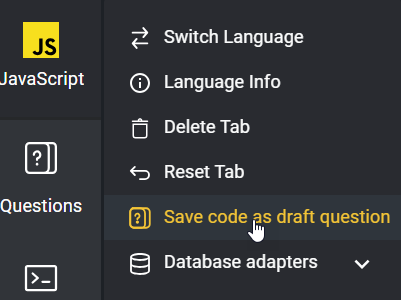
Alternatively, you can create a question from an existing tab by clicking on the vertical ellipses (three dots) next to the language and then clicking on Save code as draft question.

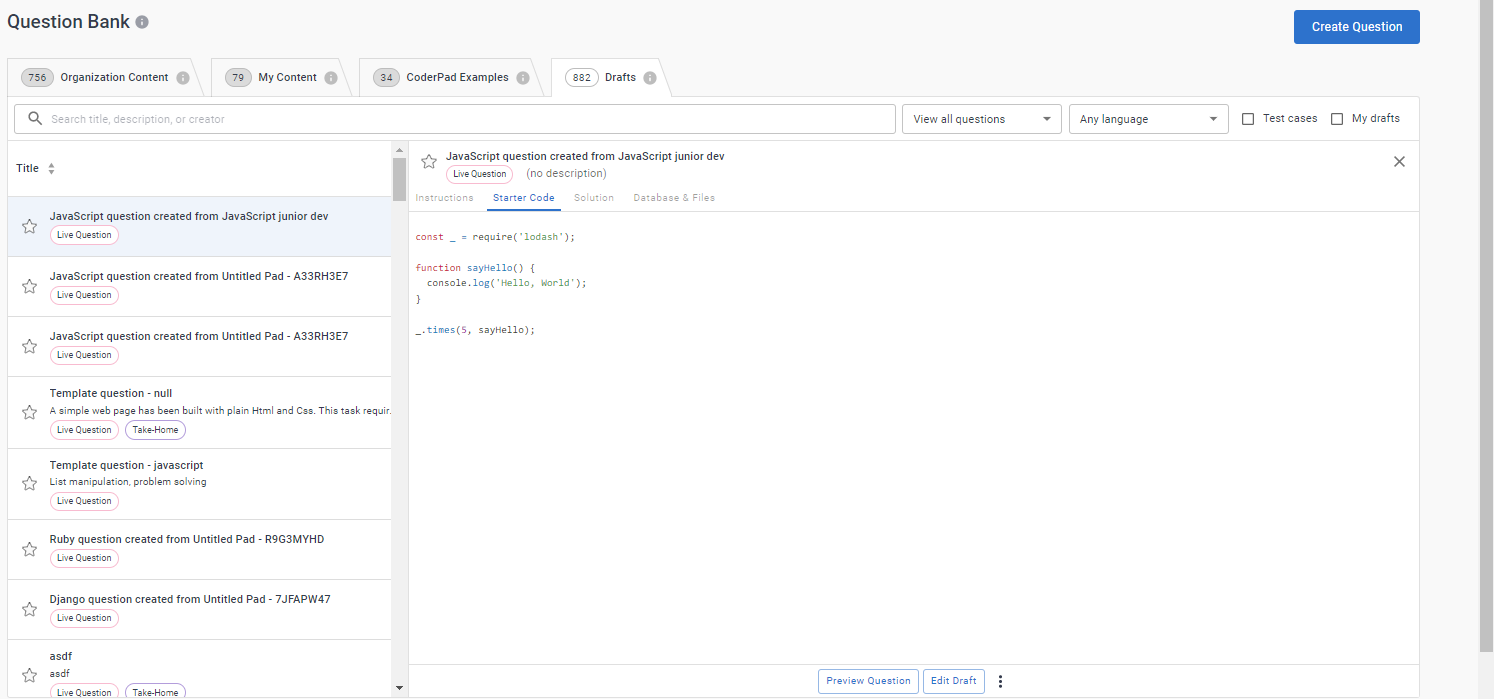
Once you click Save, you’ll be taken to the Drafts tab in the question bank. Here you can customize the question — including changing the name of the question — by clicking on the Edit Draft button at the bottom of the screen.
You’ll then be guided step-by-step through your question creation process.
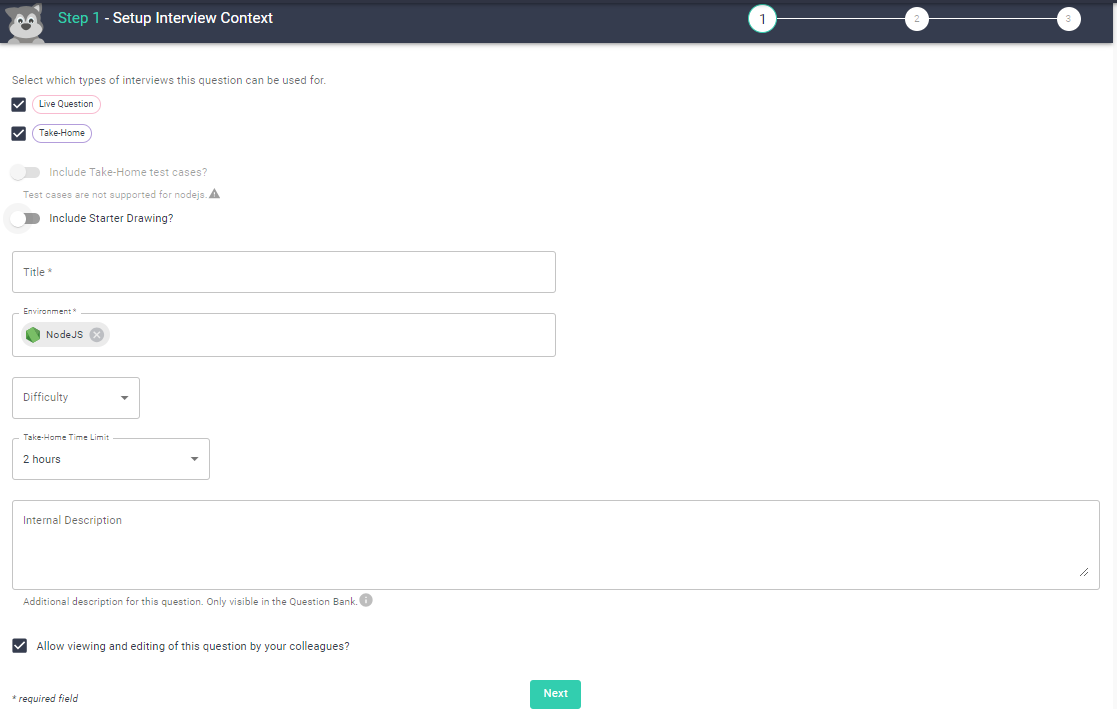
Setup Interview Context
Here you will select which types of interviews your question will be used in: “Live Question”, “Take-Home”, or both.
If you’ve only selected “Take-Home”, you can opt to add test cases. Test cases will allow you to test a candidate’s Take-Home code against certain requirements.
✅More information on test cases can be found in the Test Cases feature guide here.
Regardless of interview type, you’ll then be asked to add the following information for the question:
- Include starter drawing – Turning on this toggle allows you to add a drawing or diagram to your question, which you’ll edit in the third stage.
- Title – What you’ll see in the Question Bank to identify this question. To keep your questions well organized, we recommend coming up with a standard schema for the title of your questions. An example:
[Senior Engineer] - Turn this CSV into an Array of Objects. - Environment – The programming language or framework the question is expecting a solution in.
✅ You can select Markdown or Plain Text to create a language-agnostic question.
- Difficulty level – Used by interviewers to note the question difficulty level.
- Internal description – Notes on the question for internal reference in the Question Bank – include more info about this question for your colleagues.
You can also choose to share the draft with your colleagues and allow them to edit the question by clicking on the checkbox at the bottom of the page. You can collaborate with your teammates on the question by sharing the link to the draft.
Add Take-Home Test Cases (optional)
✅If you selected your question to only be used in live interviews, this step will not be present. Skip to adding code elements to your question if this is the case
Test cases are a way to verify a candidate’s solution against a set of return values given a set of inputs.
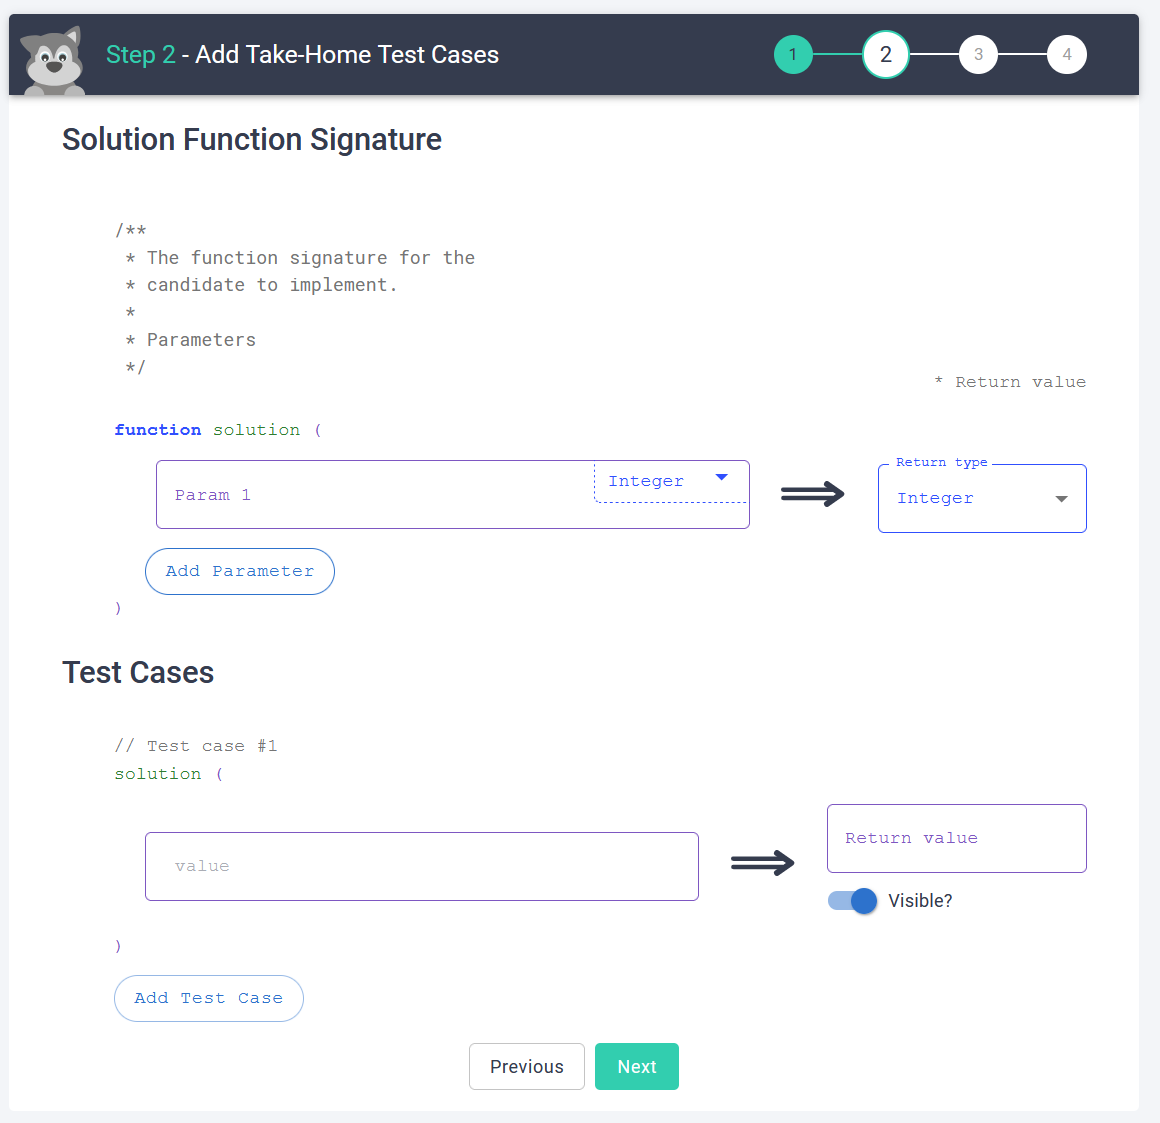
To learn more about test cases, what a function signature is, and how to add and remove test cases, please see our docs on test cases.
Add Code Elements
Next, you’ll add supporting documentation, files, and databases.

Candidate instructions – The instructions that will be shown to the candidate. This field is markdown enabled. Filling out the Candidate Instructions will ensure that the candidate will be able to view the test instructions no matter what language they select.
🖼️To add an image to the Candidate Instructions, you simply have to enter the image Markdown into the Candidate Instructions text box. Use the following markdown format:
. Note that the image must be externally hosted and public.
Add Follow-On Instructions – Selecting this button allows you to create iterative or progressive questions (up to five more) for your candidates. This lets you start with a simple task and then have the candidate build upon that first task with subsequent tasks to better demonstrate their skill set.
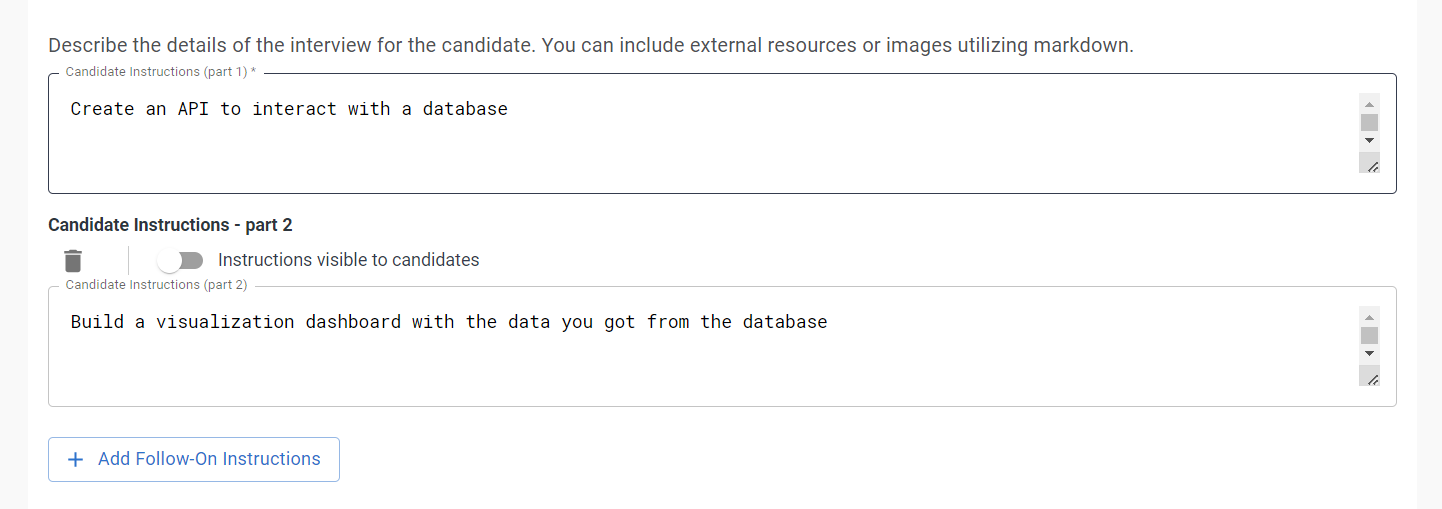
You can select the Instructions visible to candidates toggle to make the questions visible to the candidates when they first enter the pad. Alternatively you can turn this toggle on/off in the pad itself during the interview:

In the Interview Guide/Solution text box you’re also able to add guidance for interviewers or the solution the candidate is expected to code, via a markdown enabled note. This helps give the interviewer tips on what to look for in a candidate’s solution, as well as providing the interviewer with potential edge cases or tests to reference as they move through the interview.
Interview questions also support Custom Databases and Custom Files that you can attach to make your questions more representative of your production codebase.
⚠️If you’re creating a question that has a custom database attached to it your candidates will lose access to that database if they switch to a language that is not the one the question was created in. For example, if you create a question in MySQL, the candidate cannot switch to PostgreSQL otherwise they will lose access to the MySQL database in the pad.
If you have selected one of our most commonly used languages: Java, Javascript, Python 2 & 3, C++, Ruby, C#, or if you have selected PostgreSQL or MySQL from as the default language choice, then you can use a Full-Stack database with your question.
Add whiteboard starter drawing
If you enabled the Include starter drawing toggle during the first step, then you’ll see the Add whiteboard starter drawing screen for the third step.
Here you can use the Excalidraw-powered interface to create any diagrams you’d like to include with your interview question.

To access your diagram in a pad, simply open the pad with your question and then select the Drawing button on the left side of the pad.

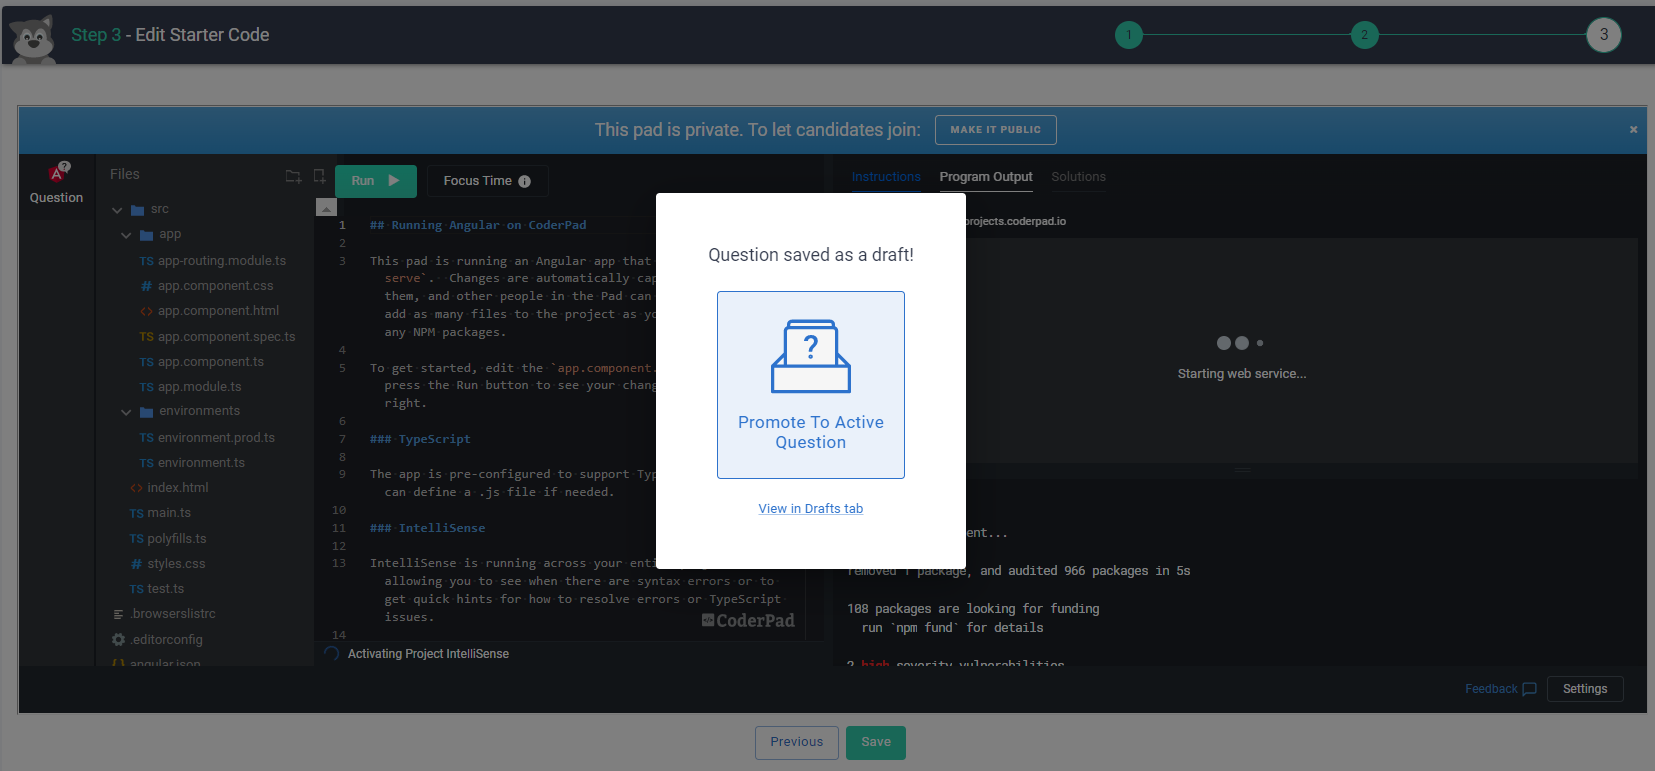
Edit starter code
Finally, it’s important to add starter code and review your question.
❗If your question included test cases, the “starter code” section will be automatically pre-populated with the expected function signature, and cannot be modified.
In the left-side coding window you can add any templates or code scaffolding you’d like to be available to the candidate.
Once you complete that step (if needed), you can verify that the other parts of the pad — like the candidate instructions test cases — are as you want them to be.
Remember, this is a fully functional pad displayed as the candidate would see it: just hit Run and you can review and run code, see program output, and verify test-cases passing when intended.

✅Keep in mind that the preview pad will not display hidden test cases in this view to accurately show what a candidate will see. To review hidden test cases, return to the test cases step.
Once you’ve finished setup of your app, click Save and Promote To Active Question to add your question to the Question Bank.
Creating multi-file questions
Start by navigating to the Question Bank in your dashboard and then click Create Question.
❗Select only “Live Question” at this time for framework questions – support for Take-Homes will be available at a later time.
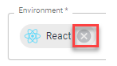
You may need to remove the default language in the Environment field in order to change the question language. To do so, simply click on the x next to the language.
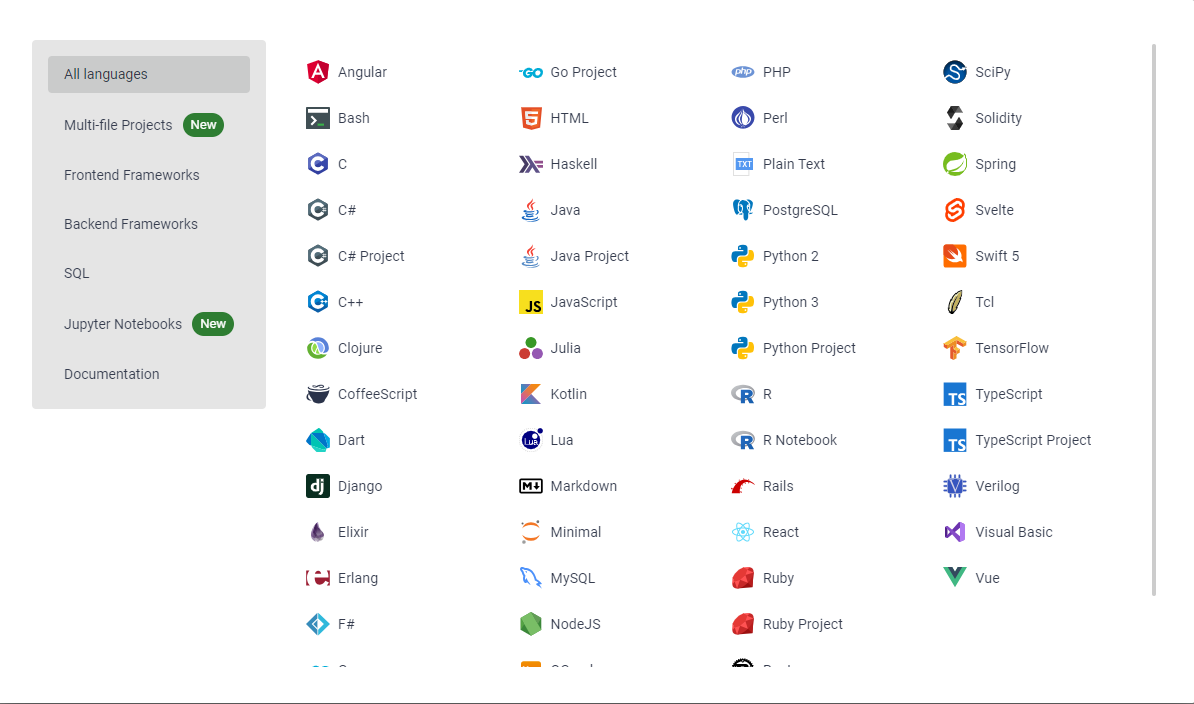
Then, in Environment field, choose one of the multi-file supported frameworks (ex: React, NodeJS, Vue, etc.).
Next, fill in all other fields as you normally would in the rest of Step 1 and in Step 2.
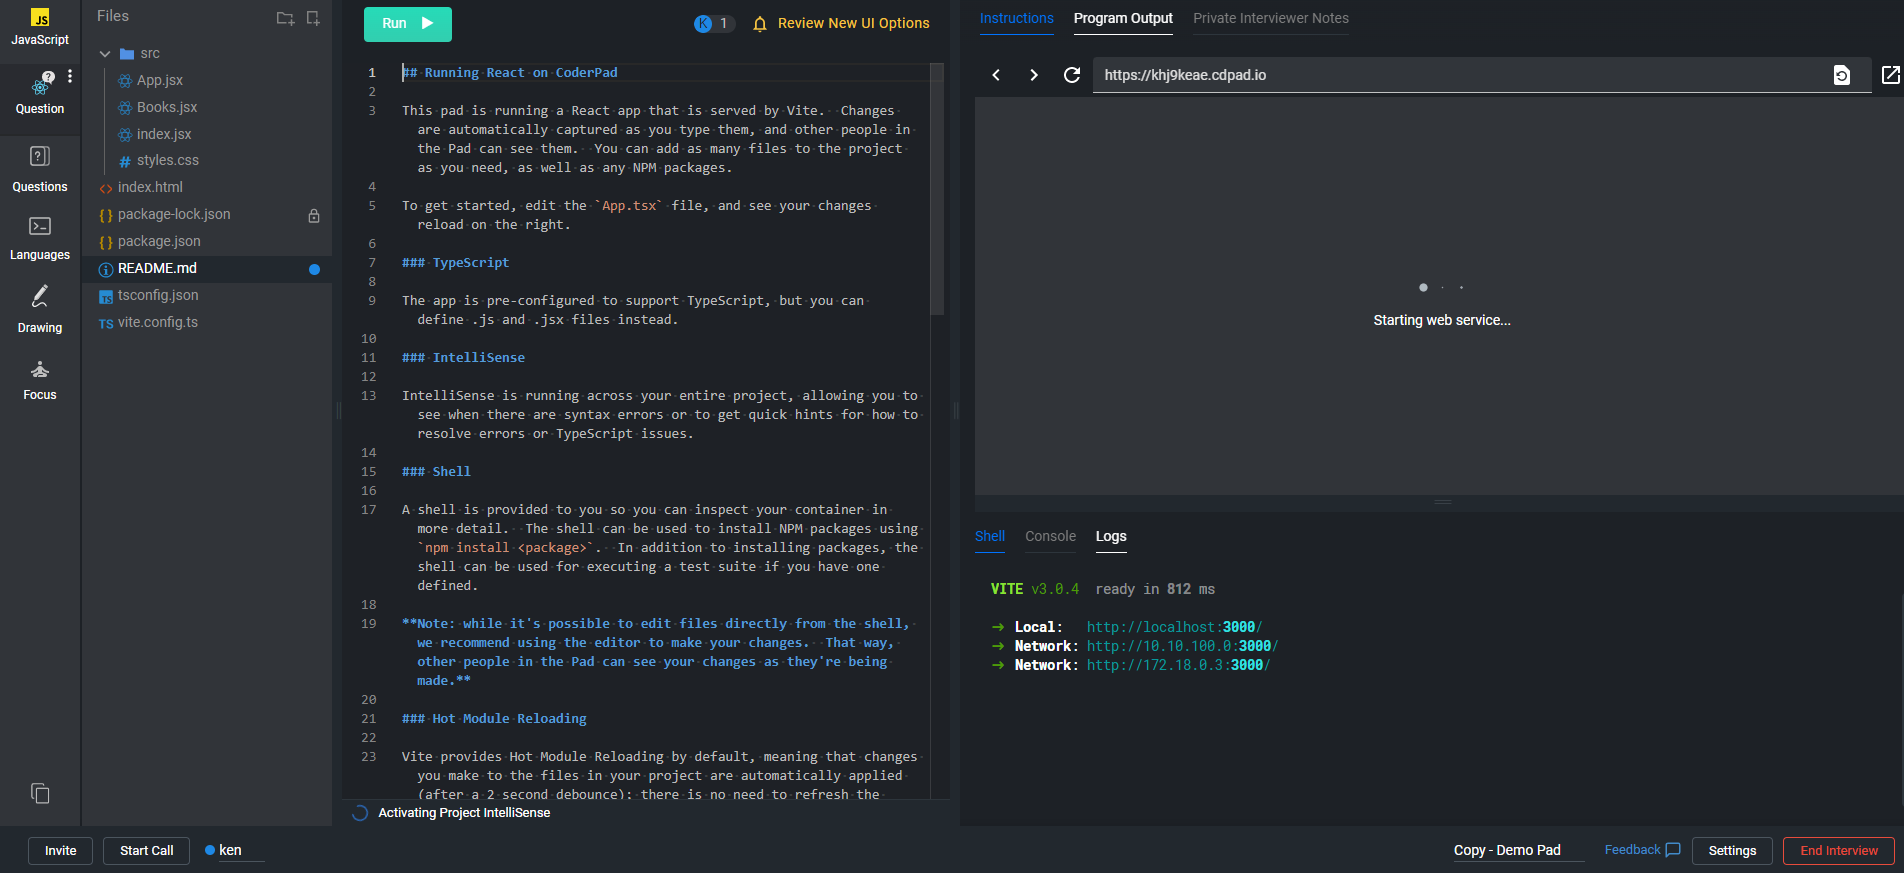
In Step 3, you’ll see your starter template. These files can be directly edited in this view. You can add files and folders, delete or rename existing files, etc. in order to build out the starting environment you want the candidate to work with.
You can also update the provided README file to share any additional info with candidates, or you can return to Step 2 and provide additional info for your candidates in the Candidate Instructions field.
You’ll be able to preview changes to your app in real time in Step 3 by pressing the Run button.
Once you’ve finished setup of your app, click Save and Promote To Active Question.
Then you can create a pad from this question or load it into a pad, just like for any other language.
✅ At this time the questions and associated app will be need to be set up for a specific frontend framework, you will not be able to automatically load a Vue question into an Angular Pad.
Drafts and Collaboration
We’ve added draft functionality to questions. A new draft is created in your Question Bank Drafts tab as soon as you complete the first question creation step.

As you progress through the steps of creating a question, it continues to be saved on each step. This means you don’t have to create the entire question in a single session, you can come back to it later on.
Once you’re done editing you’re draft, click Save to finalize it- you can then choose to view the draft in your drafts tab, or publish it as an active question ready to be used in interviews.

Using a question in a pad
There are two ways to add a question to a pad — create a pad with the question or add the question from within the pad:
1. Creating a pad with a question
You can create a pad directly from the Question Bank. Simply find the question that you would like to use and click the Create Live Pad or Create Take-Home button.
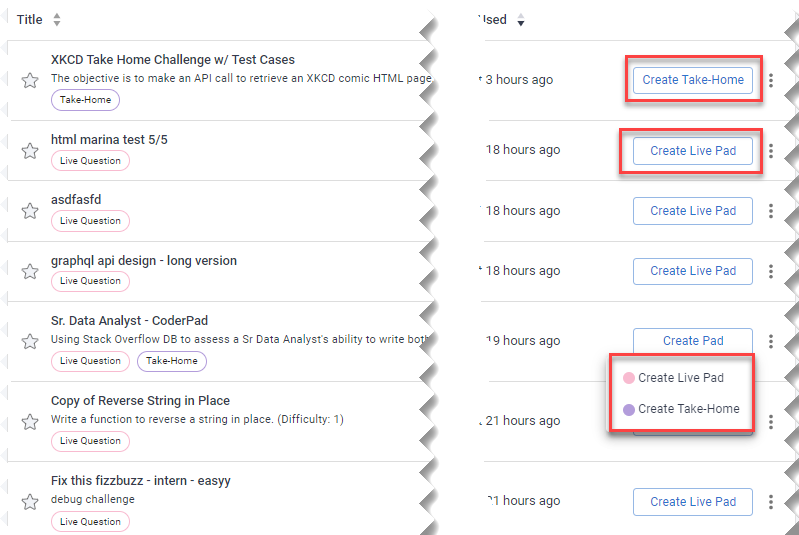
A new pad will be created with your question preloaded. You can also preview the question from the expanded view.
2. Add a question from within the pad
It’s simple to load a question from the IDE view. Once you’re in the pad, click on the Questions button (1) and then find the question you want by scrolling down the list, using the search bar, or using the pre-built filters (2).
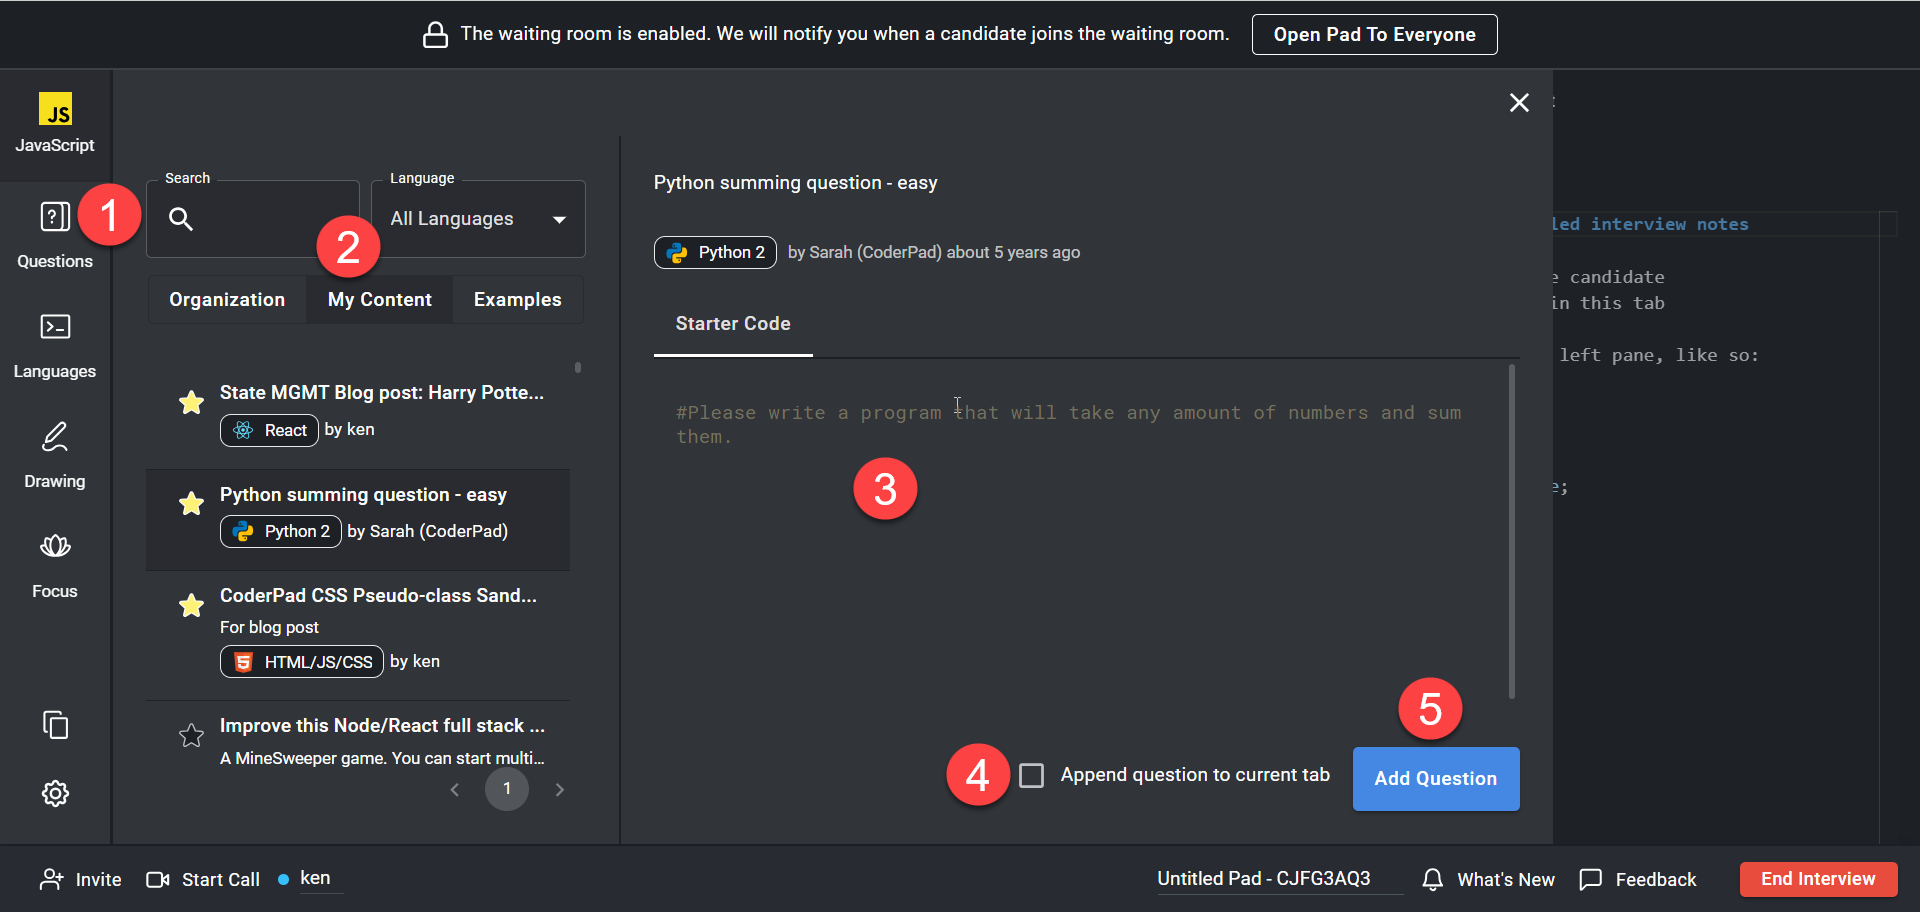
Once you select the question, you can preview it on the right screen (3). If you want to append that question to a language or question that you already have open, then select the Append question to current tab box. When you’re finished, click Add Question to add the question to the pad (5).
Edit an existing question
If you want to update an existing question, navigate to the question you want to edit in the Question Bank, select the additional options menu, and then select Edit:

This will load your existing question data into the question wizard, and you can make updates as needed.
❗Keep in mind that test cases are currently only available for take-homes questions. If you add live interview type to an existing question with test cases, it will remove the test cases.
If you’ve toggled the question type and accidentally removed test cases, you can close the tab before saving on the final step – this will revert your changes and bring the test cases back.