There are two types of pads that you can create — live interview and take-home:
✅ You can rename a pad at any time. We highly recommend you come up with a standardized syntax for naming a pad. Example: {CandidateName}-{Position}-{Interviewer}-{Q1}, which would translate to Beth Q. Candydit-Jr. Dev-Vincent W.-Pig Latin 1.
1. Create a pad for a live interview
A live pad allows interviewer(s) and the candidate to write and execute code in a shared IDE environment in real-time.
To create a live pad, the fastest way
Login to your account and go to the dashboard page
Click on the Create Pad button located on the upper right hand side of the page, and a pad will open for you.
That’s it! Simply copy the pad URL, or pad link, for both interviewer(s) and the candidate to use to access for their live interview.
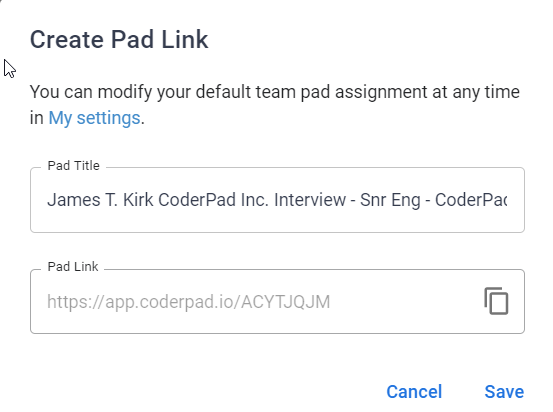
Alternatively, you can select Create Link to quickly get a pad link without opening up the pad IDE or you can select Create Multiple Pads to generate one or more pads for multiple candidates.
If you select Create Link, you’ll see a quick setup screen where you’ll ender your pad title and copy the pad link. Click Save to make the pad available for use.
To create a live pad, with a question preloaded
Pro tip: This is useful when you want to ensure all candidates start from the same question and code prompt for their live interview.
Login to your account and go to the dashboard page
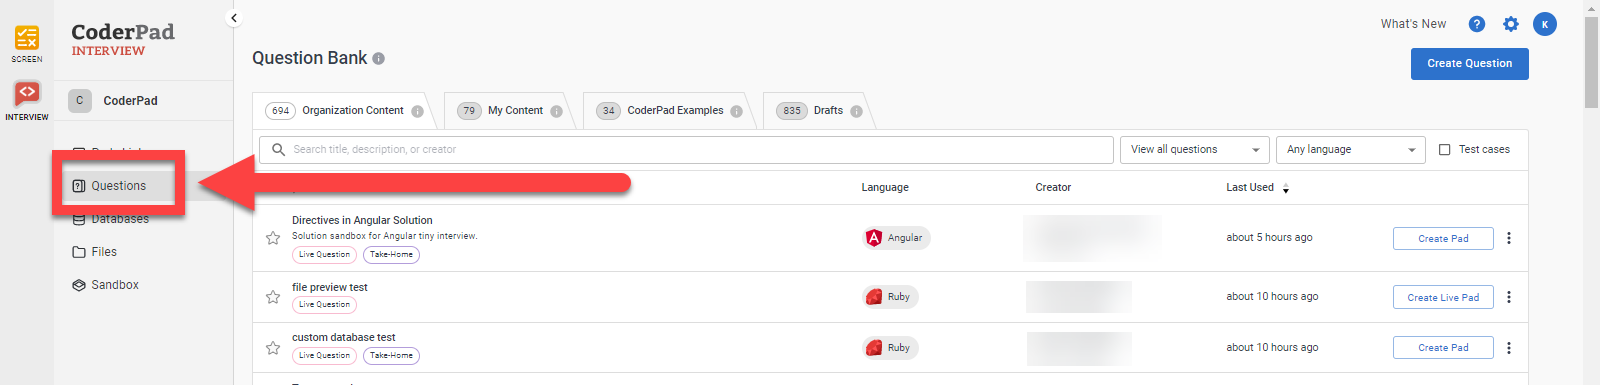
Click on Questions from the side navigation:
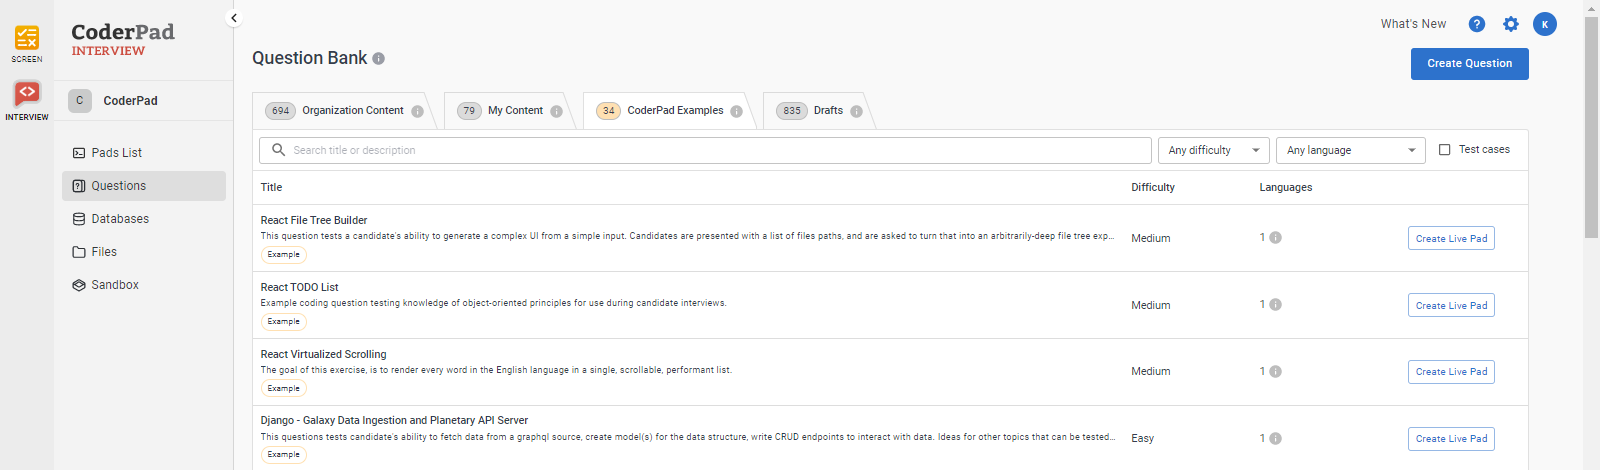
Select the question you want preloaded for your live interview:
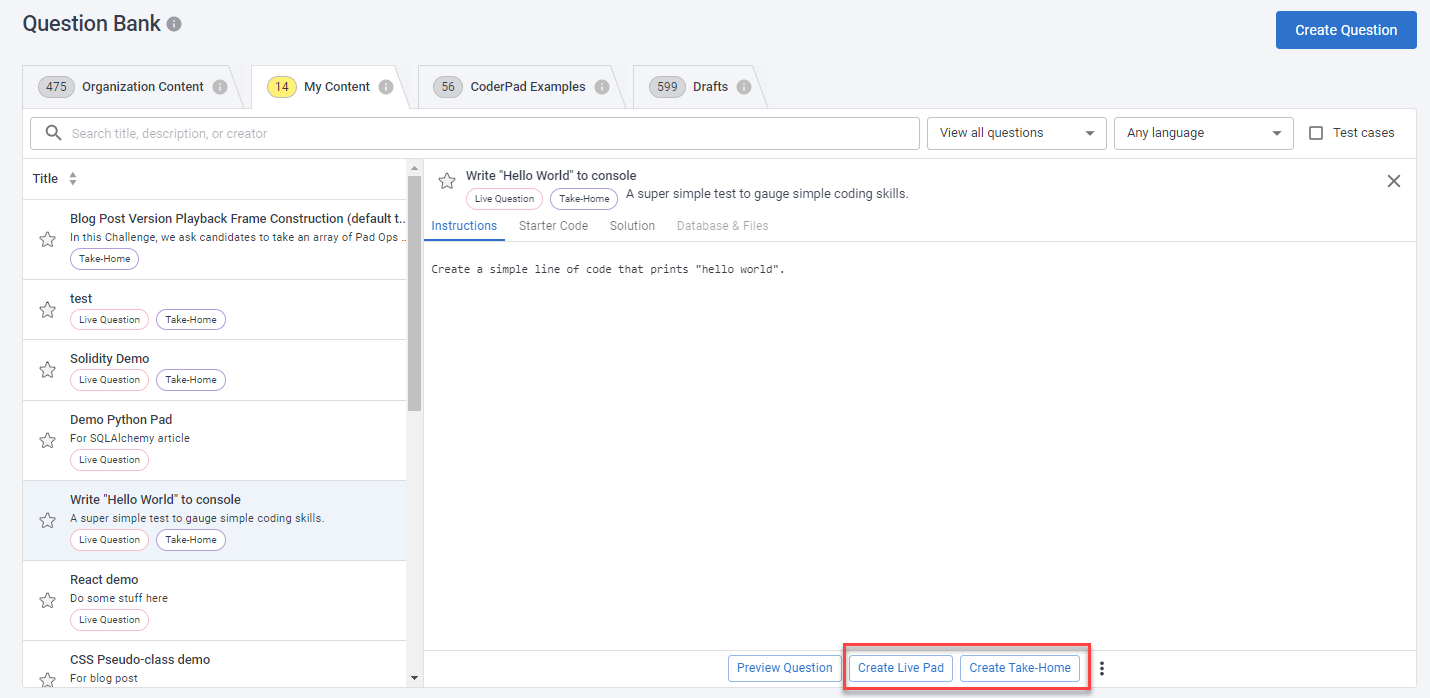
Click on Create Live Pad or Create Take-Home:
Search for an existing pad
You can use the search bar and the filters at the top of the pad list to locate a particular pad. Filters include:
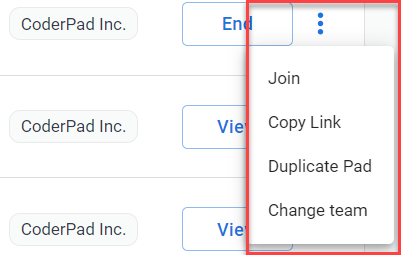
ℹ️ Notice a pad belongs to the wrong team? You can change that by clicking on the 3 vertical dots and selecting Change Team.
To create a pad from the sandbox
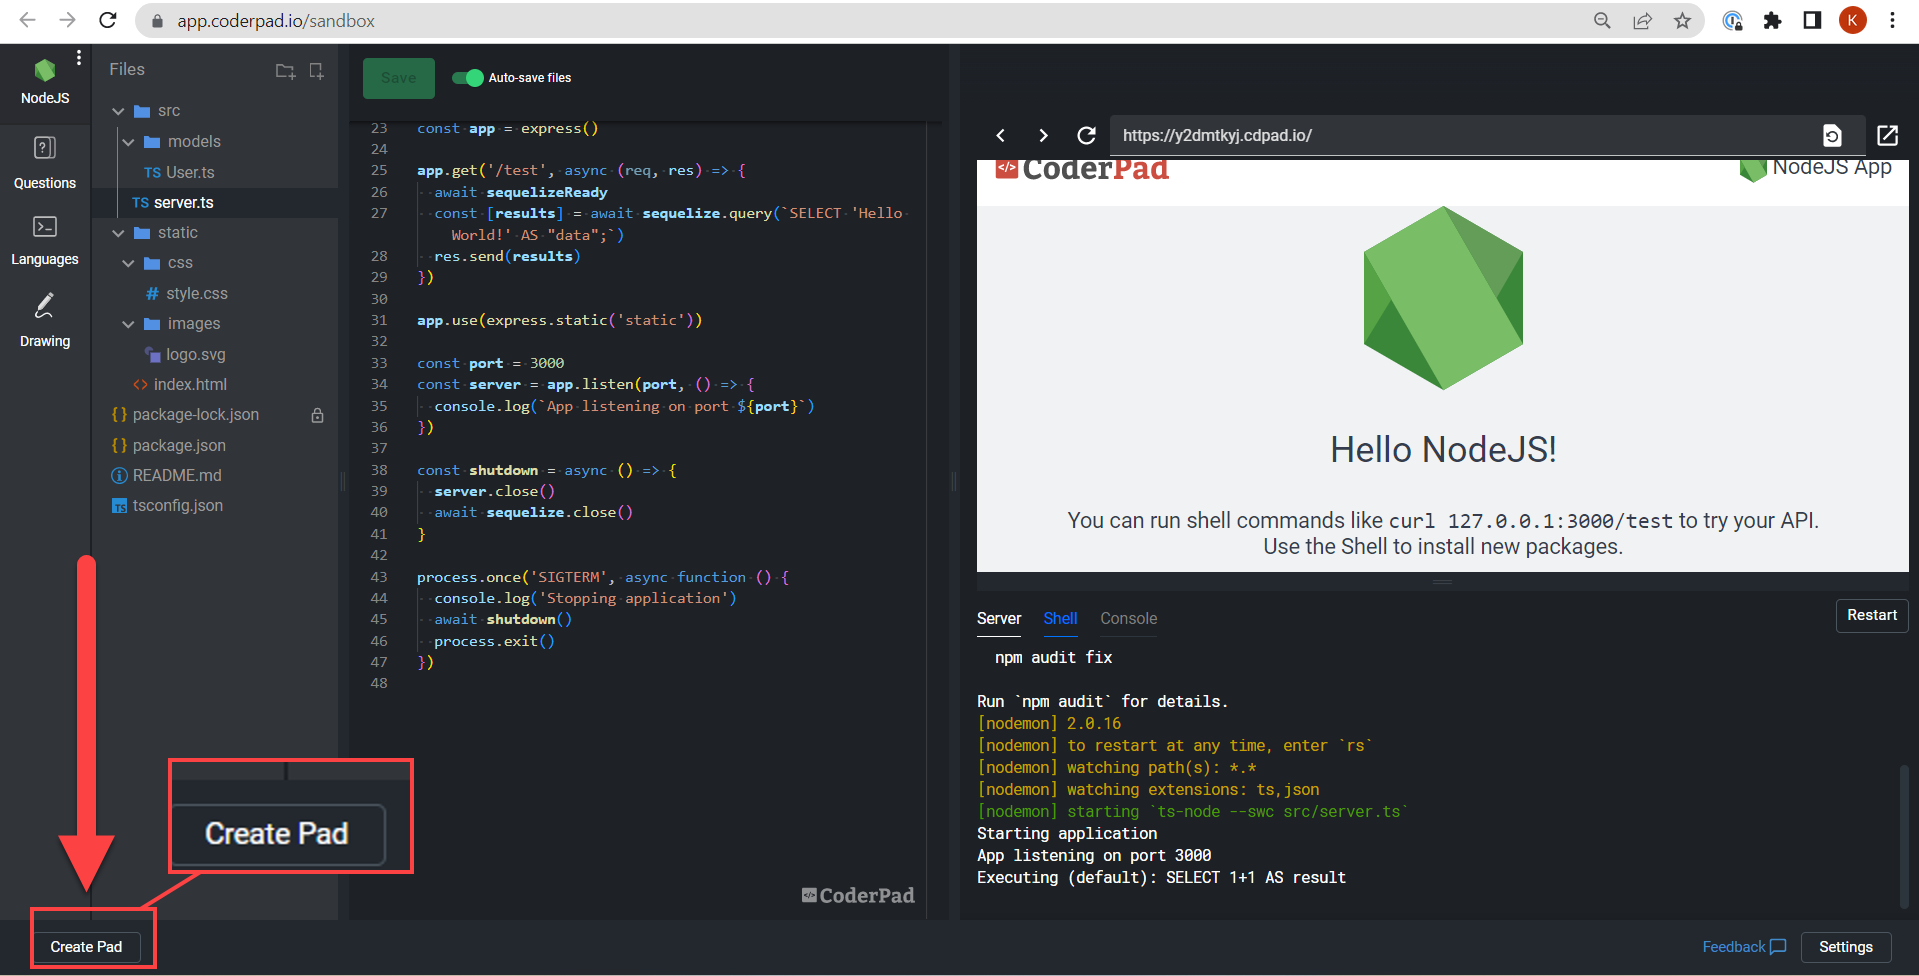
If you regularly use the sandbox to test out interview questions, you can create pads straight from there. Simply click on the Create Pad button in the bottom left hand corner of the sandbox, and a new pad window will open up giving you the ability to send the pad to candidates or coworkers and making it accessible in your Pads List.
Inviting users to the pad
Once you create your pad, it will open in a new tab.
The pad contents will default to your preferred language, and with a “Hello World” example. You can change your preferred language under your personal User Settings.
The pad URL is the link that both interviewer(s) and the candidate will use to access the pad. There are a few different ways to access this:
You can take the link directly from your browser URL bar.
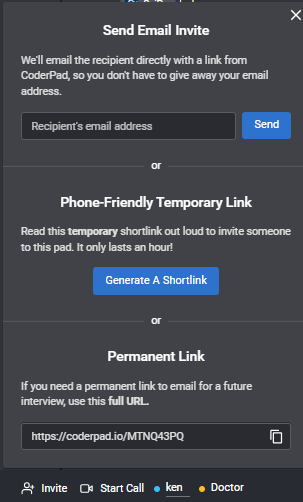
Or you can click the Invite button located in the bottom left of the pad to utilize three additional options.
Send an email invite to the pad
Generate a temporary short link
Copy permanent link (same as URL in URL bar)
Both the interviewer(s) and candidate have access to all features within the pad environment including changing languages, drawing mode, video calling, IDE settings and more.
The main difference in the environment between interviews and candidates are what the interviewer can do and see. Interviewers CAN:
Add a question or select another question
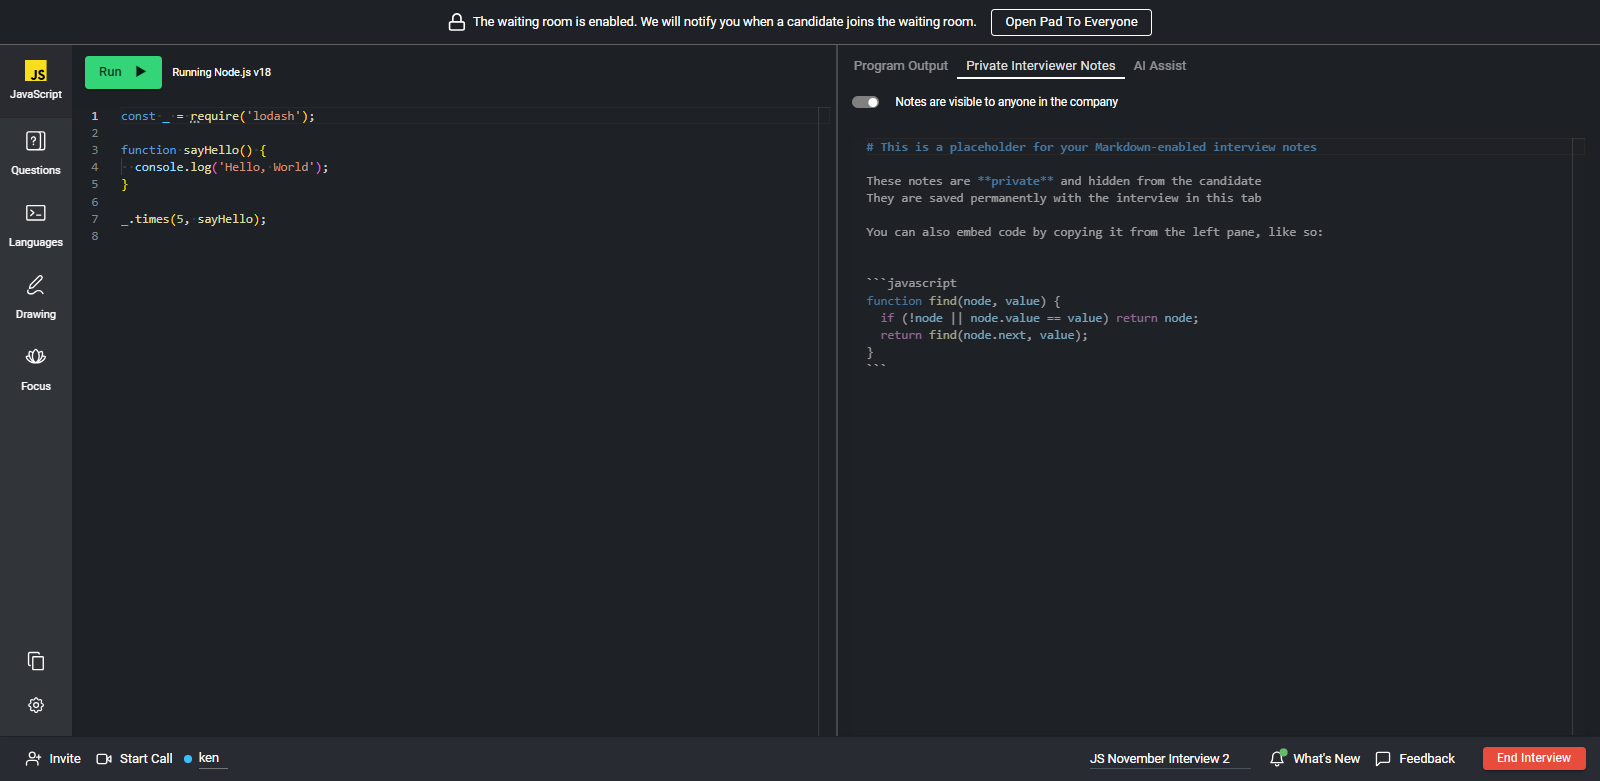
Access another tab next to “Program Output” called Private Interviewer Notes which allow interviewers to keep notes during the interview
Candidates CANNOT see your question bank or the private interview notes.
⚠️As the interviewer, you must be logged into your Interview account to be able to end the interview.
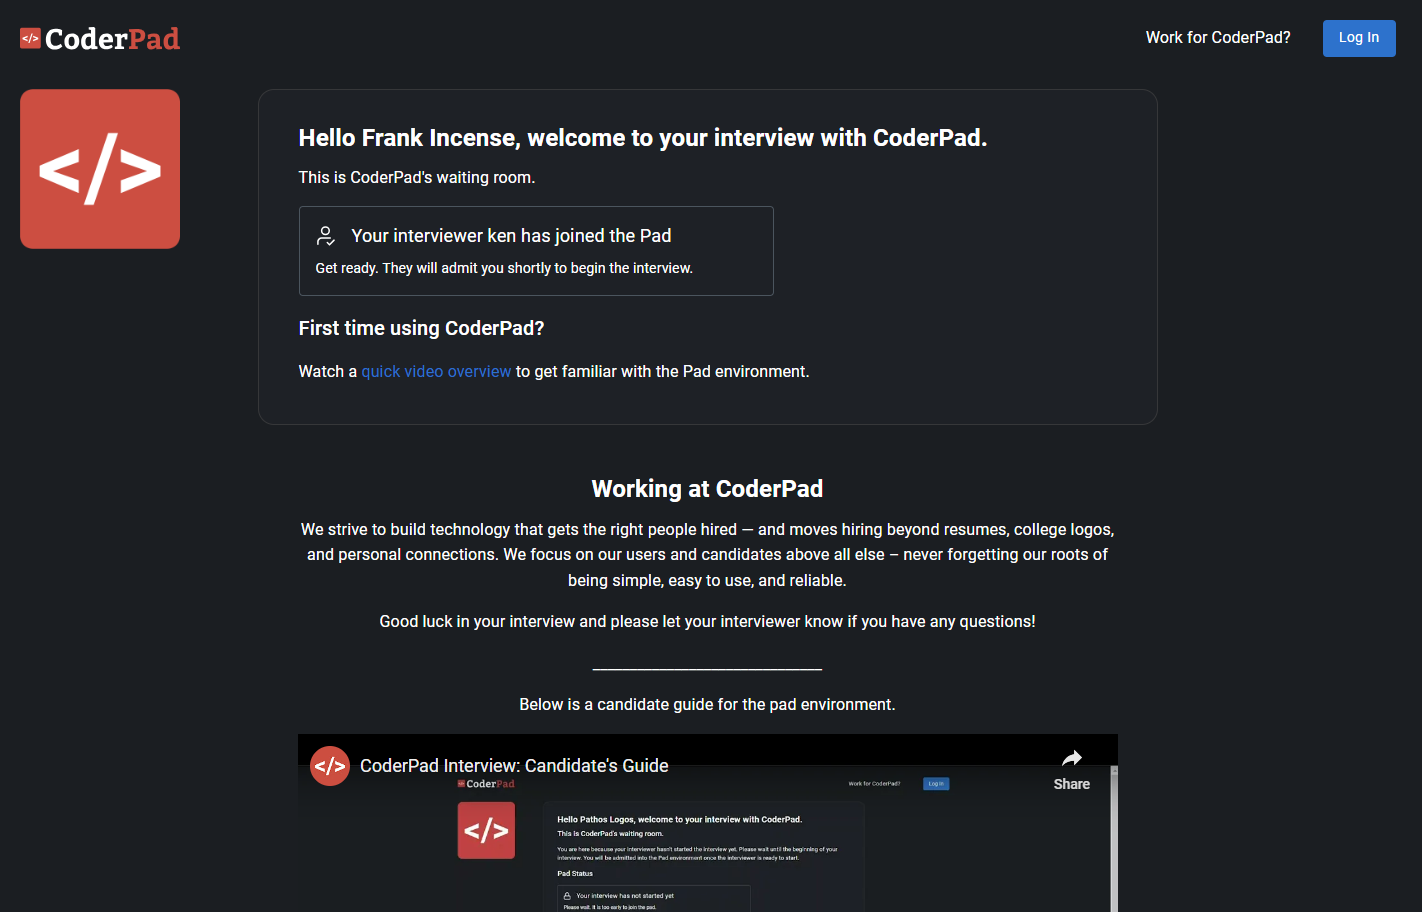
Using the waiting room
The waiting room is a screen that advises candidates of their pad status — interview start time and if the interviewer is in the pad — as well as helpful resources the candidate can use while they wait for the interview to start:
If you have the pad waiting room turned on, you’ll have to make the pad public in order for candidates or anyone who is not logged into your company’s CoderPad account to be able to access it.
If there is no one in the waiting room, you’ll see a black bar with an button to Open Pad To Everyone which you can click if you’d like to open the pad before the candidate or other interviewers arrive:
If there is someone in the waiting room, you’ll receive a blue banner at the top of the pad notifying you. Simply click on the Admit button to allow the candidate or other interviewer to access the pad.
From the Dashboard, click on the Question Bank button located in the sidebar
Select a take-home project that you would like to send to the candidates. If you have not created any of your own take-home project, check out this guide to help you get started. Take-home project questions can be filtered with the “View all Questions” filter.
Once you have selected a project, click on the Create Take-Homes button
Set a time limit. This makes the interview process more fair by allowing each candidate the same amount of time to complete the project. If you would like to set no time limit, that is also an option.
Input the name of the candidates (or the naming conventions your company uses) to create up to 100 take-home projects.
Once set up, click on the Create Pads button to generate the individual links that you will send to each candidate.
Send the specified link to each candidate.
When a candidate has completed the project, you will be notified via email and can also check your dashboard to review the code and move forward in your interview process.
Public take-home projects
Interview’s public take-home projects let you create a single URL that will load a specific take-home project question for any number of candidates. We only send submissions that pass 80% of the visible test cases to your team.
✅ Candidates can only submit a take-home test after 5 minutes to prevent wasted pads with no effort put into them.
Why should I use a public take-home project?
The Public Take-Home gives you a wider range and more flexibility in using take-home projects, helping you attract and assess even more candidates. A public take-home lets a wide pool of candidates attempt a take-home project as the first application step. Here are some ways to use public take-home projects:
Send the public take-Home project URL directly to candidates as the first step
Embed the link directly on your Careers Page to let candidates start the application process for a specific job
Create a public take-home project for a university-specific test and send it to your university candidates
Make the link available as the first step in an online job application
How do I set up a public take-home project?
A public take-home project can only be created for projects with test cases. In the question bank, select a take-home question that has test cases and click the Create Public URL button on any projects with test cases.
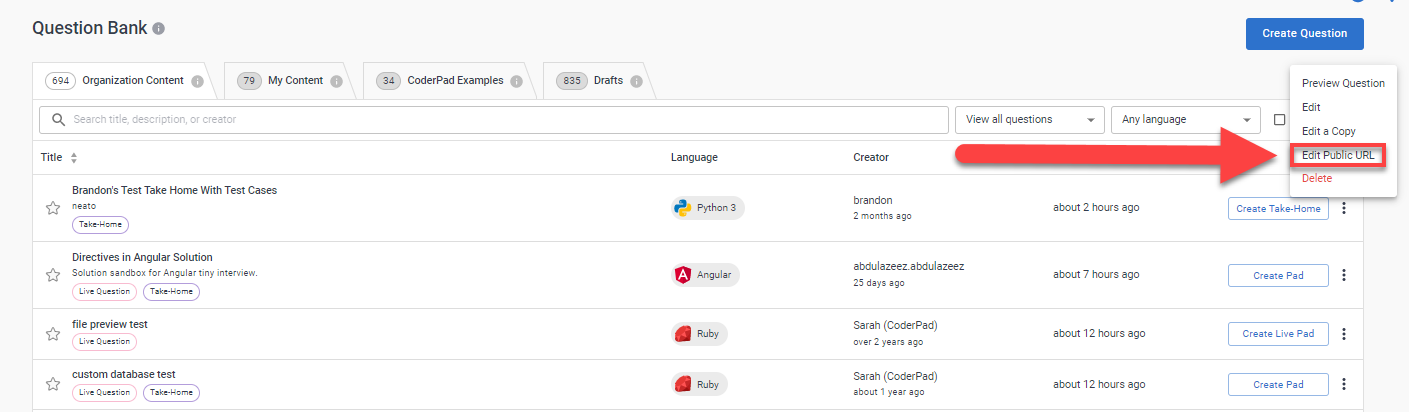
Once you’ve created the URL, you can come back and make changes to it by navigating to the take-home project and selecting Edit Public URL.
⚠️ Be careful editing the URL while the take-home project is open for candidate submissions, as this can mess up the submission process and prevent candidates from submitting their projects.
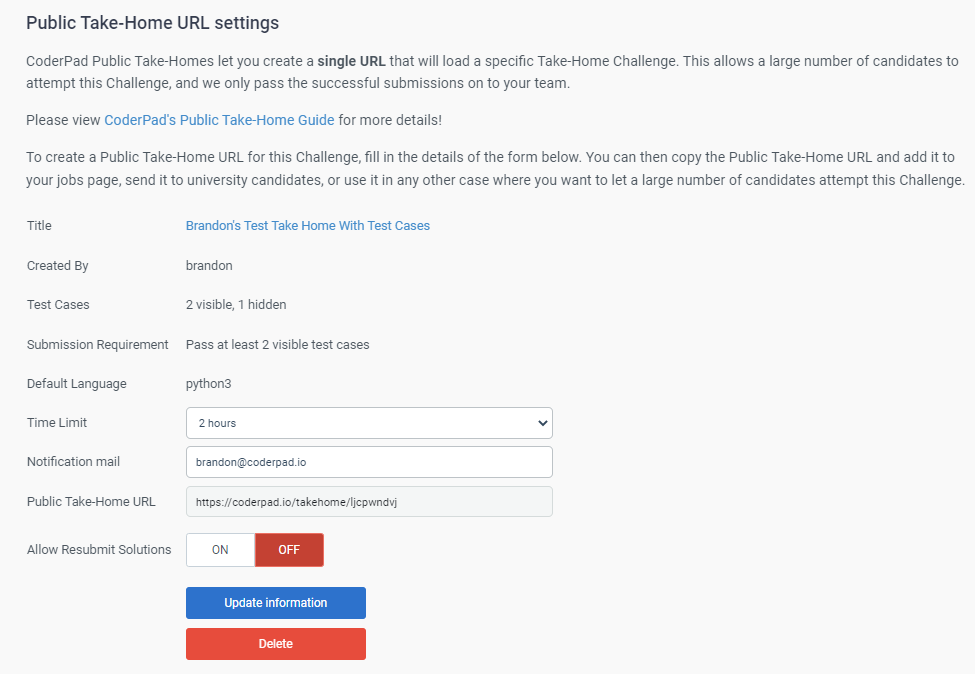
On the Public Take-Home URL settings page you can:
Provide a notification email
Set the appropriate time limit
Set the Allow Resubmit Solutions toggle.
Copy the Public Take-Home URL to send to your users.
Once you’ve confirmed your settings, click Update information to save.
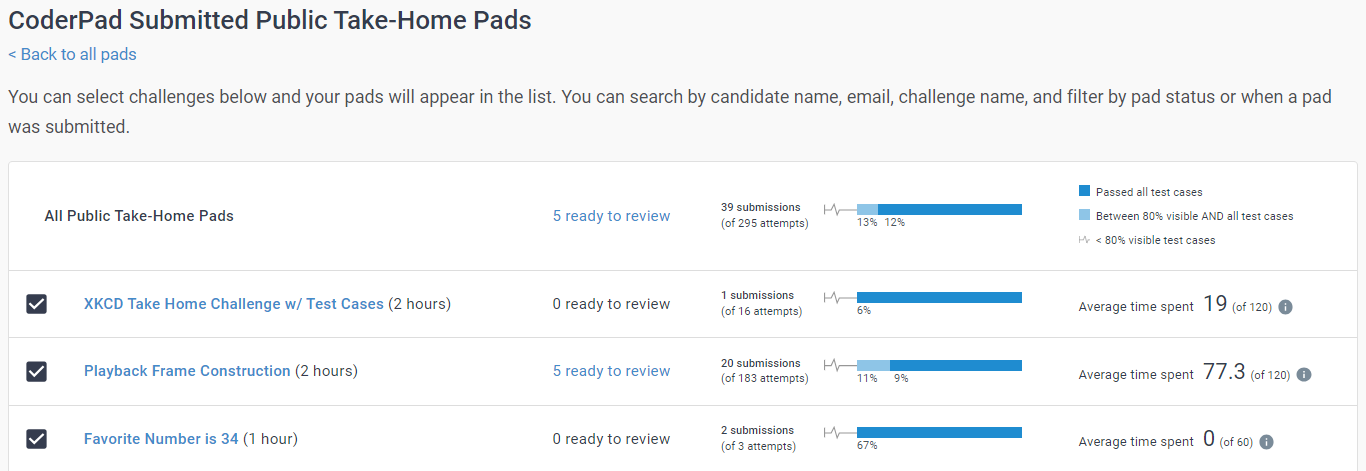
If the candidate successfully passes at least 80% of the visible test cases, we will send the candidate’s name, email, and a link to their completed take-home project to your notification email. If your team likes their submission, you can contact the candidate to set up the next interview stage. If the candidate does not pass enough test cases, they will not be able to submit the project, but will be prompted to keep trying. This saves time for both them and you, and your team won’t have to review unfinished attempts at the take-home project.
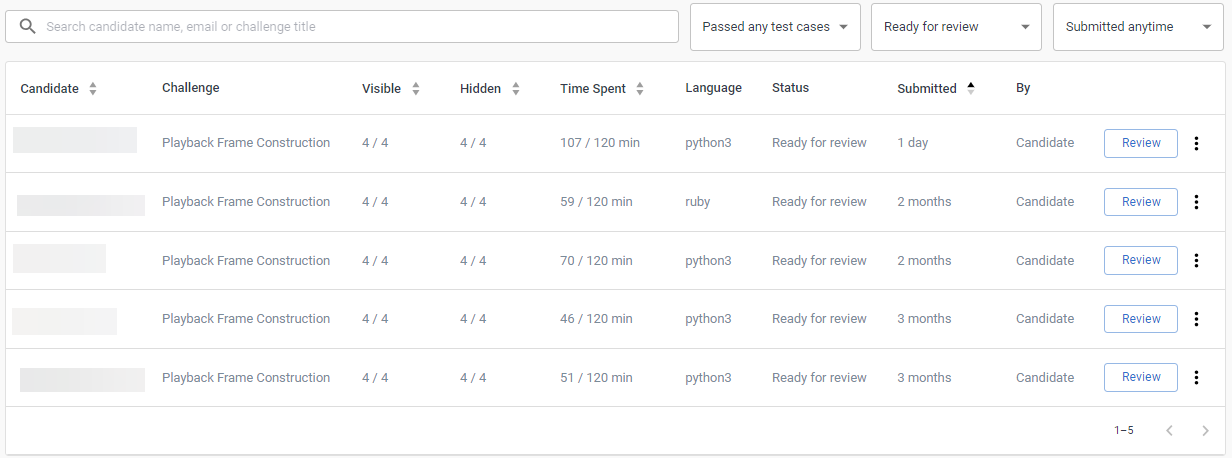
Selecting the tests or clicking on the “[n] ready to review” link will display all the submissions, which you can view by scrolling to the bottom of the page:
How is this counted against my Interview pad quota?
We will only count successful candidate submissions against your plan quota.
Editing a public take-home project
You can use the “update” button to change the notification email or the time available to the candidates. “Delete” will remove this URL from the Interview system. This means any candidates with this link will no longer be able to attempt the project. Please be certain before deleting that this URL is no longer available to candidates, or they will reach an error page.
Tips for Success
Since this URL will be public, a large number of candidates may view and attempt this project. We recommend the following best practices:
Create a unique public project for each open role on your jobs page, or for each batch of University candidates
Create and use different questions public projects from the take-home projects you use for individually scheduled Take-Home interviews.
It is also a good idea to set up a new public project (and delete the URL for the first one) after you receive 100+ submissions.