SmartRecruiters + Interview integration
Last updated on • Disponible en Français
ℹ️ As part of CoderPad’s rebranding effort, CoderPad Live is now just Interview. We’re still working with our integration partners to update the searches, until then you’ll still see references to “CoderPad” or “CoderPad Live” when you search within the partner’s application.
SmartRecruiter users can easily set up and manage live Interview pads for technical coding interviews within the SmartRecruiters platform.
- Set up your integration
- Set up a hiring process to automatically create pads
- Generate a live interview pad link
Set up your integration
❗In order to proceed, you must be logged in to your Interview account as an admin AND you must be logged in to your SmartRecruiters account as an admin.
1. Go to your SmartRecruiter dashboard.
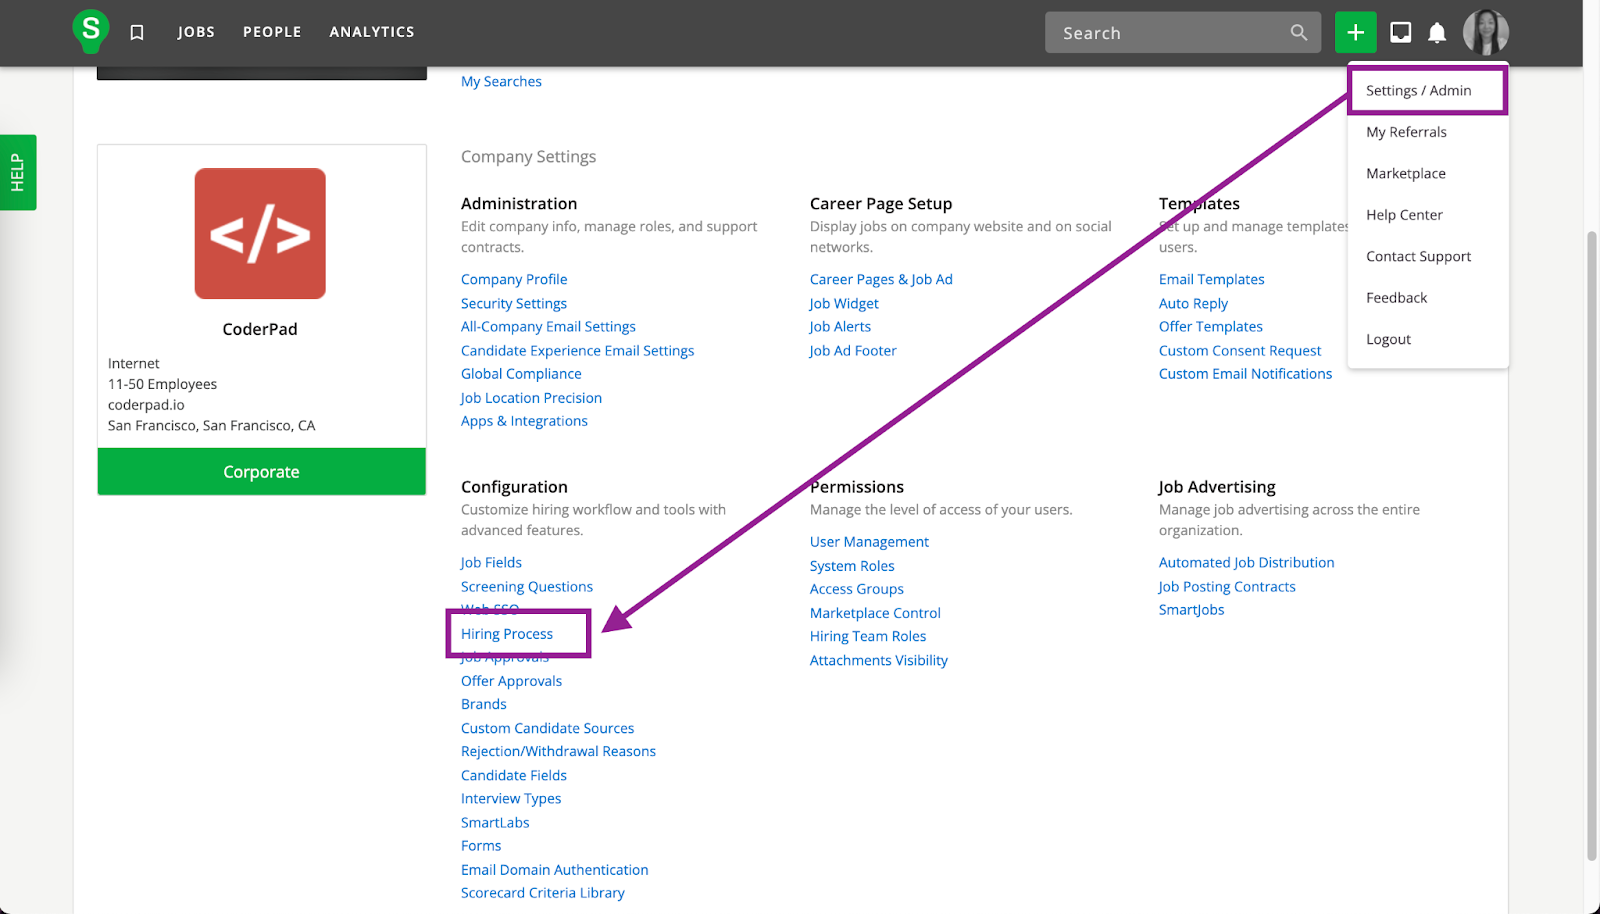
2. Click Settings / Admin in the profile menu and navigate to Apps & Integrations.
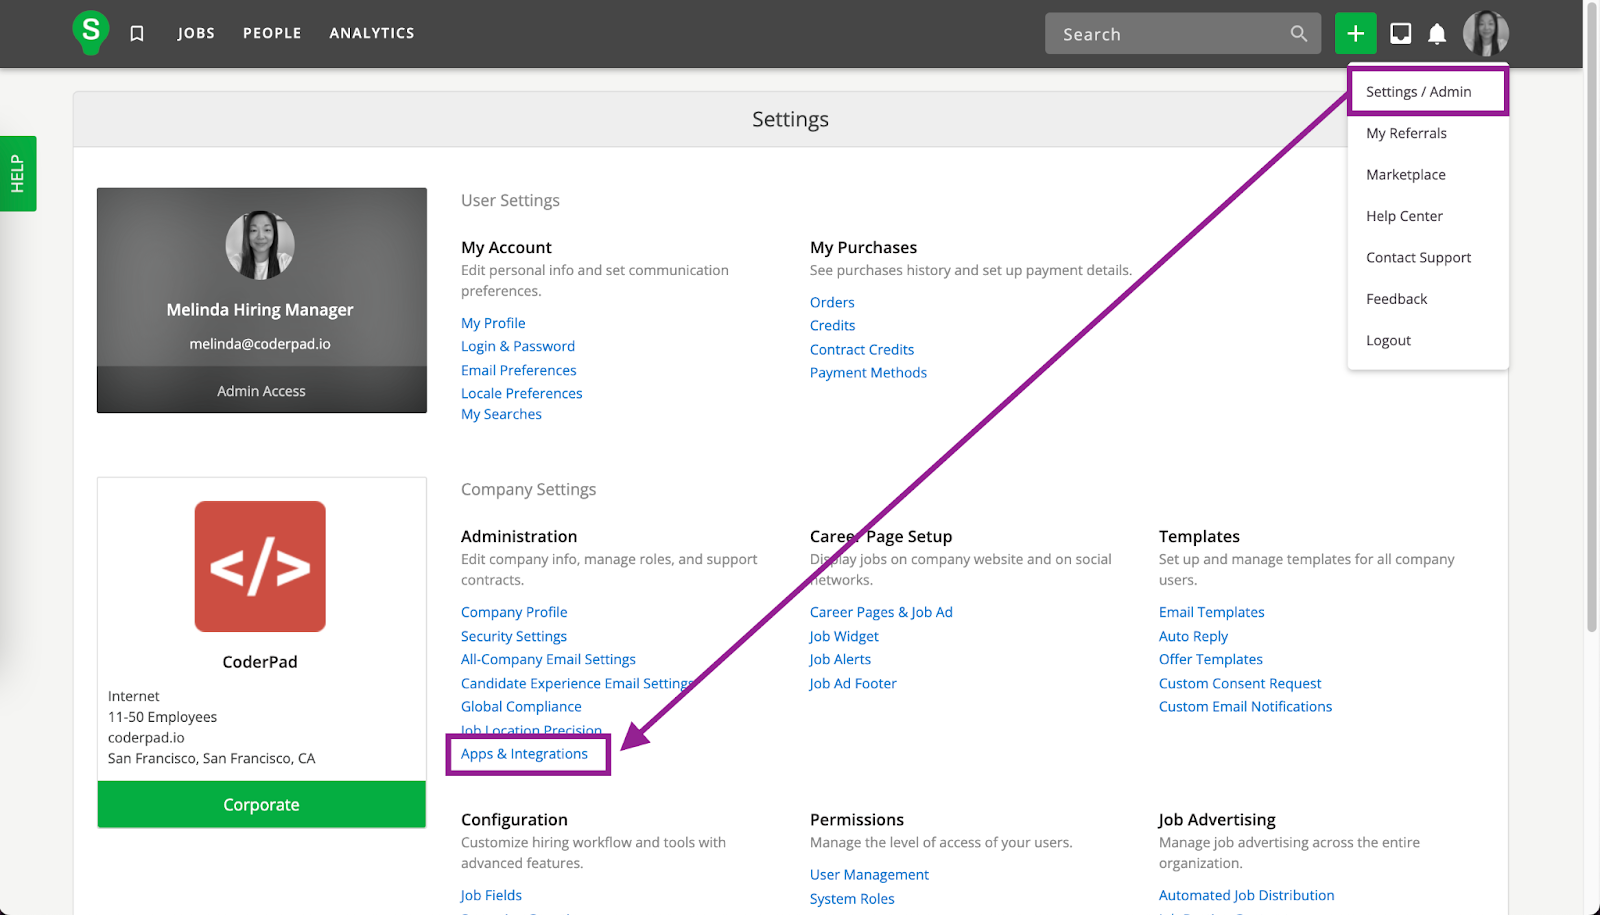
3. Scroll down the list of Apps & Integrations and click on the CoderPad integration.

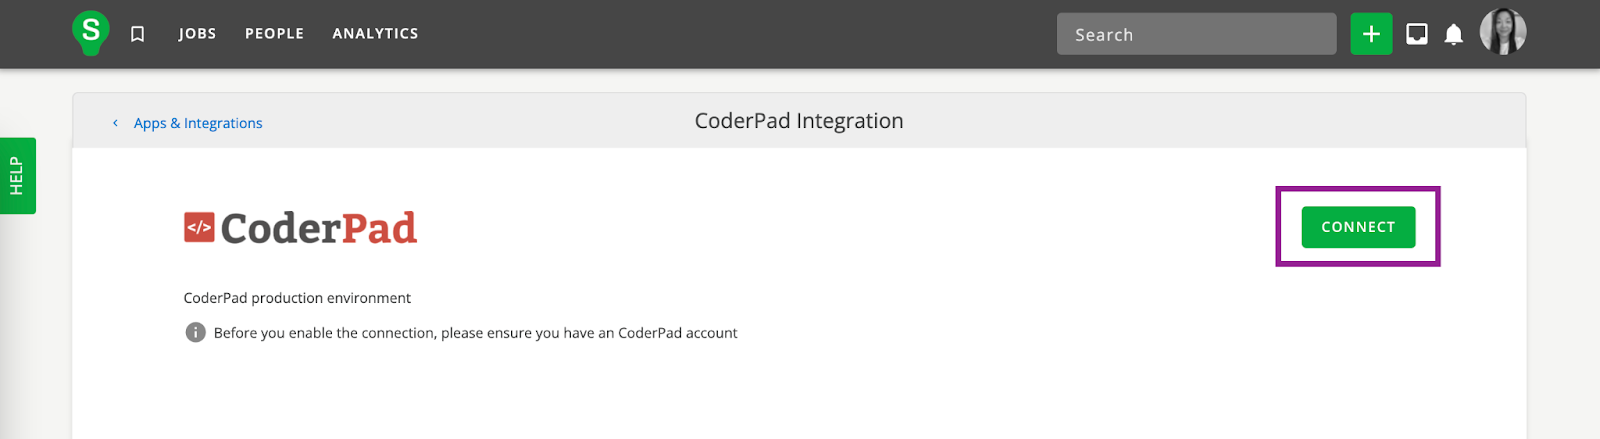
4. Click Connect.
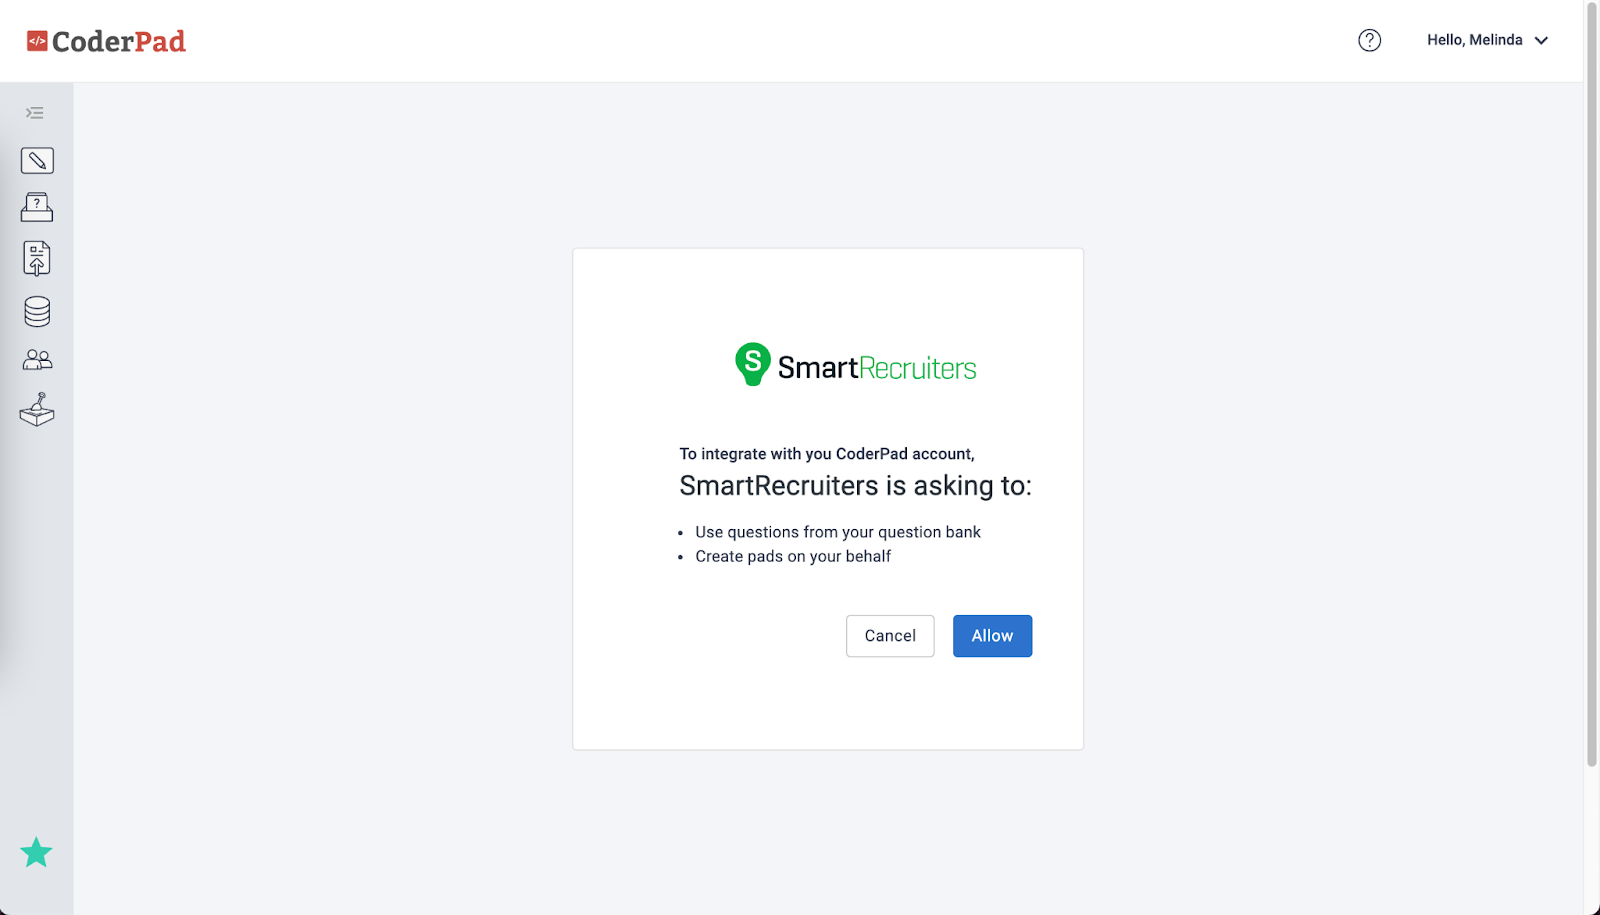
5. Click Allow and Continue.

6. This takes you to an integration request screen within Interview. Click Allow.
7. You’ll then be taken back to your SmartRecruiters dashboard.
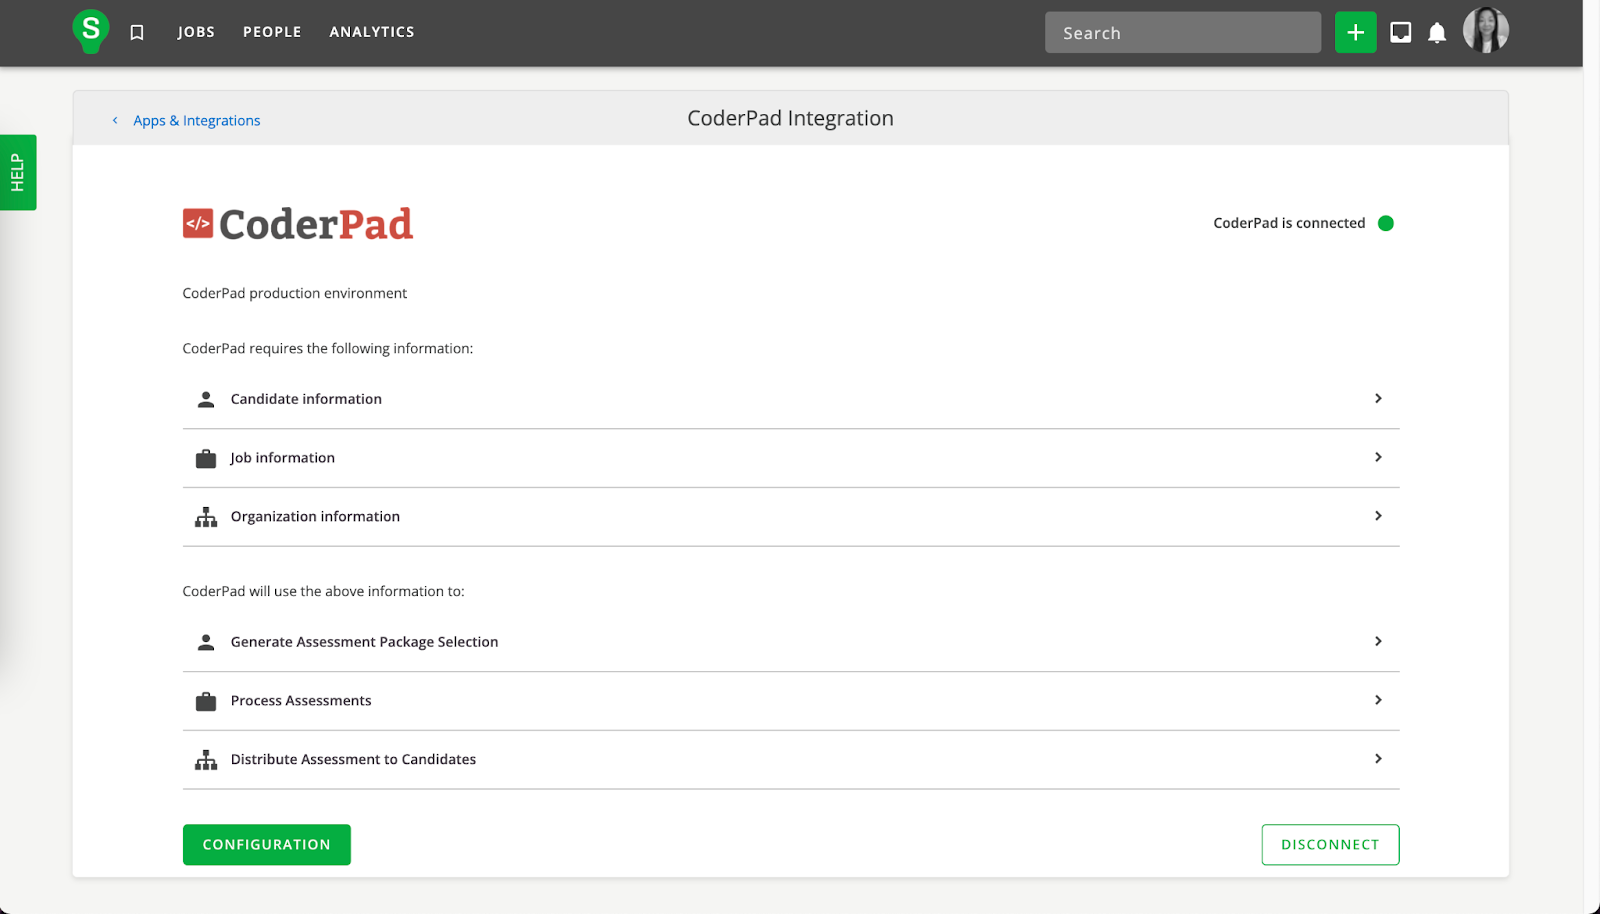
The Interview integration is now enabled. You’re ready to start setting up your hiring process!
Set up a hiring process to automatically create pads
1. As a SmartRecruiters admin, click Settings / Admin in the profile menu and navigate to Hiring Process.
2. Click Edit to make changes to your hiring process.
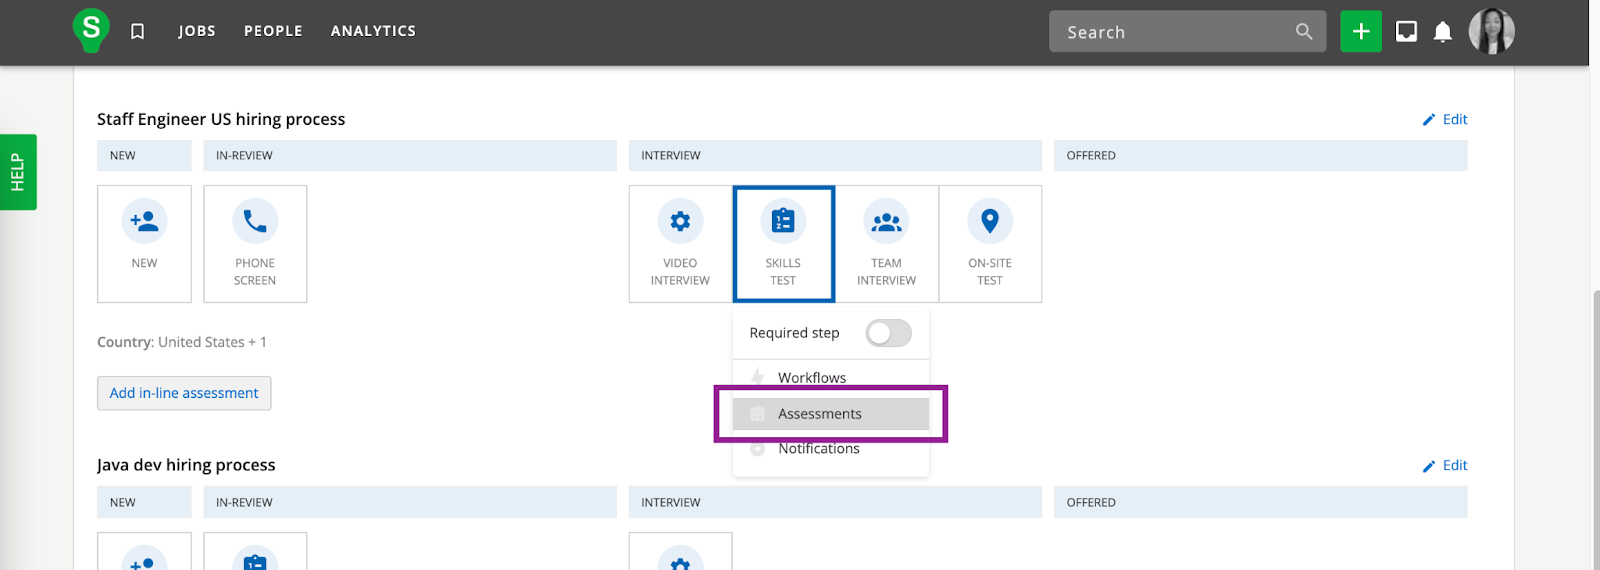
3. Add a Skills Test where desired in your hiring funnel.
4. Open the Skills Test menu, and click Assessments.
5. Click Configure.
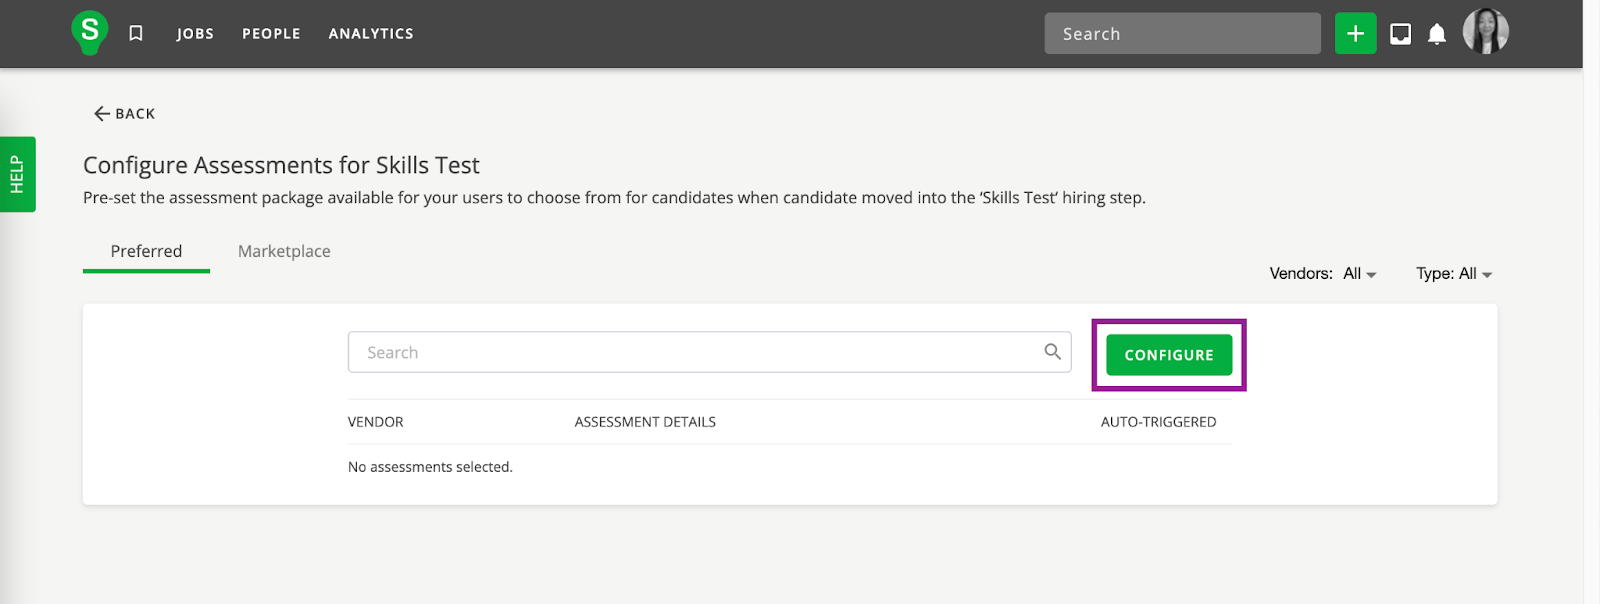
6. You should see a list of Live Questions from your Interview account. Select the question you want to use during the Skills Test stage in the hiring process.
7. Switch Auto-Triggered to on to automatically generate an Interview link once a candidate has reached the Skills Test stage for a job.
Generate a live interview pad link
Once you have configured the hiring process – as described in the set up instructions – and a candidate has moved into the Skills Test stage for a job, an Interview link is automatically generated in the Assessments section of the SmartRecruit dashboard.
Copy and paste the generated pad link to share with your candidate and interviewer(s).
✅ Keep in mind that pads generated via the SmartRecruiters integration will have pad titles using the candidate’s “[first name] [last name]’s interview” format.
Also note that changes in the state of a pad (e.g., not started, started, ended) are not reflected in SmartRecruiters, but may be found on the Interview dashboard.