Managing users & teams
Last updated on • Disponible en Français
User management
Add a user
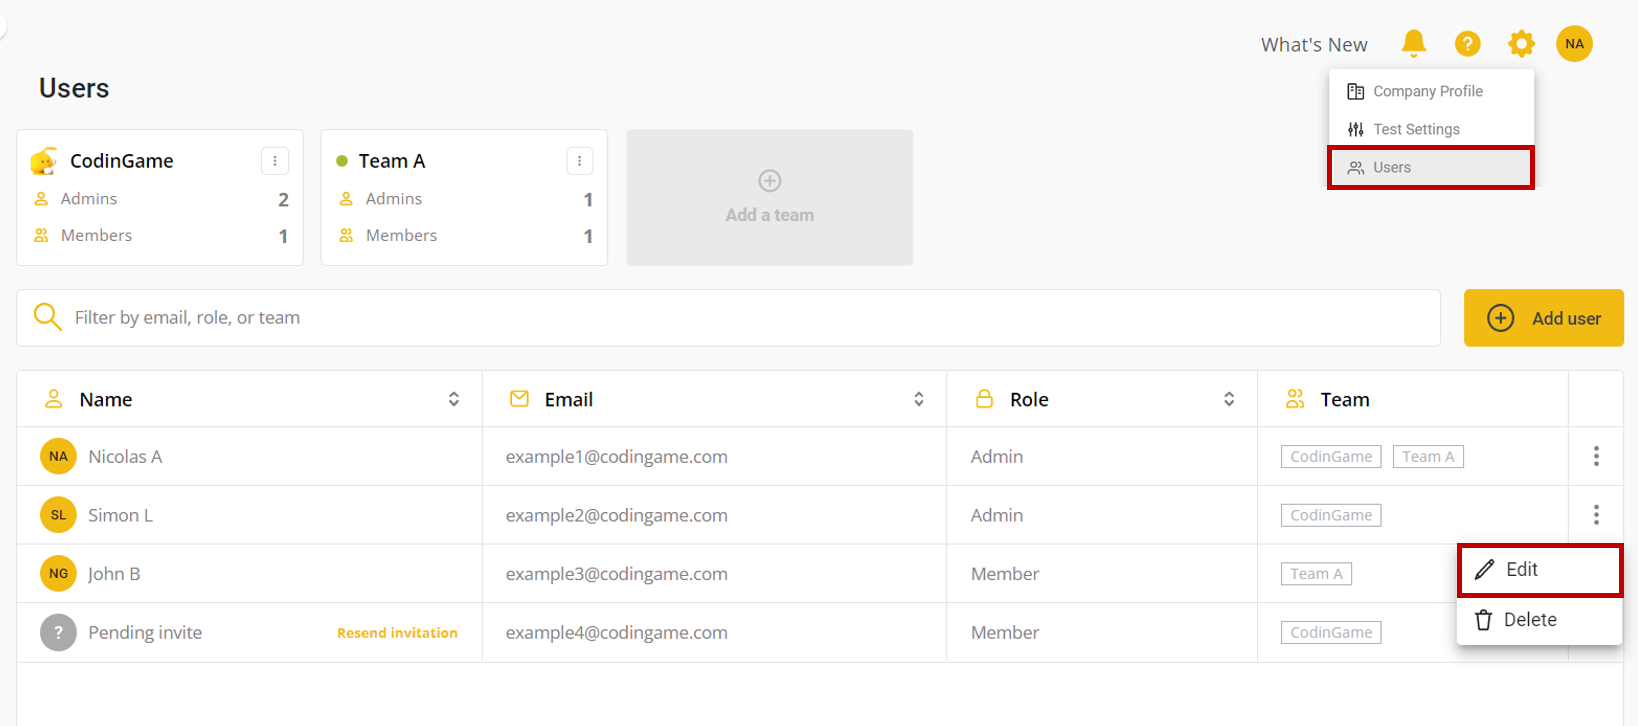
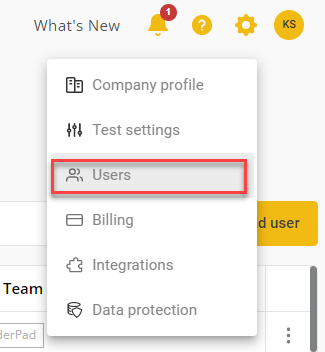
If you’re an administrator for your CoderPad account, you can invite and manage users. Just click on the Users in the settings menu at the top right of the screen to see the list of people who’ve already been invited to your account.
If you wish to edit an existing user’s permissions, click on the Edit ✏️ button. If you wish to add a new user, click on + Add user.
Only people with the same email domain name as you can be added to your account.
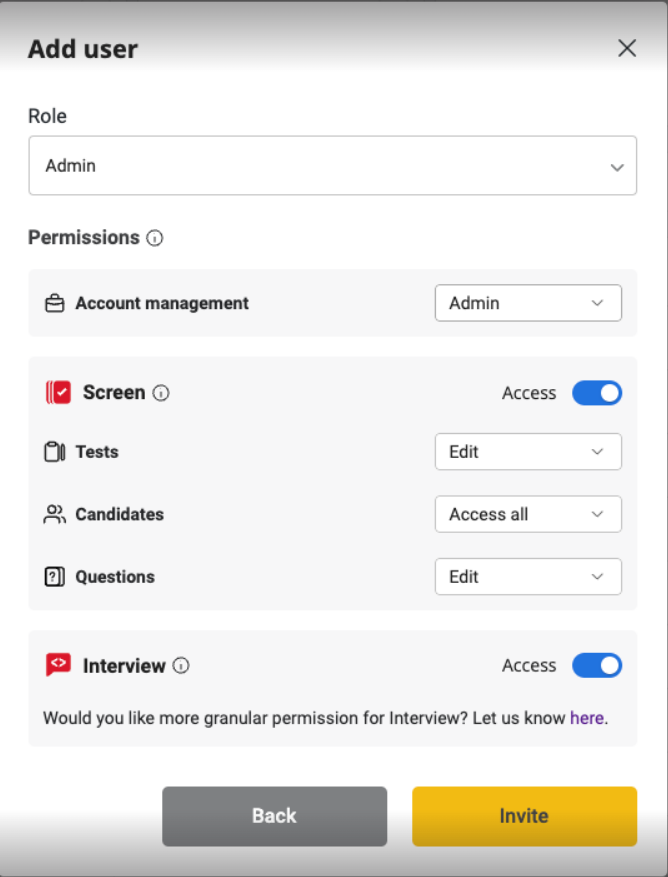
Once the Add user window is open, fill in the email address(es) you want to add. You can also import a CSV with your colleagues’ email addresses. You’ll then select the role for the new user (Admin or Member) and any team you want them associated with.

The Member and Admin roles come preset with certain roles and permissions.
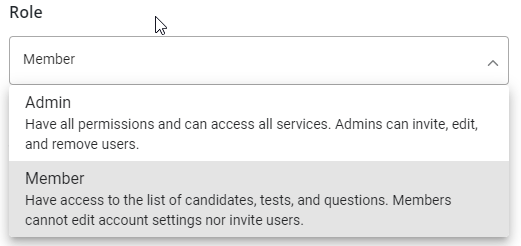
✅ An administrator can access everything on the account and manage other users.
If you wish to fine-tune these permissions, simply click on the Customize permissions link below the Role dropdown menu. You’ll then be presented with a list of permissions, you can edit them as needed. Click the Invite button to finalize the permissions and send an email invite to the new user.
Edit user permission details
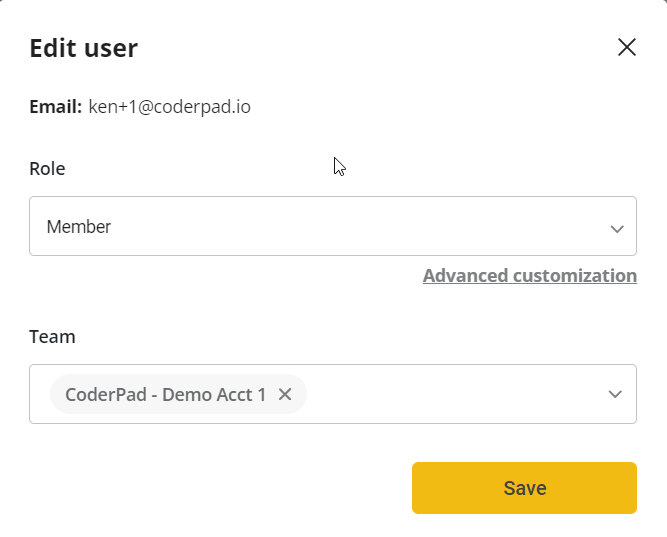
You can edit your colleagues’ permissions by selecting the appropriate access type from the drop down menu in the Customize Permissions window.
To access this window from the main dashboard, click the settings gear icon in the top right of the screen ⚙️, select Users, and then click on the three vertical dots next to the user whose permissions you want to edit and select Edit user.

You’ll see the permission window, and you can either select one of the pre-defined permission sets from the Role drop down, or select Advanced customization for more detailed permission selections.
The following levels are available for each feature:
| Feature | Permission settings |
|---|---|
| Tests | View: This user can see the list of tests Edit: This user can create, edit and delete tests |
| Candidates | No access: This user cannot access candidates information Send tests: This user can invite candidates See reports: This user can access candidate reports Access all: This user can invite and manage candidates, and access their reports |
| Questions | View: This user can see the list of questions Edit: This user can add and edit custom questions |
| Account management | No access: This user cannot edit account-related information Invite only: Only allows members to invite other members Billing only: This user will have access to the billing page and will receive invoices by email. Admin: This user will have access to all features and services Team admin: This user will have access to user management features for their assigned team only — e.g. add users, assign access roles, etc. |
✅ Some permissions might be set to “Custom” for retro-compatibility reasons.
Delete a user
If you need to delete a user, just make sure that you are one of the administrators of your CoderPad account. Then, click the Users option in the settings dropdown menu in the top right of the screen.
You will see your list of users. Just click on the three vertical dots on the right and then select Delete. You may notice that the bin on your row is greyed out. You cannot delete your own account.

Finally, just confirm your deletion.

You can switch from one account to another at any time.
Team member video tutorial
For more information on adding team members to your account, check out this Adding a team member with CoderPad video tutorial:
Team management
The team workspace is the top-level component of your CoderPad account. You can think of it as a folder containing users, pads, tests, and custom questions.
Team workspaces are a great way to organize your account and make it easy for everyone to access the tests and pads that are relevant to them. It also allows you to avoid unintentional changes by unauthorized users that could impact the candidate experience by allowing you to refine roles and permissions.
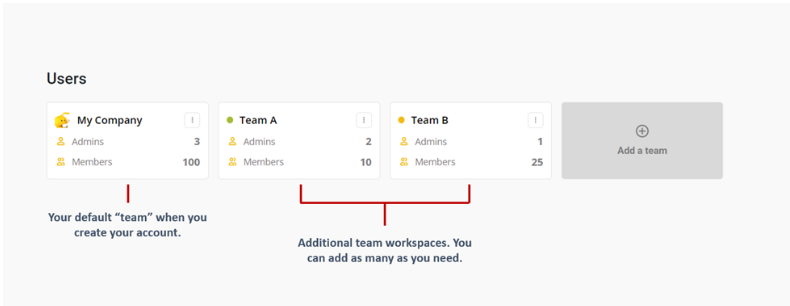
By default, all users, tests, pads, and custom questions in your Screen account belong to the same team workspace. This default setting means that all users with the appropriate permissions can access and edit all tests, pads, and custom questions without restriction.
Adding additional workspaces
There may be instances where you need to create multiple workspaces to best fit the needs of your organization.
✅Adding additional workspaces is only available with Enterprise accounts.
To add new team workspaces, go to the Users option in the settings menu.
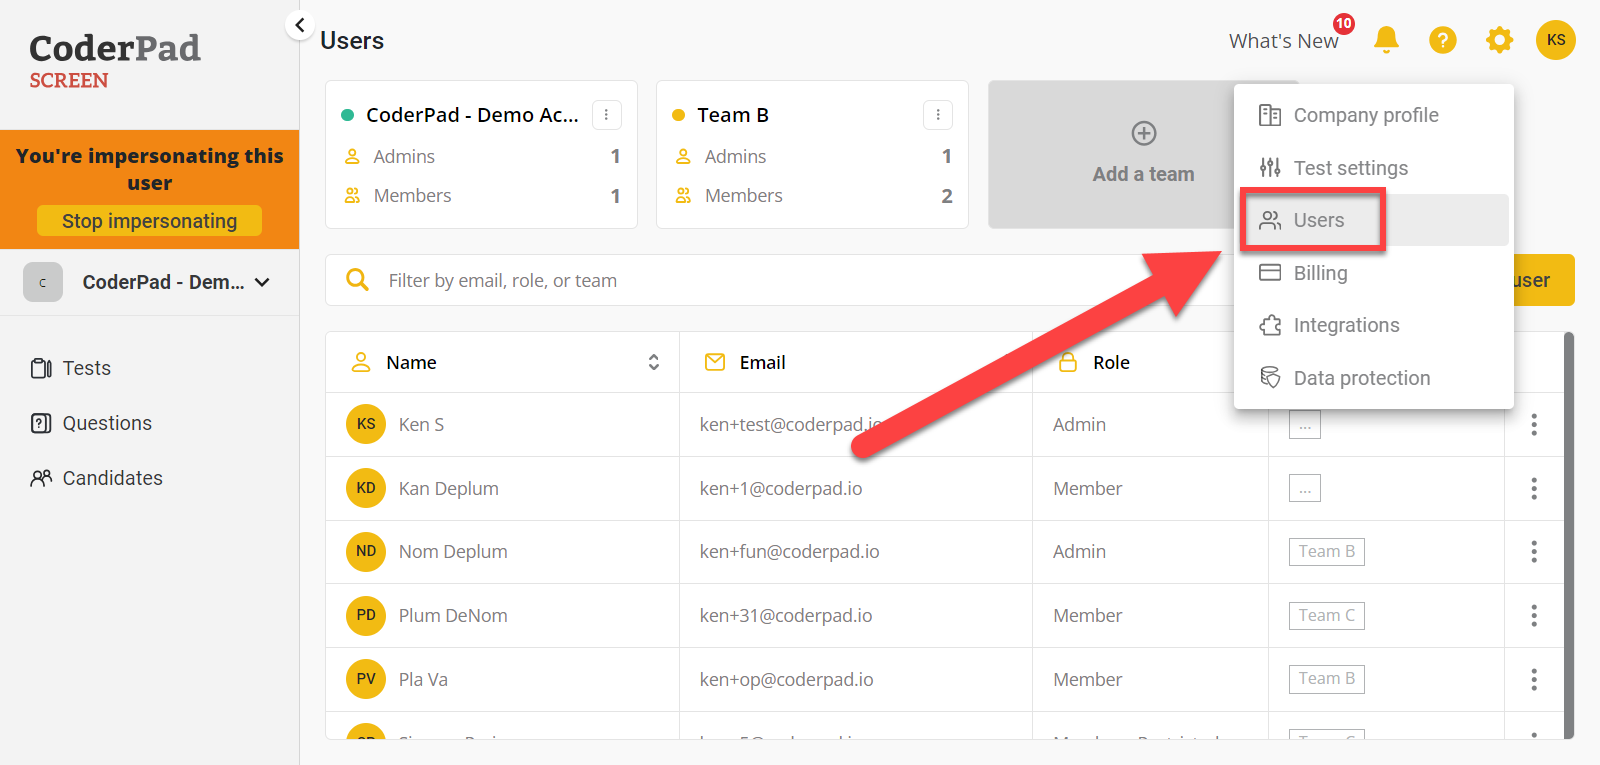
You will then see the Users page with your default team workspace. You can then add as many teams as you want by clicking on the Add a team block on the right of the screen.
Users (both admins and members) can belong to one or more teams. Each test, pad, and custom question belongs to a specific team. Therefore, if you belong to Team A, you will see Team A’s tests and pads and will be able to edit Team A’s custom questions. You will still be able to see and use other teams’ custom questions, but will not be able to edit them.