Documentation menu

Creating a test

Last updated on Disponible en Français

Creating a new test

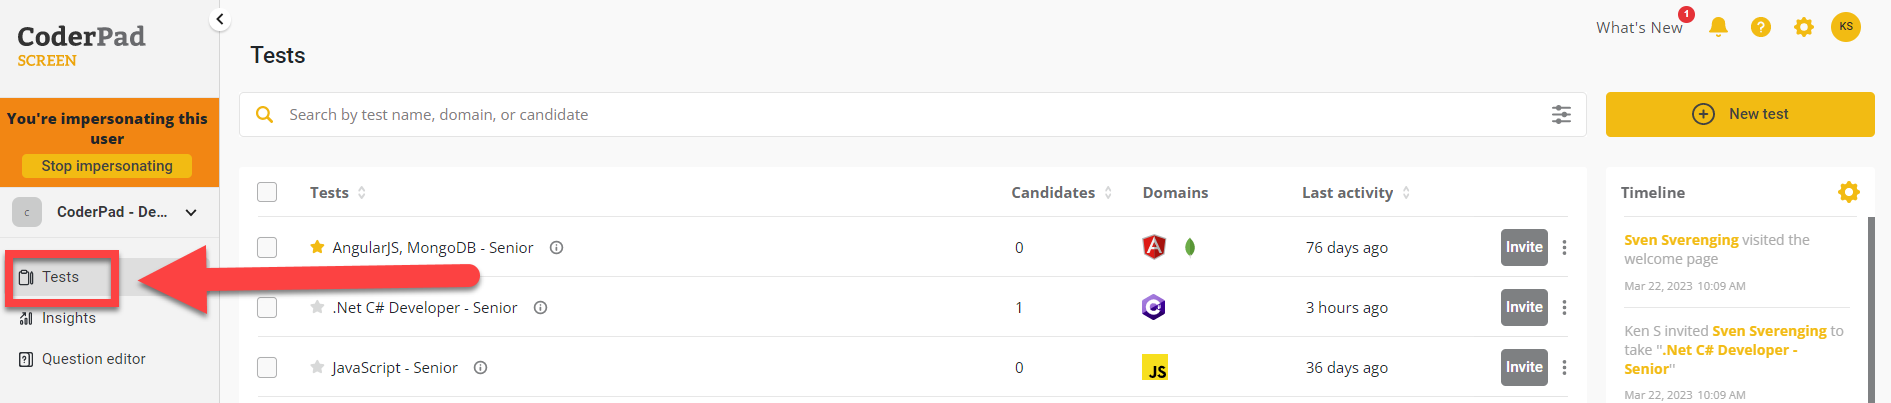
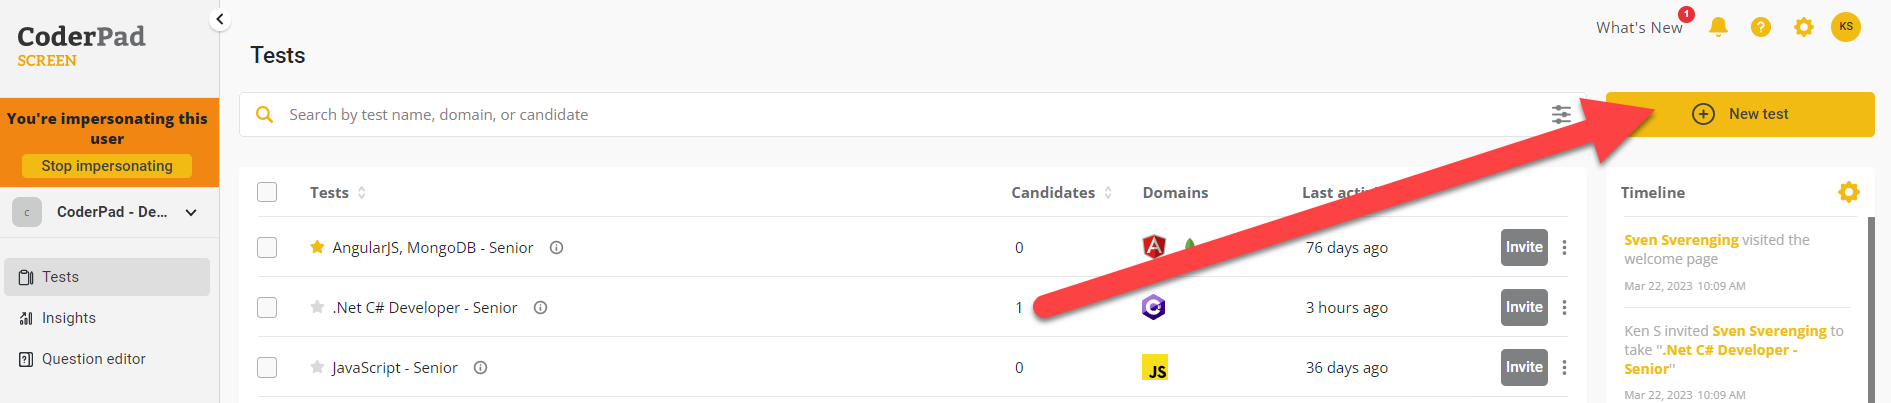
To create a test with Screen, log in to your account and click on Tests.

Arrow pointing towards the Tests tab in the left nav menu.

If you are a new user, clicking Tests will automatically create a new test.

If you’re a returning user, click New test

Arrow pointing towards the "New test" button in the center of the screen.

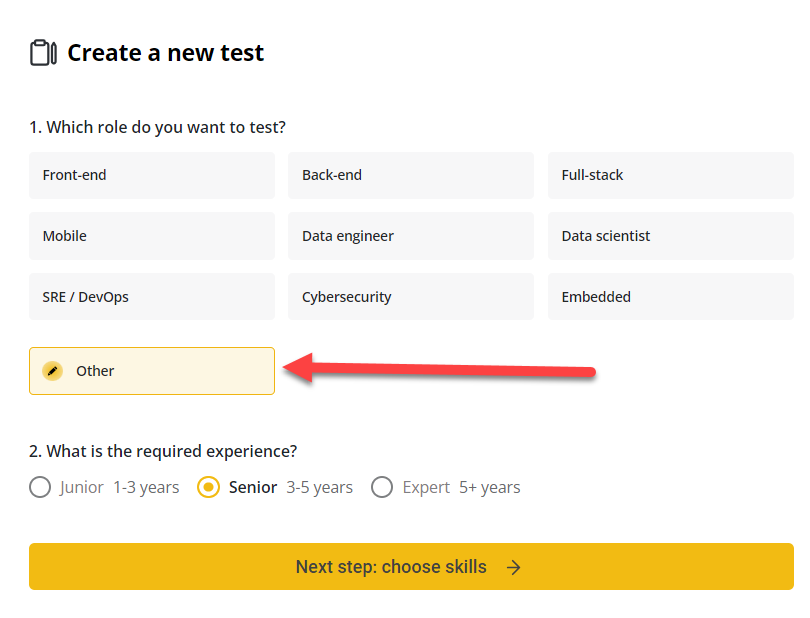
You can either select the role from the given list or select Other if you don’t see what you’re looking for. Then select the experience level you’d like to test and the team you’d like the test to be assigned to.

Here is an appropriate alt text for the image you uploaded:

"Interface for creating a new technical test on CoderPad. The options include selecting a role to test from categories such as Front-end, Back-end, Full-stack, Mobile, Data engineer, Data scientist, SRE/DevOps, Cybersecurity, Embedded, and Other. The required experience levels are Junior (1-3 years), Senior (3-5 years), and Expert (5+ years). There is also a field to select which team will have access to the test, with 'CoderPad Inc.' filled in as an example. A button labeled 'Next step: choose skills' is at the bottom."

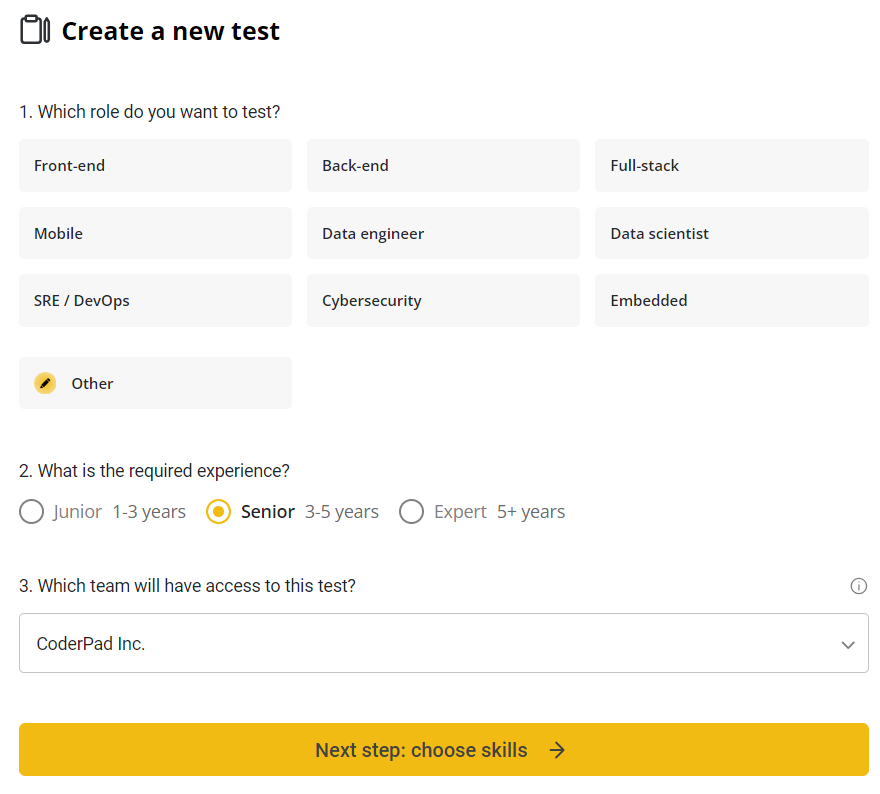
✅ The team assignment feature is currently only available for Enterprise plans.

On the next screen you’ll see a list of languages or frameworks associated with the role you selected. Simply click on the + button next to the suggested skills (A) you’d like to add to your test; when a skill is selected it will turn yellow (B). If you selected Other for your role, you can use the search bar to find the technology you’d like to add to your test.

The second test creation screen is shown with the ability to select relevant languages or search for ones not listed. There is a letter "A" next to the selected skills and a letter "B" next to the other suggested skills.

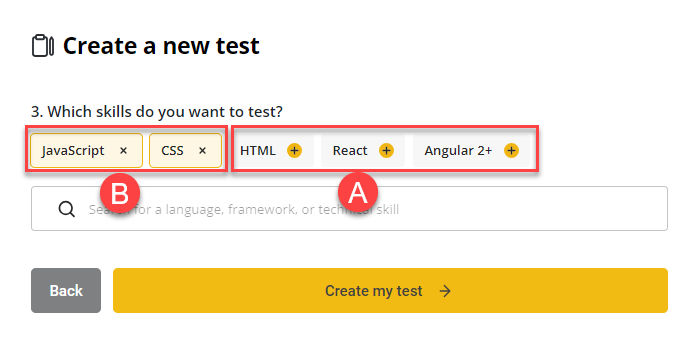
Finally, click Create my test to save your test. 

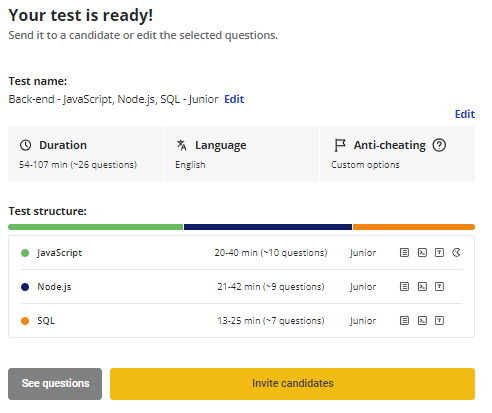
The new test contains random blocks of questions according to your specified criteria. 

Test confirmation screen with a 1 next to the "see questions" button, a 2 next to the "invite candidates" button, a 3 next to the "Edit" button for the test name, and a 4 next to the "Edit" button for the duration/language/randomization options.

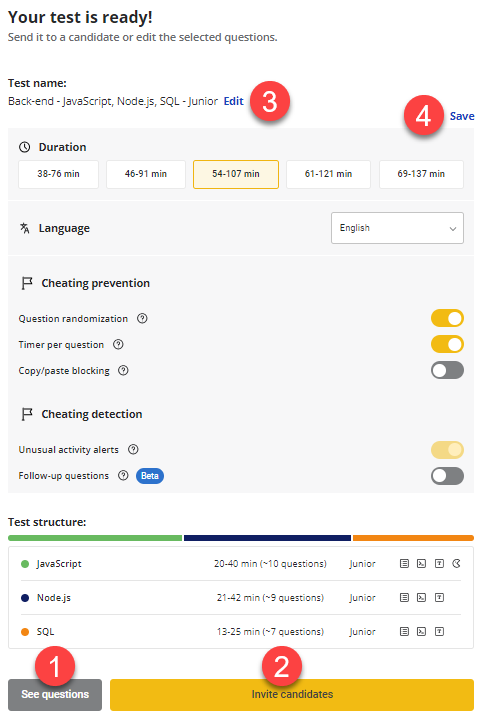
If you’d like to see what questions are included on your test, or customize the test with different questions, click See questions (1). When you’re ready to send out an invitation to candidates for them to take the test, click Invite candidates (2). To change the name of your test, click Edit next to the test name (3). If you’d like to change the duration, test language, or enable/disable cheating prevention and detection methods, click the Edit button above those fields. Click Save (4) to proceed with any changes to the test configuration.

The test confirmation screen is shown with the duration, language, and randomization toggle options expanded.

Creating a test from a list of questions

You can create your own tests from CoderPad’s list of question and your own custom-created question list.

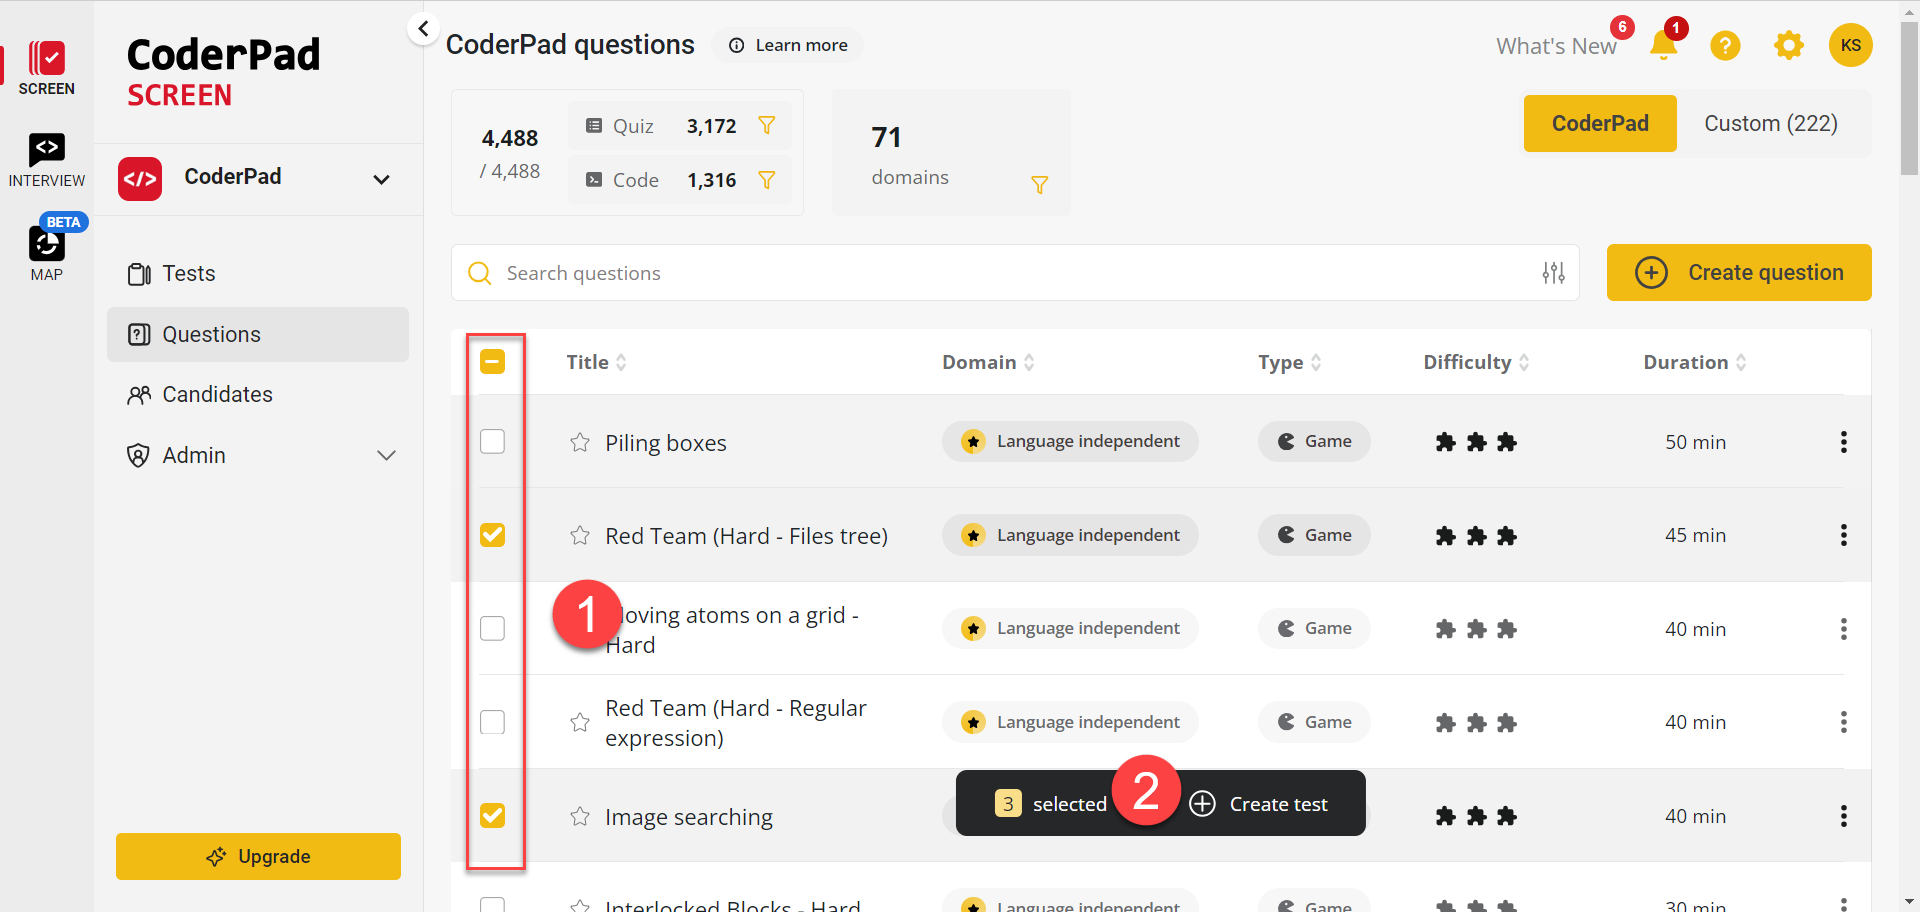
Simply navigate to your question page and select the checkbox next to the questions you’d like to use in your test (1). Then click Create test from selection (2).

The image shows a screenshot from the CoderPad platform, specifically in the "Questions" section. Here’s a description of the key elements:

1. **Checkboxes (Highlighted in Red Box)**: There are checkboxes on the left side of each question title. Some of these are checked, indicating that the questions have been selected.

2. **Selection Indicator**: Below the list of questions, there is a black bar with a label "3 selected" followed by a "+" button labeled "Create test," indicating that three questions have been selected for creating a test.

3. **Question List**: The screenshot shows a list of questions with various details:
   - **Title**: Names of the questions (e.g., "Piling boxes," "Red Team (Hard - Files tree)").
   - **Domain**: "Language independent" is indicated, meaning these questions don't depend on a specific programming language.
   - **Type**: Most of the questions are marked as "Game."
   - **Difficulty**: Displayed using puzzle icons, where more puzzle pieces suggest a higher difficulty.
   - **Duration**: Time allocated for each question is shown (e.g., 50 min, 45 min).

4. **Top Navigation Bar**: Contains elements like notifications, settings, and user profile initials ("KS").

5. **Create Question Button**: A yellow button labeled "Create question" is on the right side, which likely allows the user to add a new question to the platform.

6. **Filter and Search Options**: There's a search bar and filter icon above the list of questions for refining the search results.

The interface is clean and seems to be designed for managing and organizing coding or programming questions for assessments or interviews.

Your test will generate with the questions you’ve selected. You’ll be taken to the test customization screen, where you can add more questions, add a random block, update the test settings, or send the test to candidates.

Using favorite questions

If there are questions you regularly like to use on tests, you can move them to the top of your question list to make them easier to find by marking them as favorites.

To do this, simply locate your question in your list of questions, and select the star icon ⭐ located next to the question.

Custom question list with the star icons highlighted next to their respective questions.

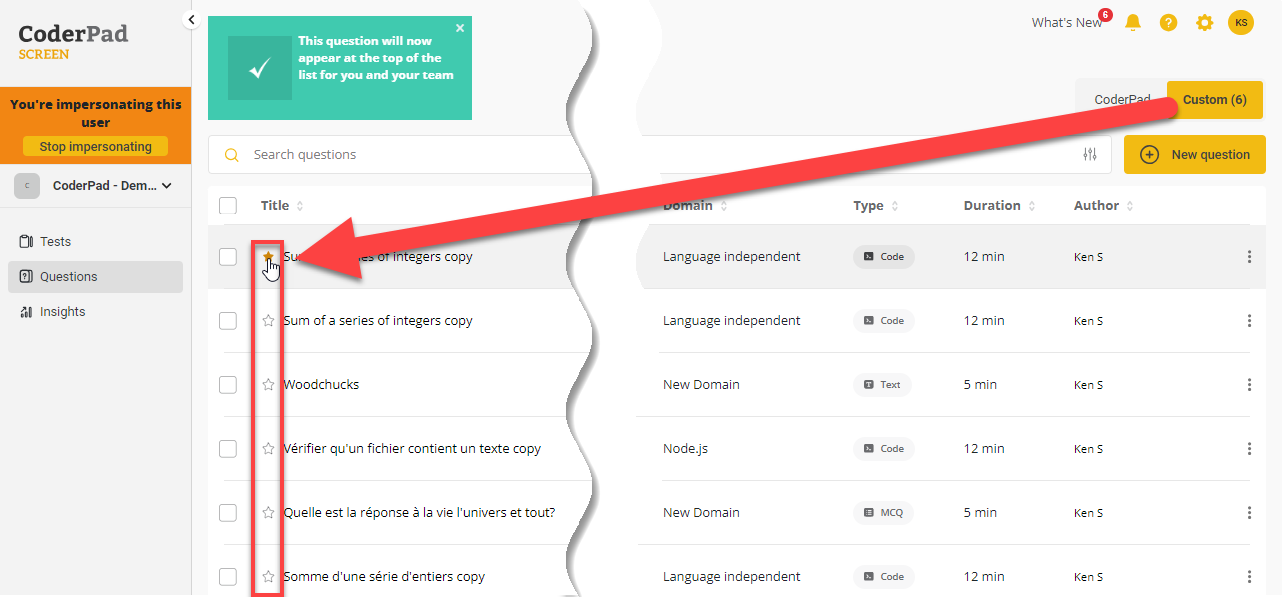
You’ll then see the question at the top of your question bank:

The question bank for language independent questions is shown with an arrow pointing to the favorited question at the top of the list.

Language independent tests

To create a language independent test, go to My Tests by clicking on Tests in the left navigation menu, and then click New test.

Arrow pointing towards the "New test" button in the top right side of the screen.

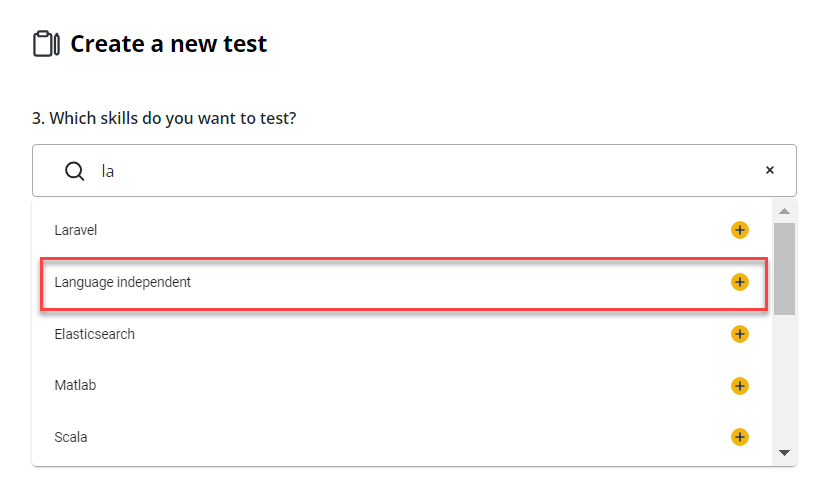
In the first screen, select Other from the roles and then select your desired experience level for the test.

First test creation screen with "other" role selected.

On the next screen, type in “language independent” and select that option from the drop-down list.

The second test creation screen is shown with "language independent" option highlighted in the drop down menu.

Then click Create my test to finish the process.

Test confirmation screen for language indepenent test is shown.

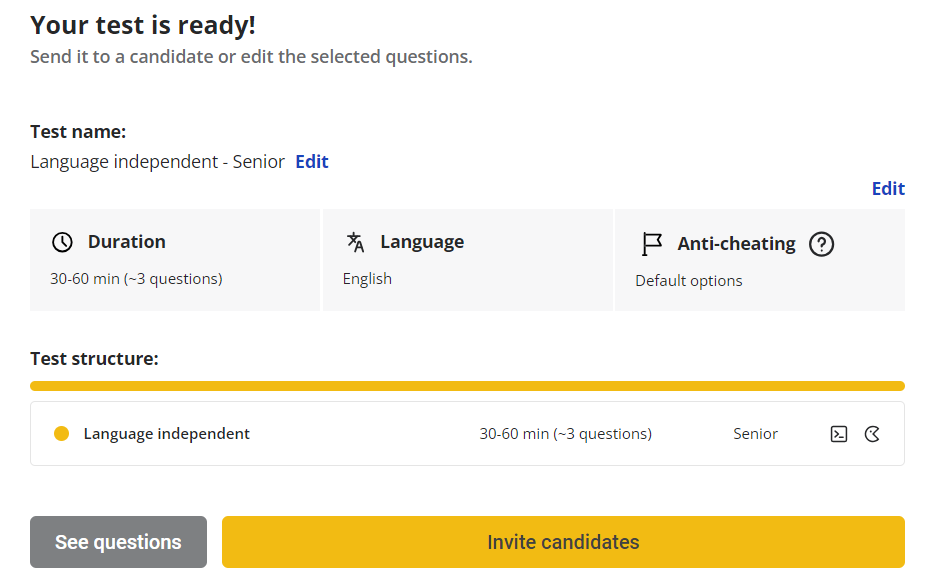
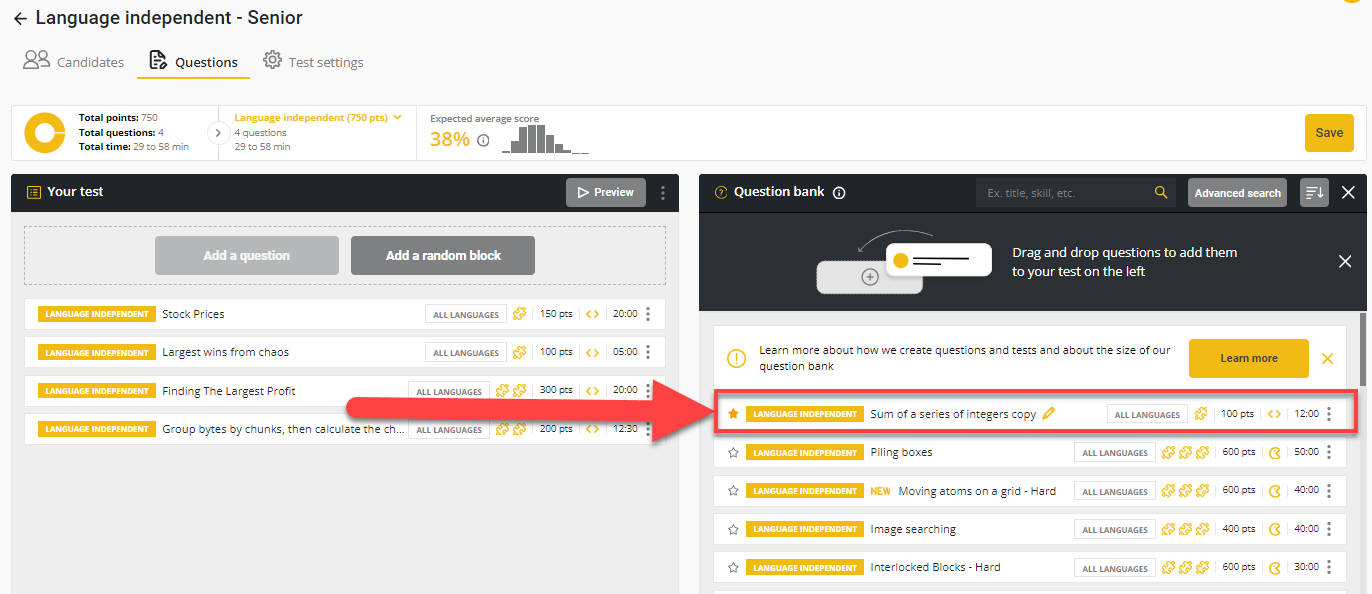
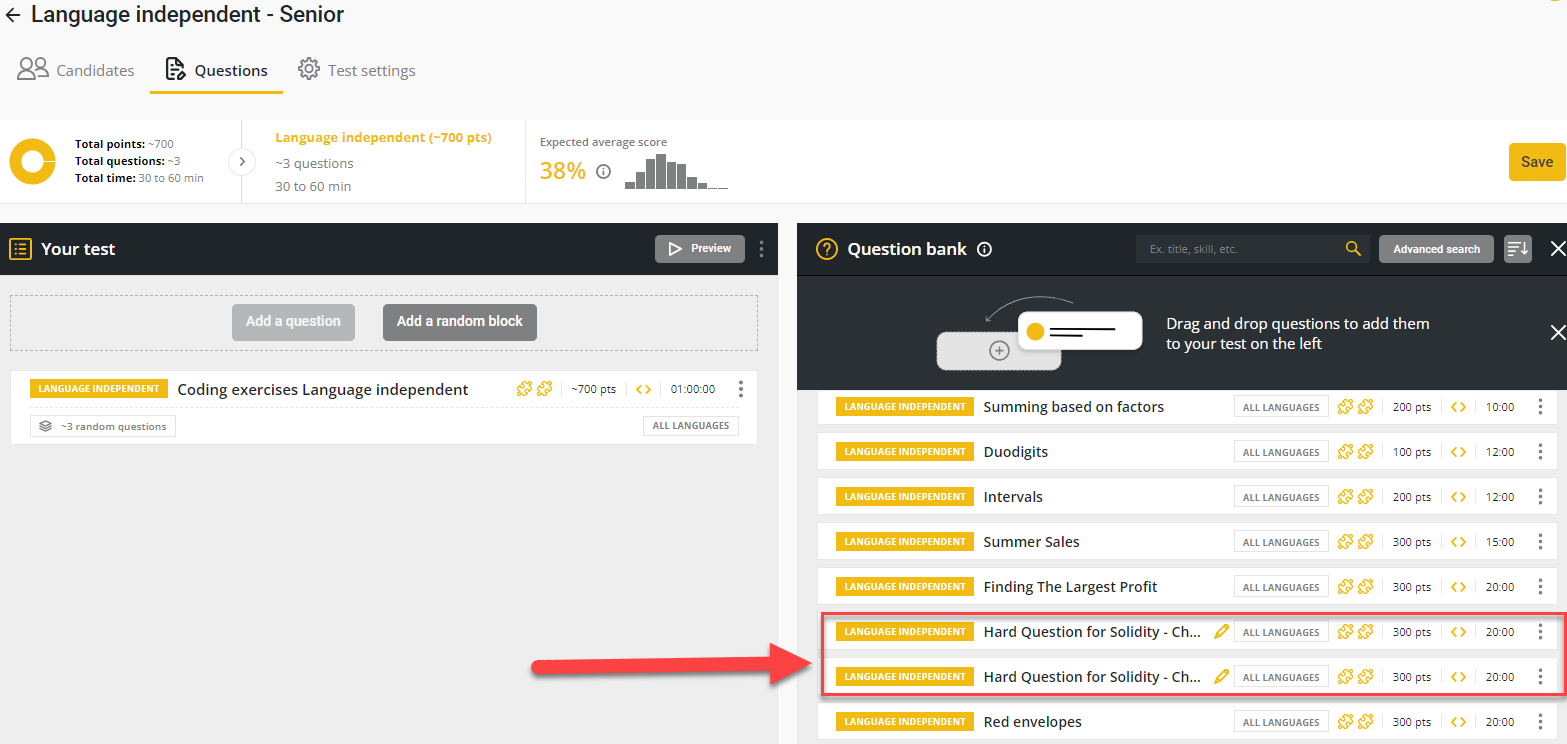
The test’s customization settings — which you can access by clicking on See questions contains a list of available language independent questions that you can include in your test.

✅ Language independent questions are only available as programming exercises.

Screenshot of the Custom test screen with "your test" on the left and a set of random questions on the right.

If you created your own custom language-independent question (indicated by the pencil ✏️ symbol), you will see it in the Question bank:

Arrow pointing to a custom question in the question bank.

If you’d like to limit the language independent question to specific languages, you can click on the language dropdown on the question box and select one or more languages for the candidates to choose from.


The interface is titled "Language independent - Senior" and is part of a testing platform. It includes the following sections:

- **Header**: The top section shows navigation tabs including "Candidates," "Questions," and "Test settings." The current tab selected is "Questions."
  
- **Test Overview**:
  - **Total points**: ~870
  - **Total questions**: ~4
  - **Total time**: 30 to 60 min
  - **Expected average score**: 40%

- **Question Editing Section**: 
  - There's an option to "Add a question" or "Add a random block."
  - A "Language Independent" label is selected along with a coding exercise for "Language independent." The interface also allows selecting specific languages. In the drop-down list that appears, "JavaScript" is checked, indicating it has been selected. Other language options listed include C++, Go, Java, Kotlin, PHP, and Python 3.

- **Set of Random Questions**:
  - On the right, there’s a panel labeled "Set of random questions" where it indicates that each candidate will receive ~4 questions randomly selected from the list below.
  - The listed coding questions include:
    - Piling boxes (600 pts, 50:00 minutes)
    - Red Team (Hard) (600 pts, 45:00 minutes)
    - Moving atoms (600 pts, 40:00 minutes)
    - Image searching (400 pts, 40:00 minutes)
    - Interlocked Blocks (600 pts, 30:00 minutes)
  
- **Miscellaneous**:
  - There is a "Preview" button in the editing section to allow reviewing the test.
  - The interface also shows a "Save" button in the upper-right corner, with some notification icons next to it.