Using pad features
Last updated on • Disponible en Français
Getting started
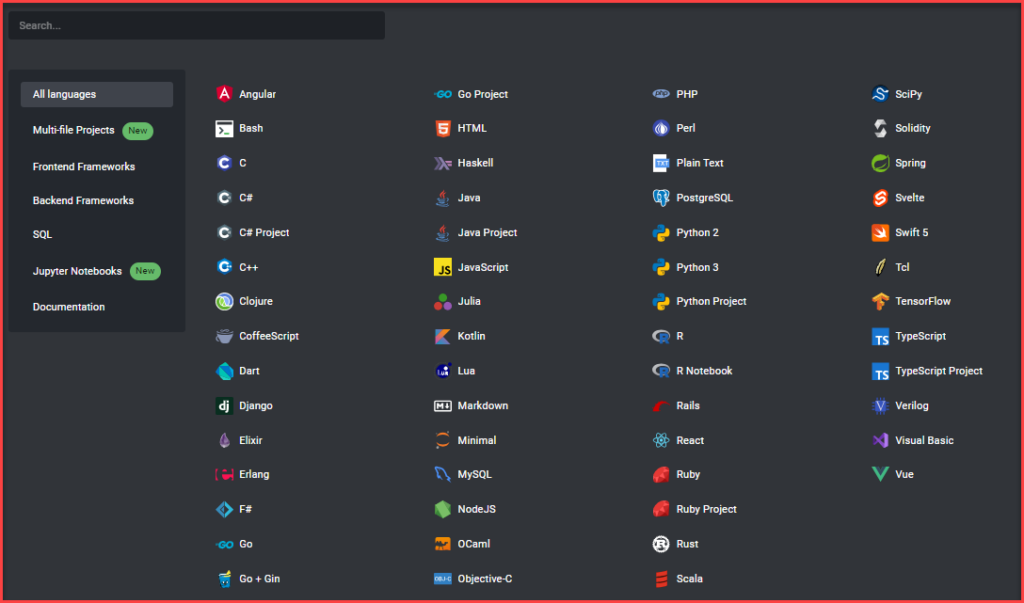
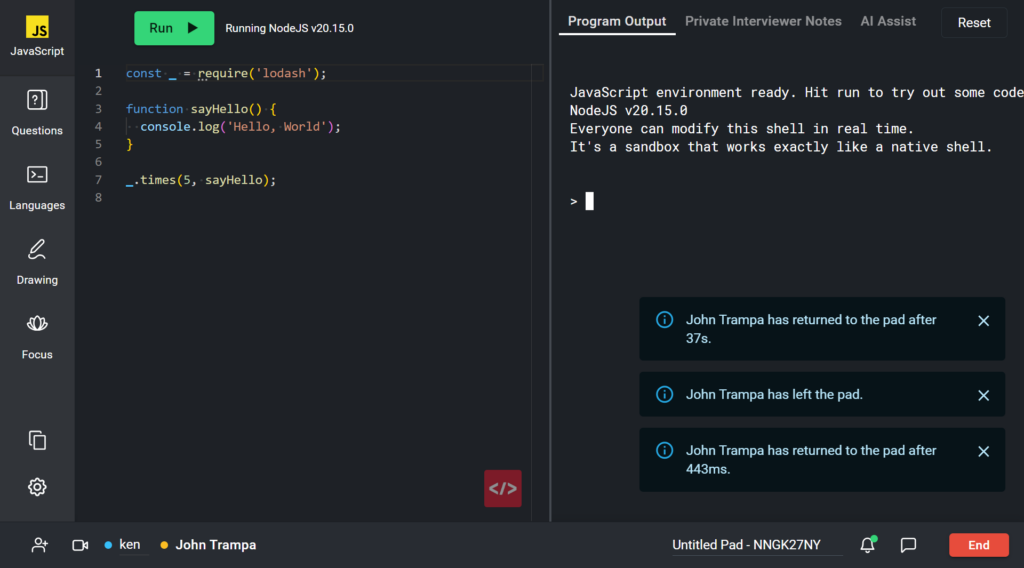
Pads support a large number of programming languages and frameworks. Each language has an IDE, a code execution pane and a REPL (where available).
✅ You can have multiple language environments per pad. You can also add a new language environment at any point during the interview.
To add a new language environment to the pad, click on the Languages button on the left side of the screen. You’ll see a list of languages and frameworks to choose from.
Once you select your desired language or framework, a new tab will open with the example code or app for that particular language:
Now you or your candidate can begin coding!
Whenever anyone makes any edits in the code, you’ll be able to see their cursor along with a tag that has their name.
Multi-file pads
CoderPad offers three types of language environments — single file like the OCaml pad you see above, and two types of multi-file pads:
- Multi-file projects, which are non-framework backend languages and include C, C++, C#, Java, Ruby, Go, Python3, TypeScript/Javascript, and Scala
- Multi-file frameworks, which include frontend and backend frameworks like React, Angular, Node, and Spring.
Like single file questions, we recommend the following tips to get the most out of your multi-file pads:
- If you’re using a blank pad or sandbox, you can use the Save code as draft button (right click on the language icon to pull up this option) to turn the pad into a question draft.
- You can use multi-file environments for both take-home and live interview pads.
- Be aware that if you set up starter code in one language environment, it won’t automatically copy over to a new language environment if a candidate switches over.
Pad set-up
To quickly set up your multi-file pad or framework, you can drag and drop files, folders, or complete projects into the file tree. You can also a new folder or file to the file tree by clicking click on the folder or file icon, respectively.
If you want to save your pad to use in the future, you can click Save code as a draft question in the pad options to turn the pad into a reusable question which you can access in the Questions bank.
File tree and code editor
All multi-file pads offer a file tree and Monaco-based code editor. When you click on any file in the file tree (1), the file will display in the code editor (2) for you to edit as needed.
The shell
You can use the shell to install packages from the terminal using external package managers like npm or pip3. Any libraries you have installed as part of a question (using either the question wizard or the Save code as draft question feature) will be saved to the question for use by your candidate.
⚠️ Playback is not currently available for the shell. If using a multi-file language environment, we recommend having the candidate use the Run button as much as possible to print code to the Program Output window, which is recorded with playback.
Multi-file projects
In addition to the file tree, multi-file language pads have the following features:
- A Monaco-based code editor
- A Run Main/Run Tests button that allows you to switch between running the code and running any test cases associated with the code.
- A Program Output tab where you can view the results of Run Main and Run Tests, a Private Interviewer Notes tab, and an AI Assist tab.
- An interactive shell.
✅ You can add different run commands or run more than one file at a time by updating the
.cpadfile.

✅ If you’ve added a database to your question, we recommend setting up the ORM code as part of the question rather than having the candidate to it — it saves time and allows the candidate to focus on the more important business logic. You can use the AI Assist tab to ask ChatGPT to generate ORM code for you.
Multi-file frameworks
When you select a multi-file framework to code in, you’ll notice a multi-pane window that’s similar to what you’d find in popular IDEs.
- The first pane displays the contents of the active file selected in the file tree.
- The second pane renders the output of your application.
- The third pane provides an interactive shell, server log output, and a console.
- A URL is provided if you’d like to open the rendered app in a separate window.
With multi-file frameworks you’ll not only have access to the standard code editor, but you’ll also see additional features that make front-end and back-end engineer interviewing more realistic.
✅ You can find more information on each framework and its settings by viewing the
README.mdfile located in the file directory.
Output window
In addition to viewing the rendered code in the output window (4), you also can access your private interview notes or API Requests client (1). You can also copy the URL (2) from the URL bar to paste into a new tab/window, or use the pop-out button (3) to do the same.
✅ The API client is only available with backend frameworks.
Server logs, console logs, shell, and API request history
The bottom portion of the right side of the pad consists of the following:
1. Server logs. You can restart the server by clicking on the Restart button in the top right of the window.
3. Console logs. You can select the type in the drop-down in the top right of the window.
4. Request history for the API client.
To find more information on using multi-file frameworks, check out the Engineer’s guide to multi-file frameworks.
Follow users
Follow any user by clicking on their name at bottom left of the pad. Follow is intended to be hands-off — if you click or start typing in the editor or file tree you will break out of follow. However, you can interact with the right hand pane tabs without affecting the follow.
⚠️ Follow will not change the file view if the followed user only clicks on the file title. It picks up the file change when the followed user clicks into the editor and starts working.
Suspicious behavior notifications
If it’s enabled, you’ll see pop-ups appear on your interviewer’s screen every time a candidate copy/pastes or leaves the CoderPad browser tab.
Switching Languages
We offer two ways to switch languages:
- Switching languages within a question — use this option to answer a question in a different language.
- Switching to a new language tab — use this option to start coding in a new blank tab.
For either option, you can switch between languages at any time during the interview. Select the previous language or tab to view code you’ve written there.
1. Switching languages within a question
If you have a question loaded into the pad and your candidate wants to use a different language to code in, they can use the hover menu.
Hover over the question tab and the options menu will display, including the Languages drop-down. You can use the search bar to type in a language or select it from the list below.
Question instructions will still be available on the right side of the pad.
✅ When you switch languages in a question, the code from the previous language will automatically be displayed in the new language editor as a comment. This is so you and your candidate don’t lose your work as you switch between languages.
2. Switching languages to open a new pad environment
This option will open a new language tab without being associated with a question. Simply click the Languages option in the left tab menu and select the new language you’d like to use.
❗When you switch between environment tabs, all other pad participants will also be switched over to the same environment along with you. Give other pad participants a heads up when you are about to switch environments.
✅ Any code you write in a language environment will be saved in that tab, so you never have to worry about losing your code.
Auto vs manual file save
In the multi-file language frameworks (both front-end and back-end) you’ll see a toggle to disable the current hot reload/auto-save functionality. This setting is at the pad level, so changing the setting will also change it for all other pad participants.
The default setting is the current auto-save behavior. If you toggle to “manual save”, you’ll need to click the Save button (or the ⌘ + S/ CTRL + S keyboard shortcut) to save file changes and see them appear in the right hand pane.
Adding a question
To add a question to the pad, click the Questions button on the left side of the screen. Then click the Select A Question tab. You’ll see tabs for your Organization‘s questions, My Content, and Examples questions, mirroring the Question Bank. You can search or filter questions by language.
Once you’ve added a question, you can change the language on that tab, by clicking hovering on the tab then choosing “Language”. This may be convenient if a candidate wants to use a language that the question was not originally written in. Switching languages on the tab ensures that any attached resources like databases or files can still be accessed from the question tab.
For more details and tips on switching between languages in a question, check out the Switching Languages section above.
Language information
✅ Only select languages will have a Language Info tab. For multi-file frameworks and projects like Node and React, you can view the framework information in the README.MD file included in the project file tree.
You can access more information about the language environment by hovering over the language name in the left navigation menu and then selecting Language Info.
Database Adaptors
Interview’s environments supply common language-specific database adaptors and ORMs for use in assessments.
⚠️Note that most languages do not have support for database adaptors.
To select a package for your language, first hover over the language you’d like to add an adapter to. Then click on the Database adapters drop down menu to see the adaptors for that particular language.
❗ This will erase/replace any code you have previously written in this tab.
Drawing Mode
Drawing mode is now accessed from the tab navigation:


