The Interview platform allows you to create custom databases and attach them to questions to assess a candidate’s data processing skills. Click on an item in the table of contents below to learn more about using the database feature.
For example, a Node pad runs a Node.js Express application with a built-in connection to a PostgreSQL database. We’ve also installed Sequelize, a promise-based ORM tool that simplifies interactions with the database. You can find more details in the server.ts file. To set up a database in a Node pad, you can either run a database initialization script or do so via an API endpoint, like those in server.ts.
Creating a custom database
You can upload custom databases and attach them to questions to test a candidate’s ability to manage, write, and edit database queries either using SQL or a language ORM/adaptor.
✅ Interview’s custom databases are available for MySQL and PostgreSQL.
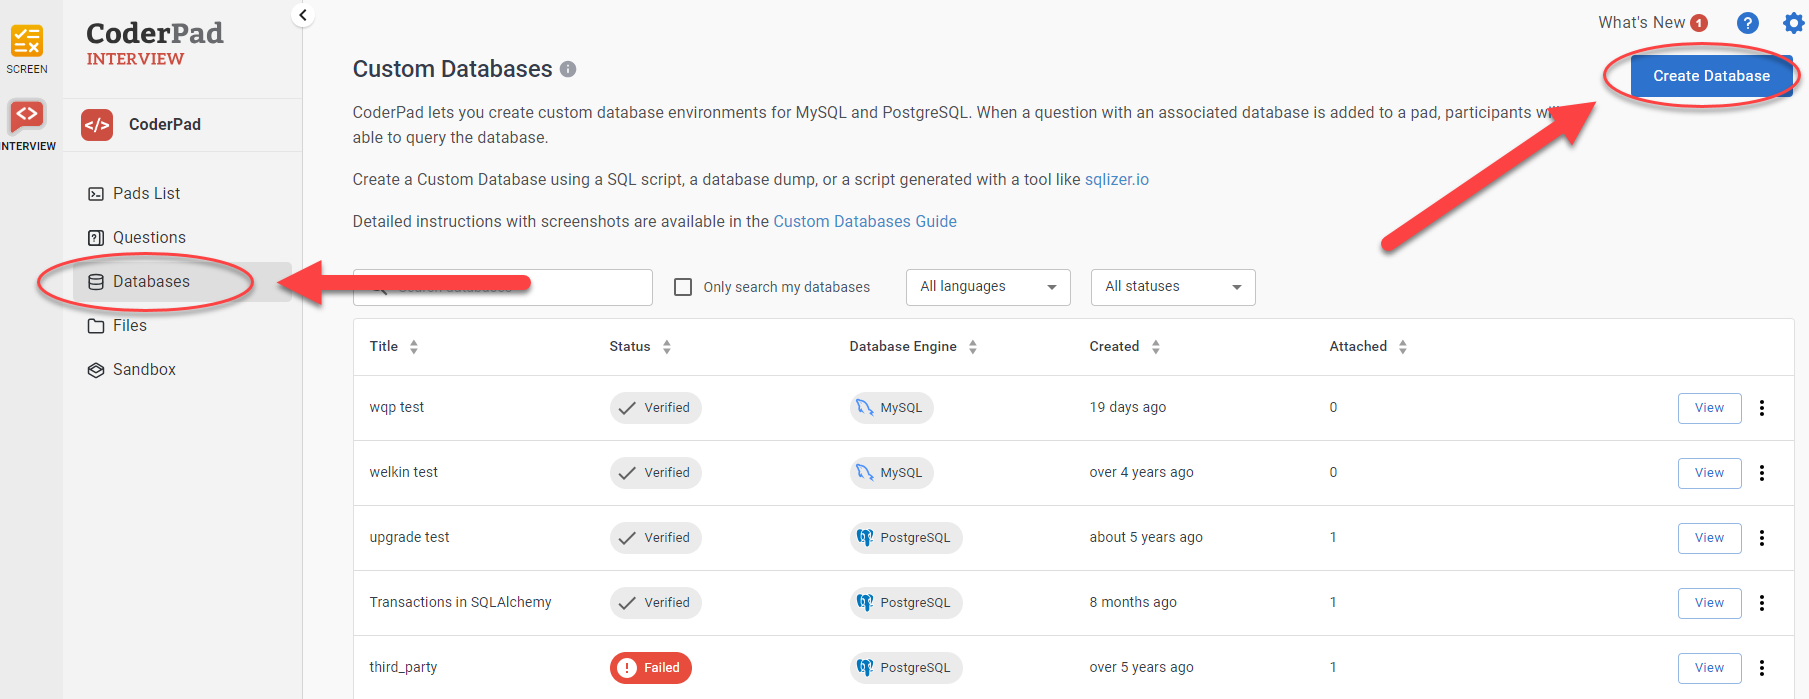
To start, navigate to your Interview dashboard and click Databases in the left-side navigation bar to go to the Custom Databases page. Then click Create Database.
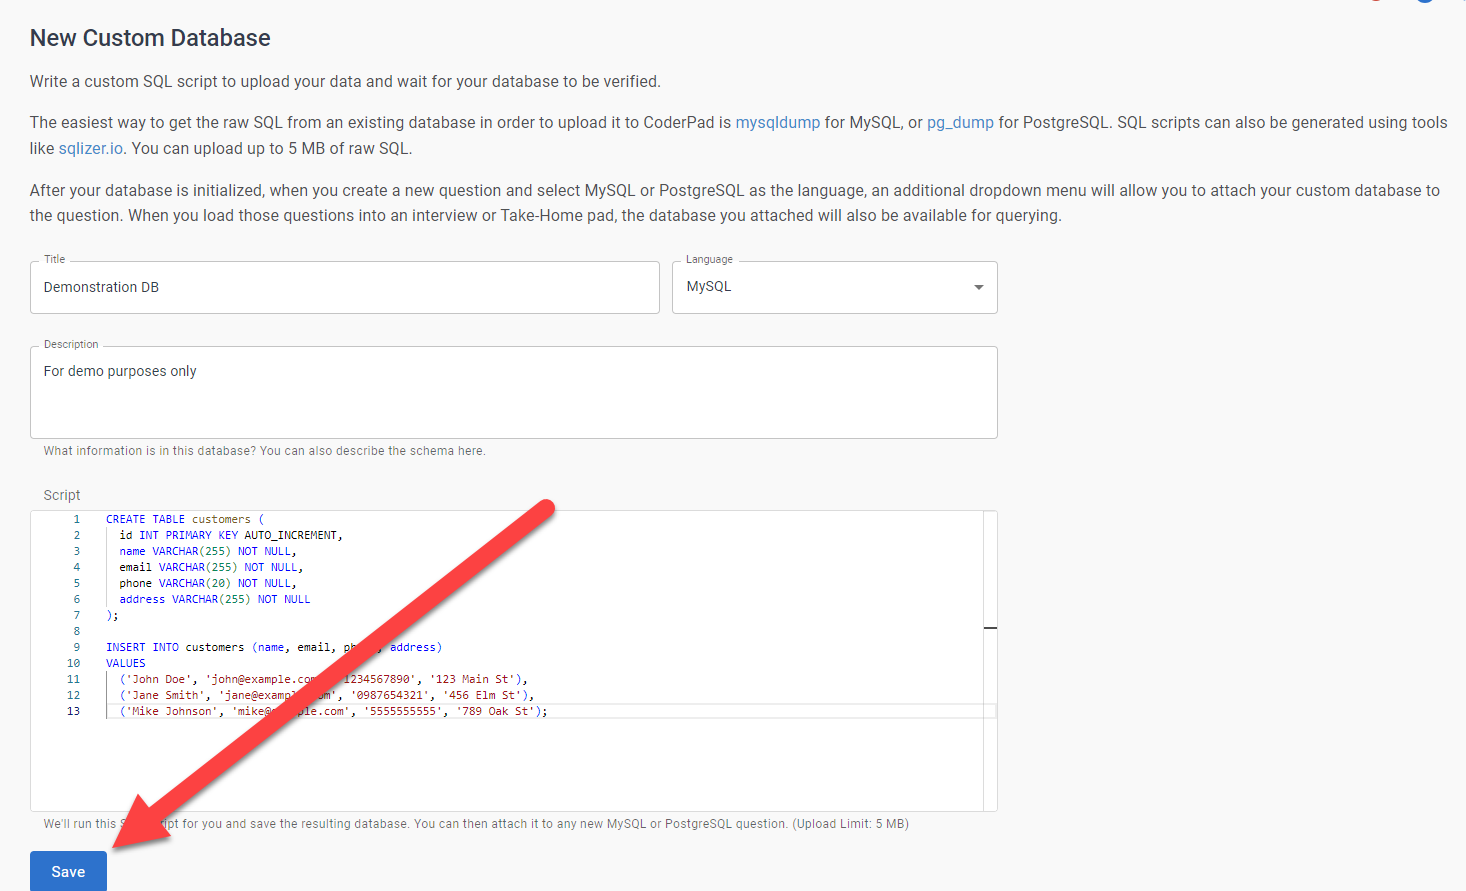
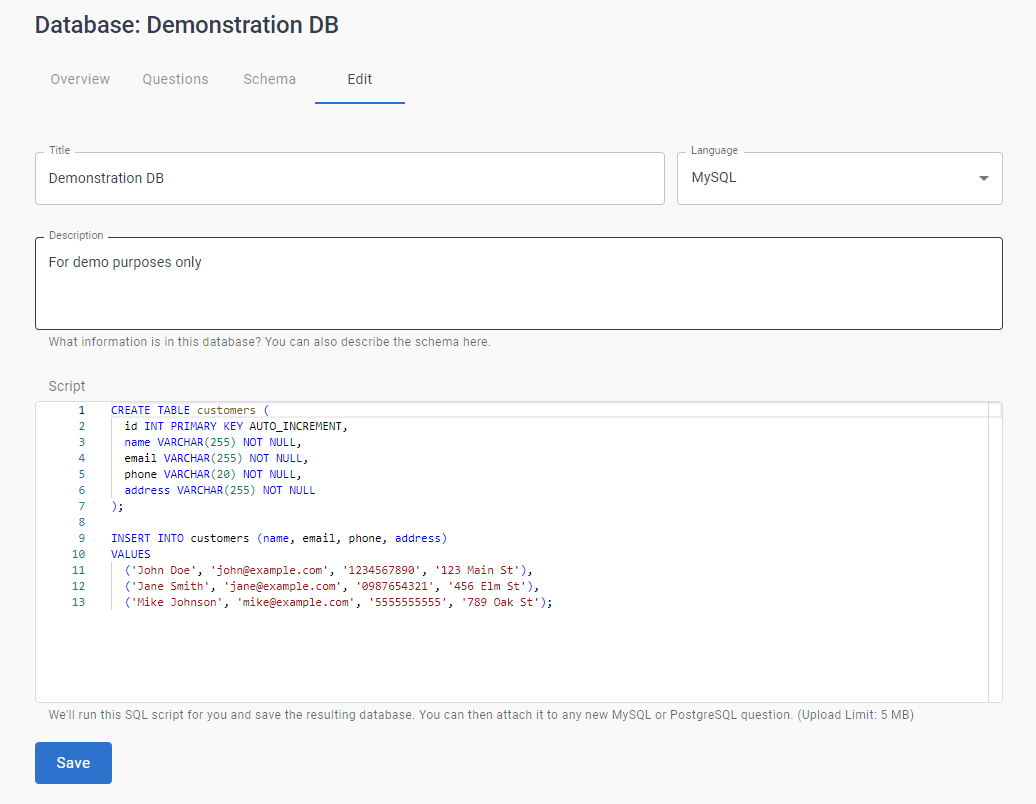
Add a Title, Description, and select MySQL or PostgreSQL from the Language dropdown.
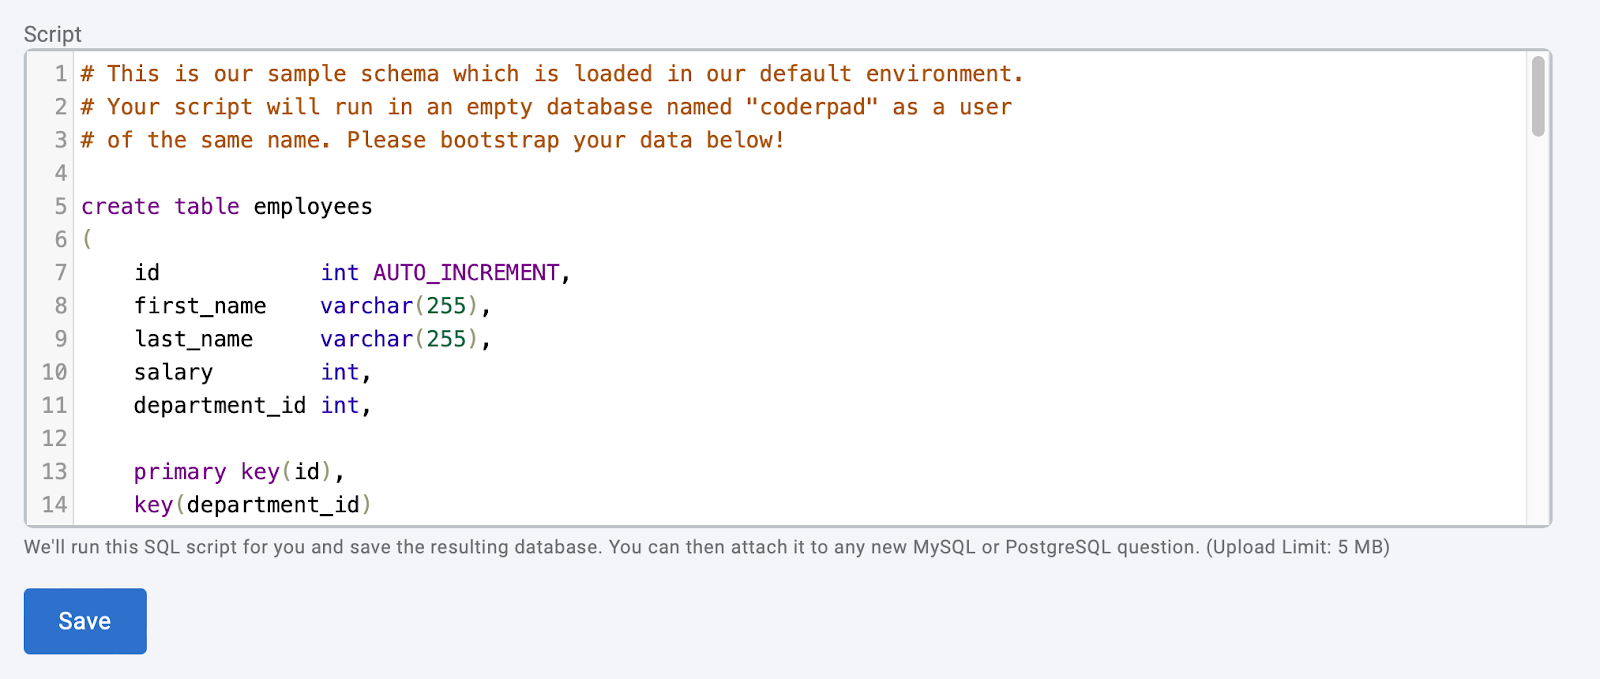
Below that you’ll see the SQL script that will create the sample database. You can edit this as needed to create your desired database; alternatively you can copy and paste SQL from an existing database into the text box for further customization.
Interview provides a sample database creation script which includes employees, projects, and department tables.
✅ The easiest way to get the raw SQL from an existing database in order to upload it to Interview is with mysqldump for MySQL, or pg_dump for PostgreSQL. You can upload up to 5 MB of raw SQL.
Verify the details and click Save to create the database.
You’ll see a notification that your database is initializing.
❗If you see an error message, it means your SQL is structured incorrectly. Please correct the errors and try again.
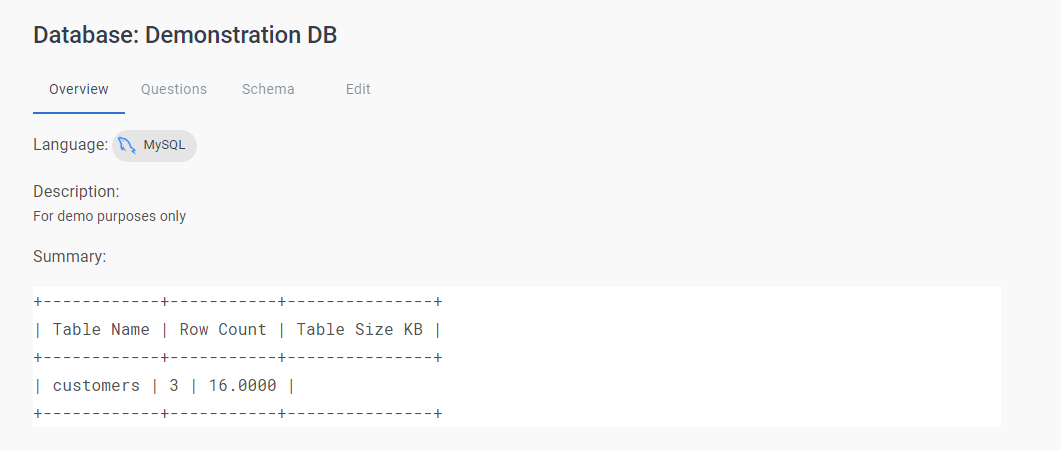
Once the database is initialized, you’ll see the Overviewtab which will give you a summary of your custom database.
You’ll also see the following tabs.
Questions
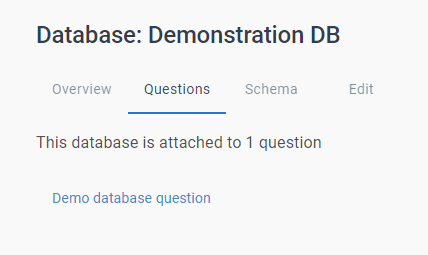
The Questions tab will show you any questions that have the database attached to them.
Clicking on the question will open it up in the question bank dashboard.
Schema
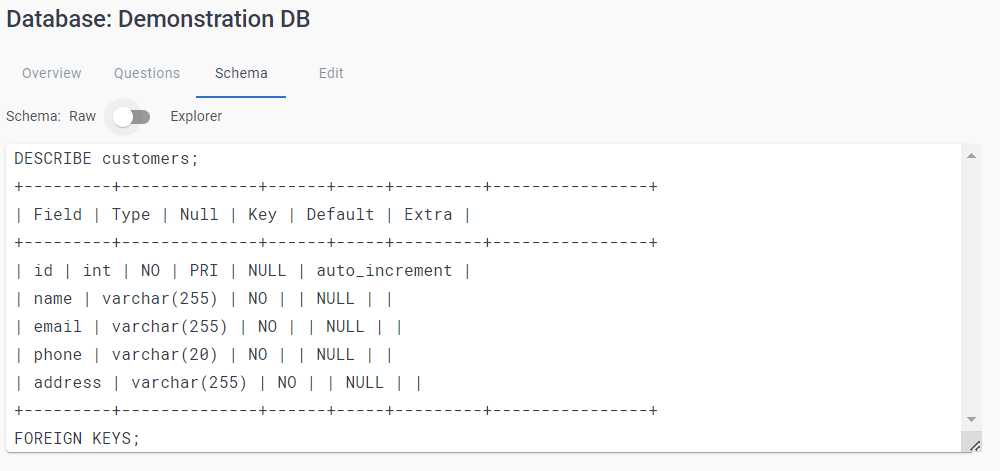
The Schema tab will display the database scheme. You can switch the toggle at the top to switch between the Explorer view and the Raw view.
The Raw view displays the standard SQL schema definition:
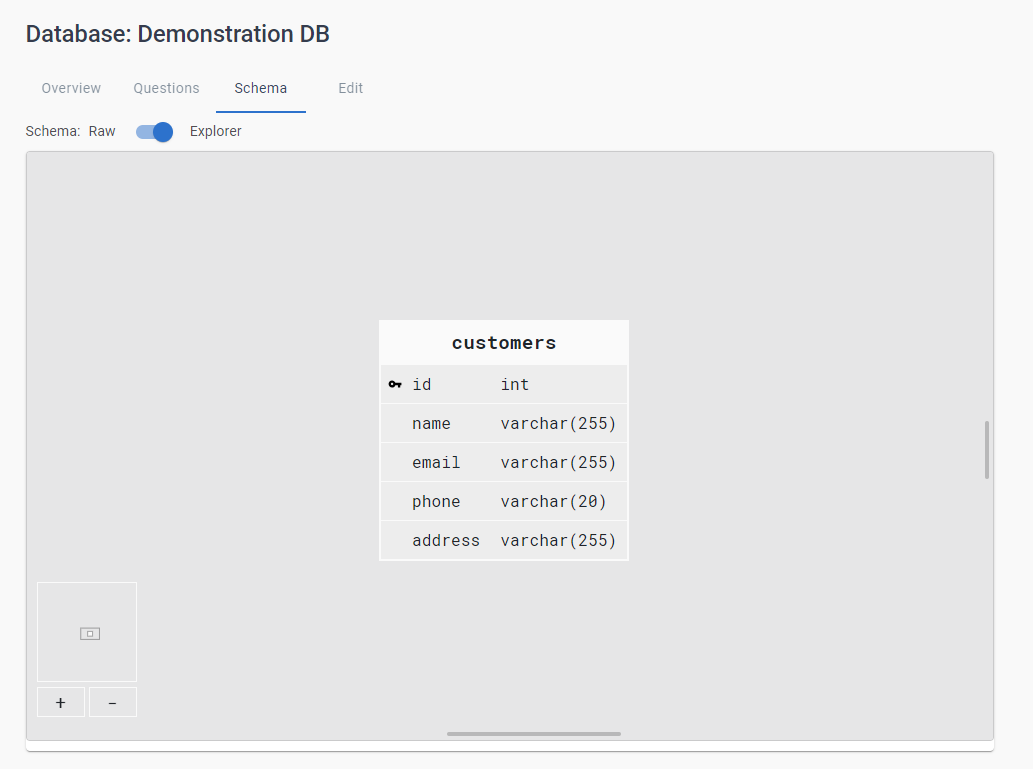
The Explorer view displays a graphical representation of the database with tables and relationships between the tables. You can zoom in, zoom out, and click on the screen to move around the schema.
✅ Both the interviewer and candidate will be able to utilize the Raw and Explorer views in the pad.
Edit
The Edit tab will open the customization page so you can make any changes to the database that need to be made.
✅ You can reach the Overview, Questions, Schema, and Edit tab options at anytime by navigating to the Custom Database page from the left nav menu and then clicking on the View button of the database you want to access.
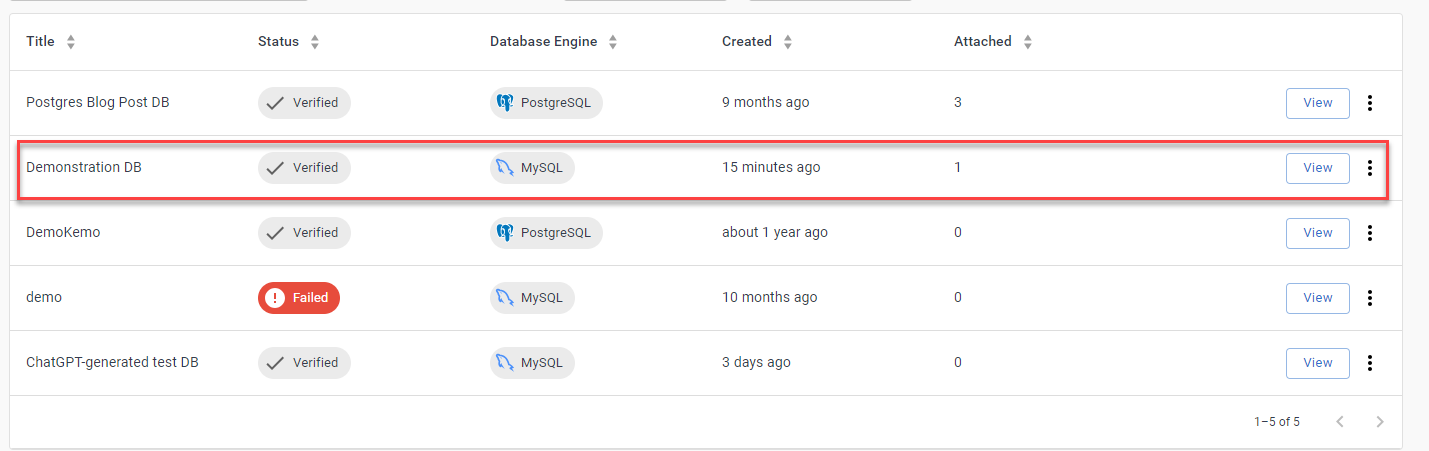
In the Databases tab on the dashboard you’ll now see your new database in the list of available custom databases.
⚠️ To delete a database, simple click on the three dots to the right of the row and select Delete. Keep in mind that this operation is permanent.
Add a database to a question
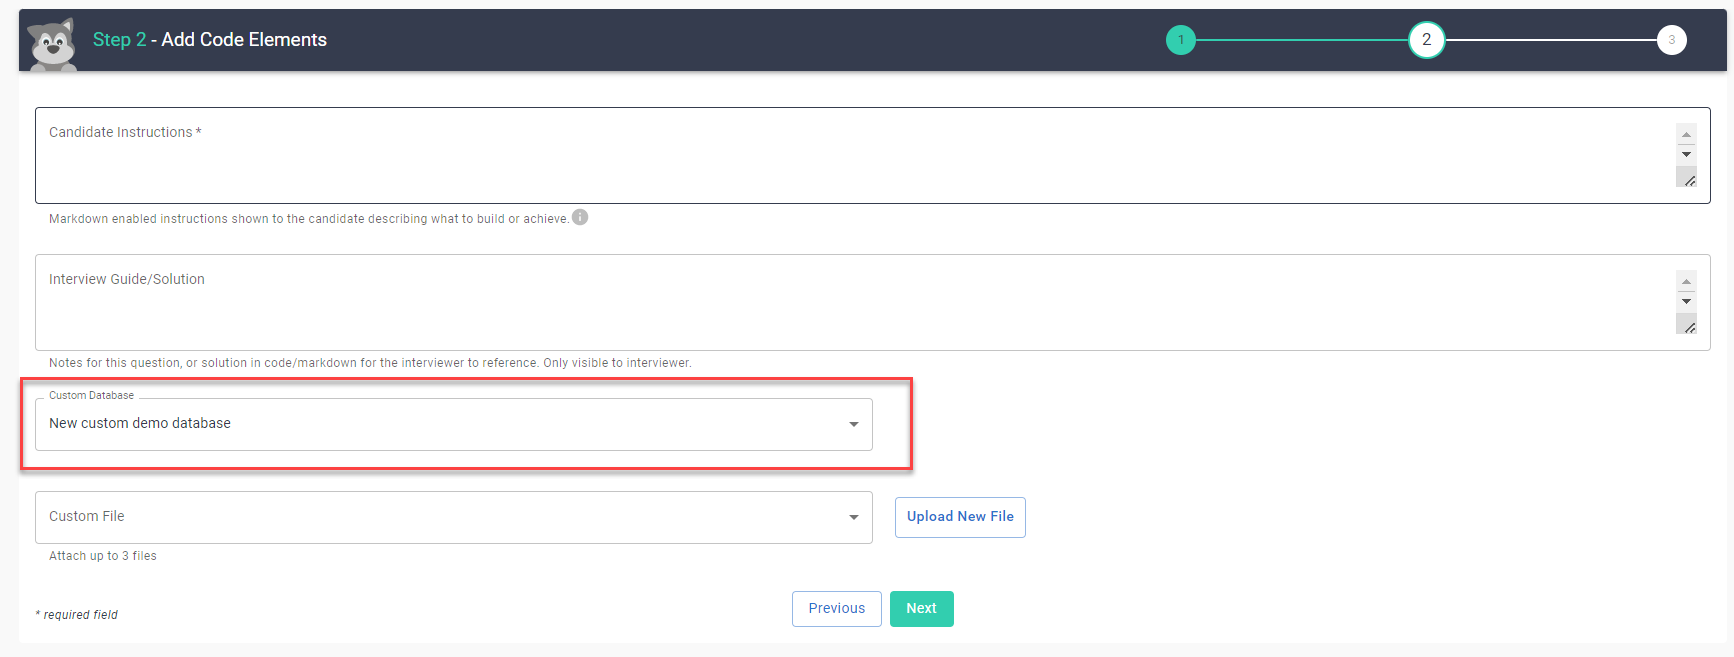
Custom databases must be associated with a question from the Question Bank. You can do this in Step 2 – Add Code Elements of question creation or editing by simply selecting your database from the Custom Database dropdown menu.
When you load the question into a pad, the database will be available for querying either directly through MySQL/PostgresSQL, or through an ORM/adaptor for languages that have them.
Accessing the database in the interview
Once you’ve created your question and custom database, the database will automatically be accessible when you create the pad.
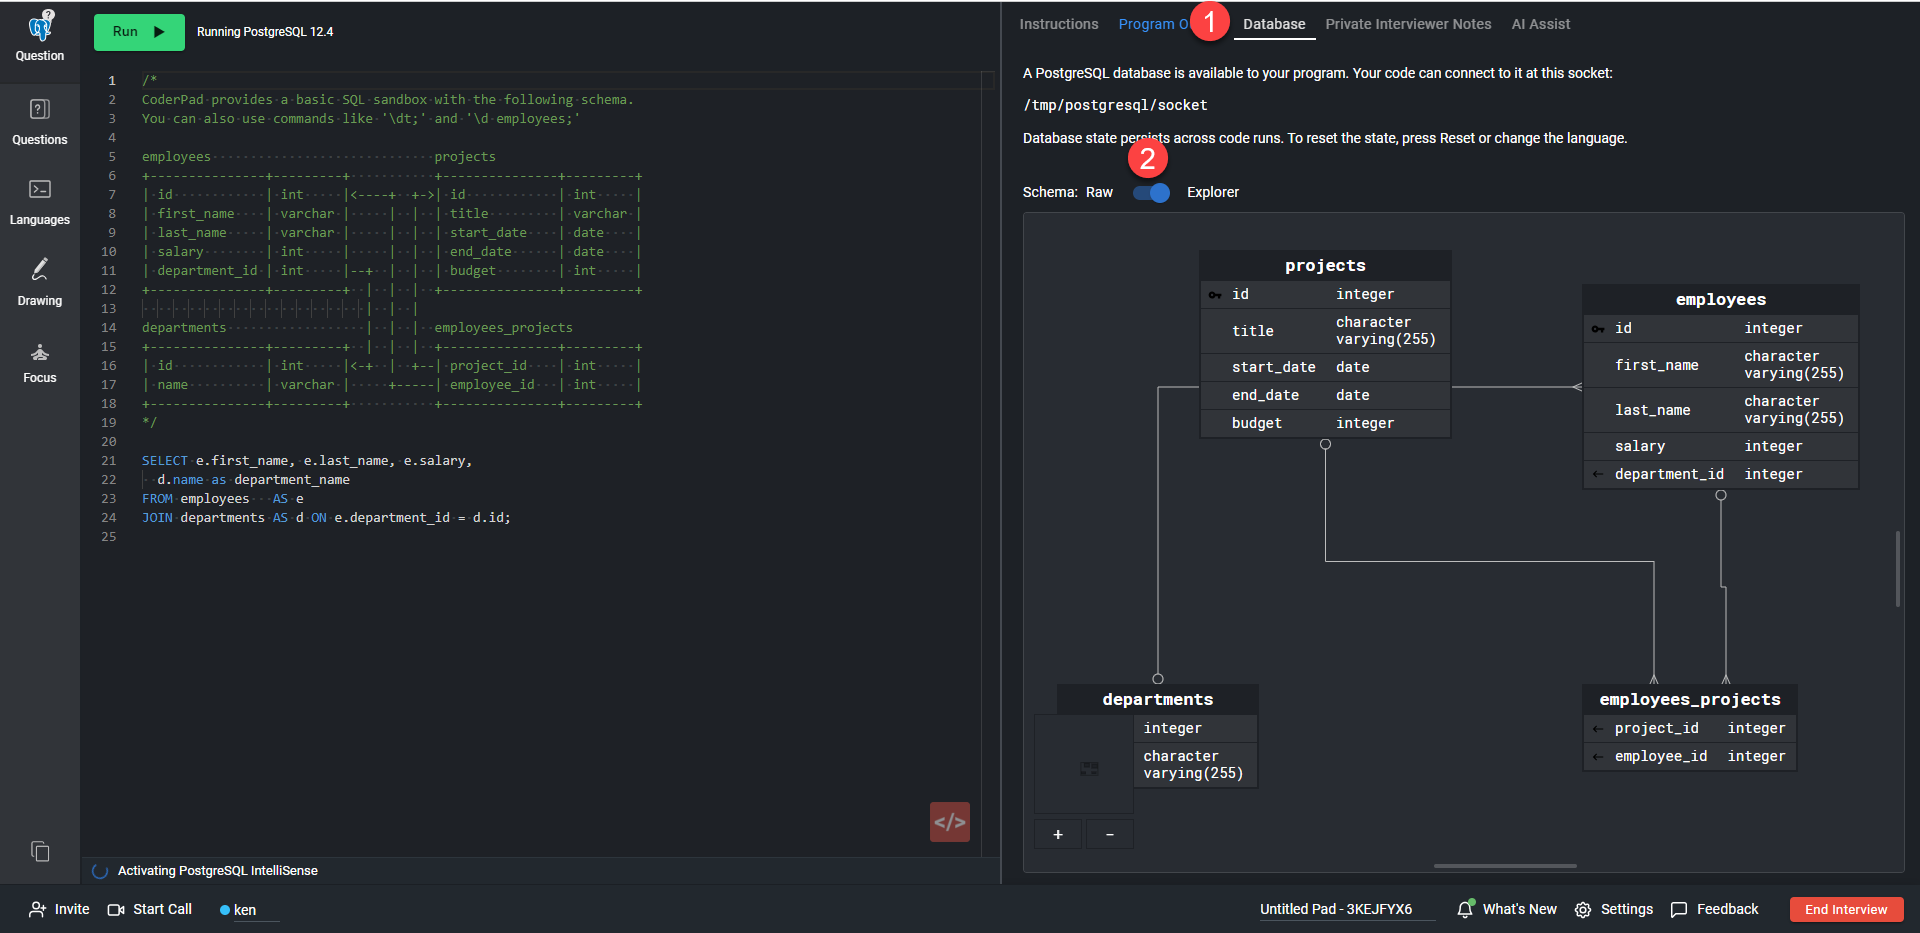
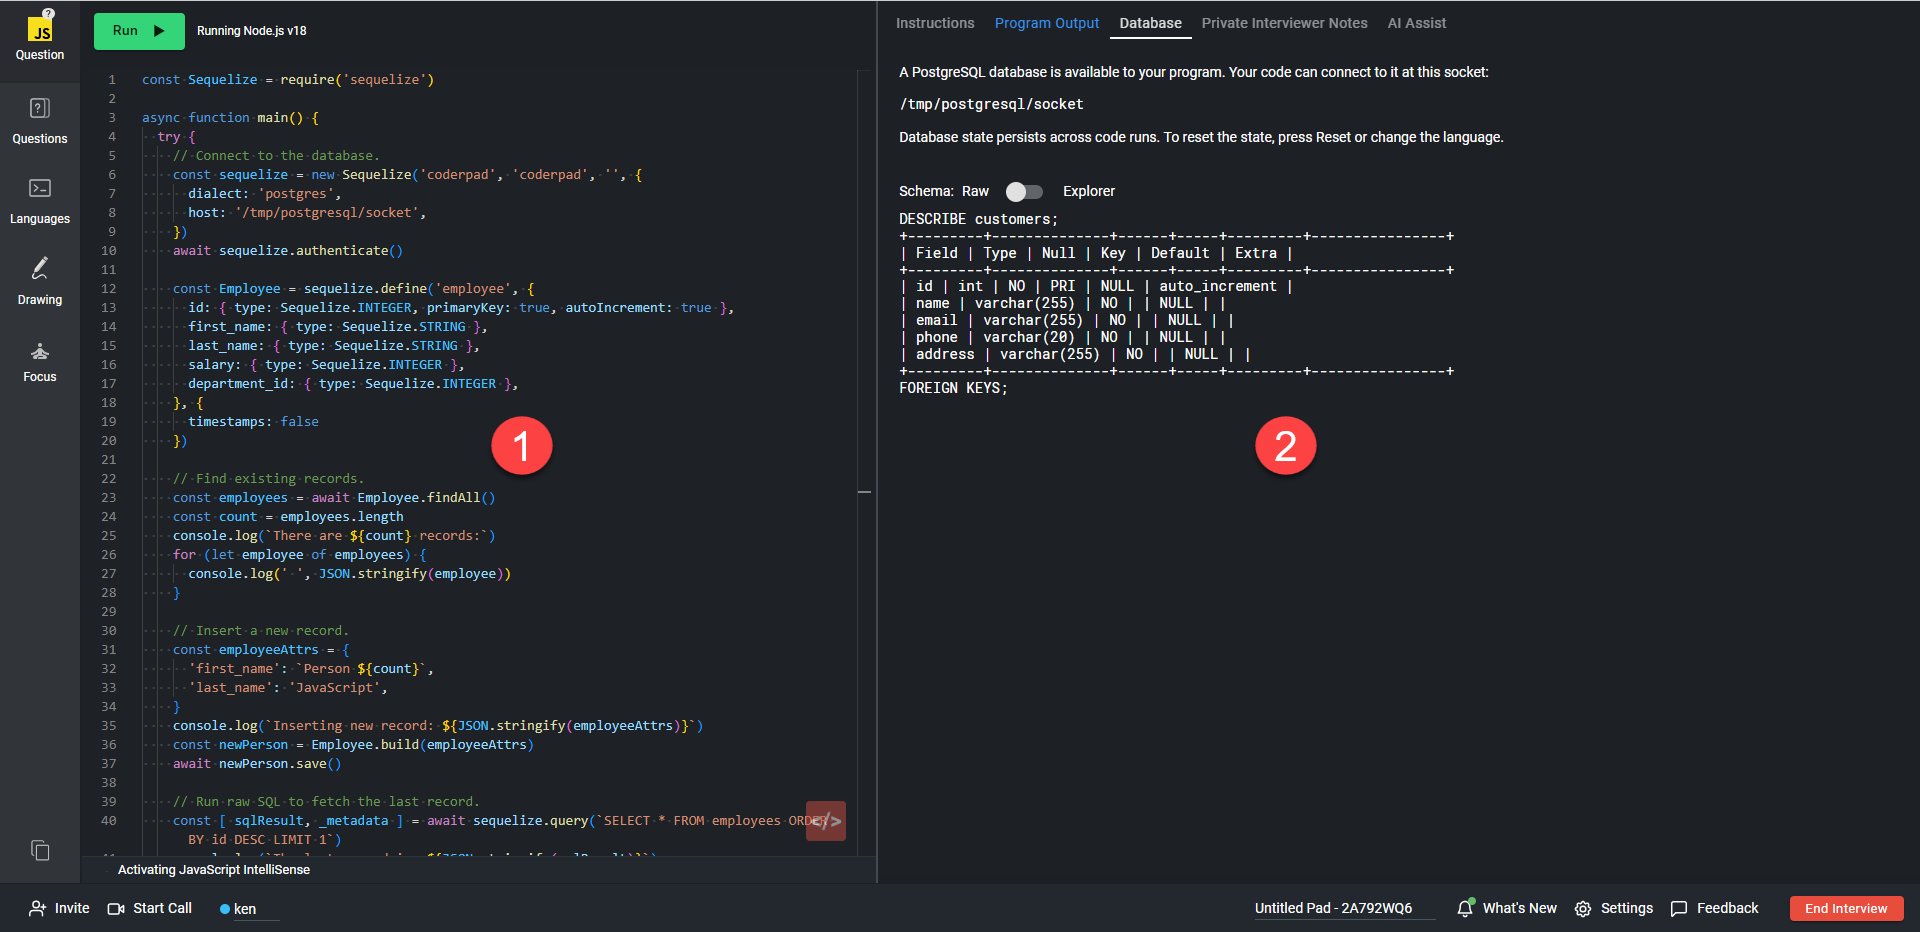
Both the interviewer and candidate will have access to the database schema in the Database tab at the top of the right pad pane (1). You can switch between the Raw and Explorer mode with the toggle button (2).
Like in the database creation step above, in Explorer mode, you can zoom out of the diagram and click and hold the right mouse button to move around the screen:
As far as accessing the data in the database programmatically, there are two ways to do that within the pad:
Interview provides common ORM/adaptor libraries so you can directly query databases from non-database language environments. For example, you can now have candidates load SQL records and interact with them in Python, or show their ActiveRecord skills within the Ruby environment.
This feature is available for the most commonly used languages in Interview, preconfigured with the adaptors listed below. Additional languages may be added based on customer needs.
To setup data access through an adaptor, you’ll first need to select one of the supported languages listed above from the language dropdown.
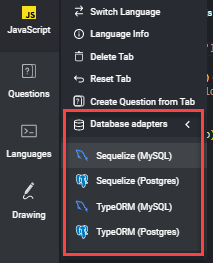
Once you do this, you’ll see a new Database adapters menu appear next to the language; this menu auto-loads the database adaptor.
Click on the dropdown, and choose whether you’d like to use the MySQL or PostgreSQL adaptor. Selecting an adaptor automatically loads example adaptor/ORM code in the left hand pane (1). You can see your database schema in the right hand pane under the Database tab (2):
❗Loading the DB adaptor code will comment out all existing code, including any question code. Best practice is to load the question at the start of the interview, and you may need to rearrange code a little once you load the adaptor. This approach does provide the most flexibility in candidate interview language choice or preferred DB adaptor.
✅ If you do not have a database attached to a question when you select an adaptor package, the pad will load a sample database for you.
Keep in mind that the adaptor package is just helper code. As mentioned above, you also have the option to paste in the adaptor code when setting up a question. This lets you skip the package loading step, as the database will always be loaded with the question, not the package.
This does require you to select a particular language and adaptor for the candidate to use when setting up the question, so there is less flexibility at interview time.
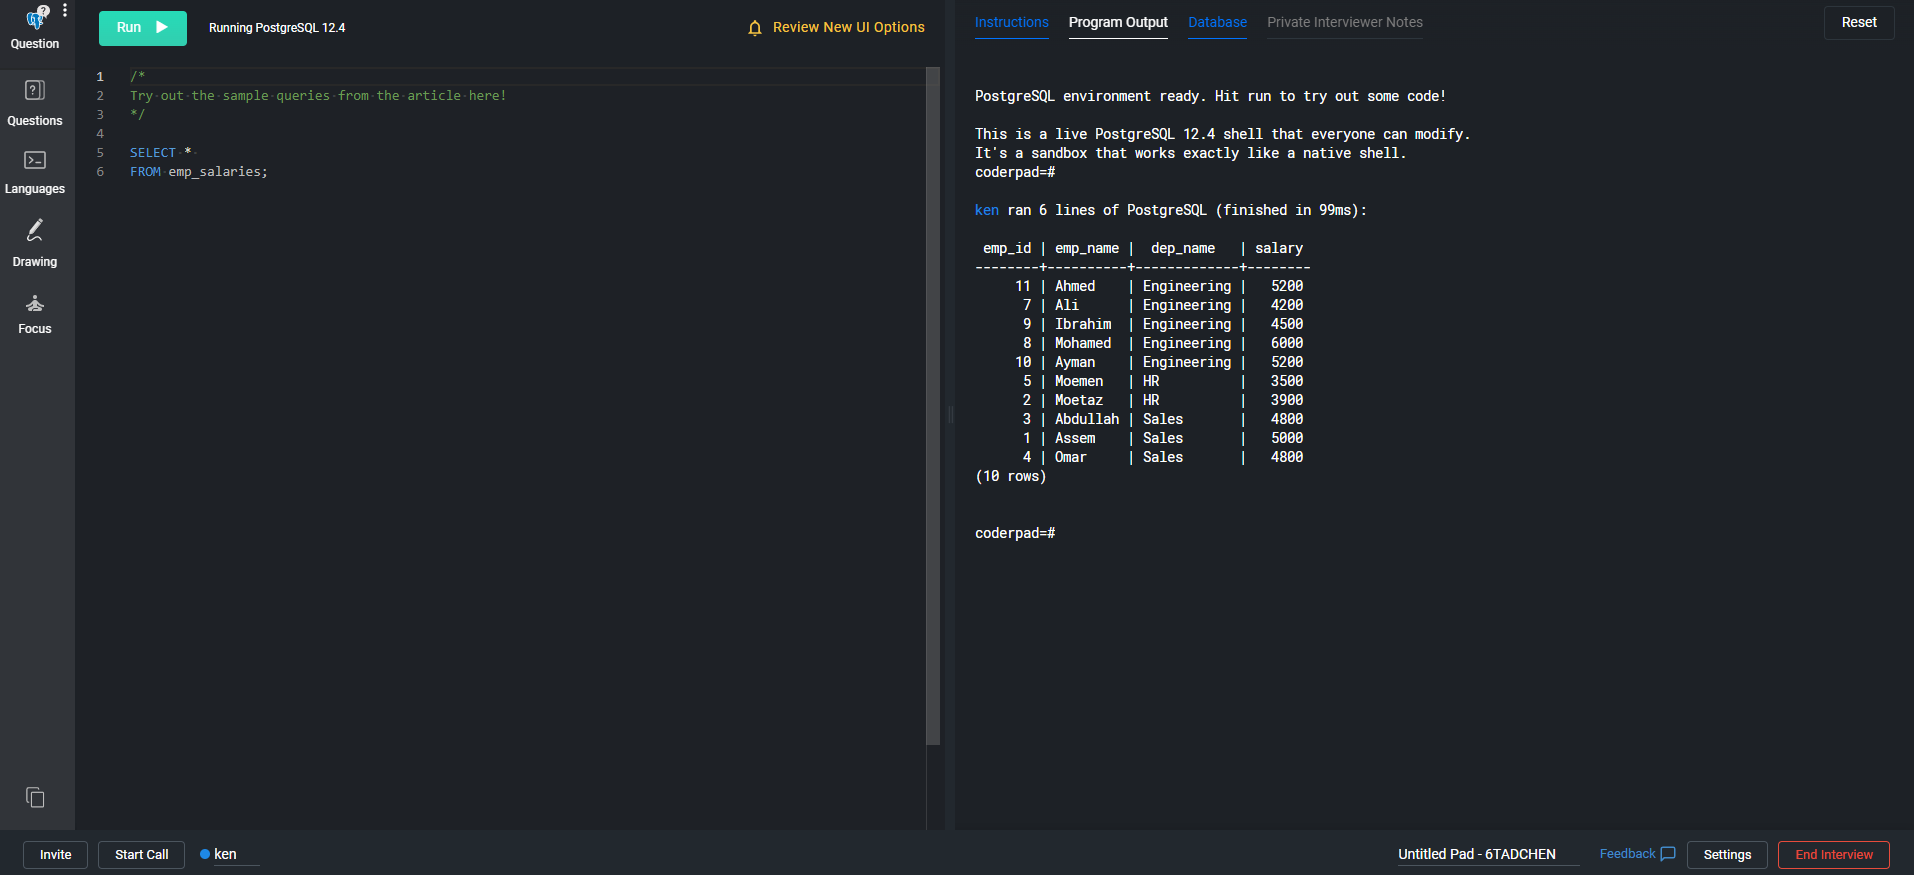
Via SQL:
Candidates can write and run SQL queries against the database at interview in the code editor. Once you select your SQL flavor (MySQL or PostgreSQL), there is no further configuration required.
Important reminders
When you set up your own custom database, the original DB will always be saved and never edited; a copy is loaded for each new interview session.
Edits – such as row inserts, updates and deletes – are stateful during a specific interview session and persist between subsequent code execution.
You can reset the DB back to its original unmodified state during a specific interview by pressing the Reset button in the top right corner.