Pad bulk actions
Last updated on • Disponible en Français
Create multiple pads
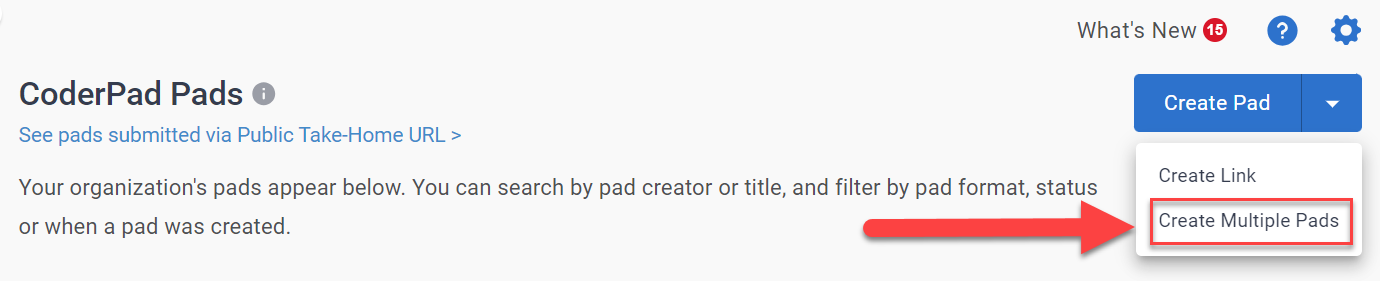
To create multiple pads at the same time, first click on the Pads List in the left navigation menu to open up the pads dashboard. Then click on the drop-down menu under Create Pad and select Create Multiple Pads.
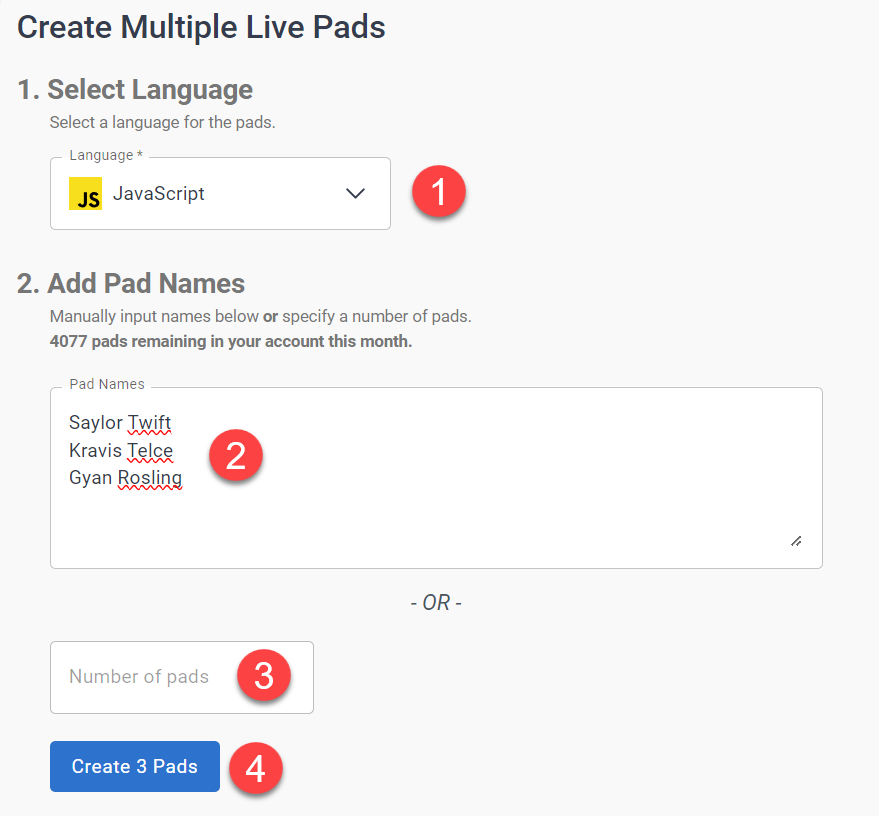
This will open up the bulk pad creator. All you need to do is select the pad language (1), add the pad names if you know them (2) or just add the number of pads you want to create (3), and then click Create [n] Pads.
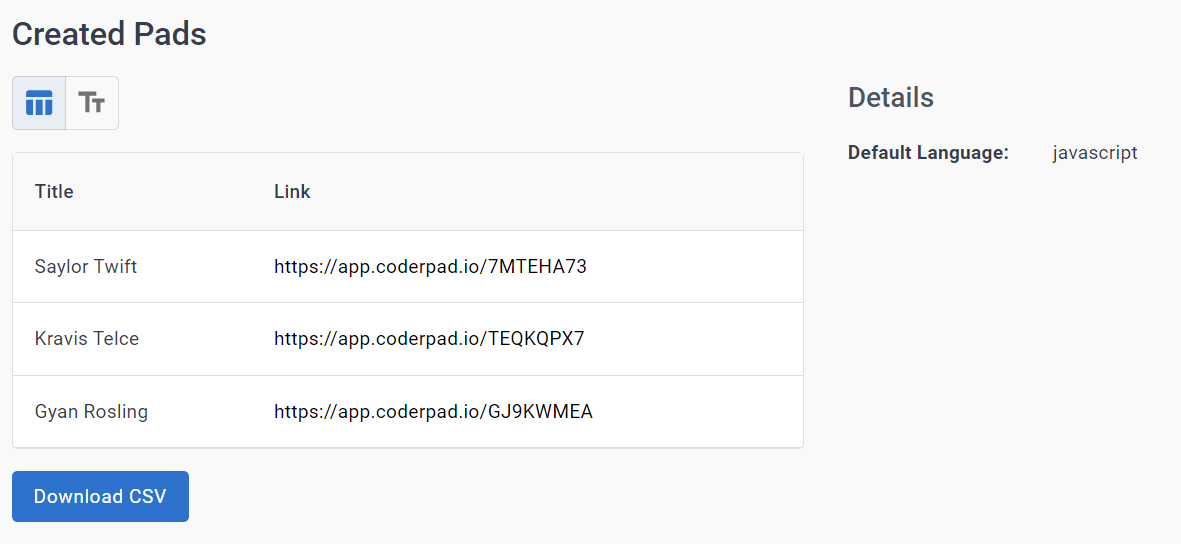
You’ll then be taken to a screen that will give you the pad URLs that you can send out to your candidates, or you can download the same information in a CSV for further processing by your application or scheduling system.
End or delete pads
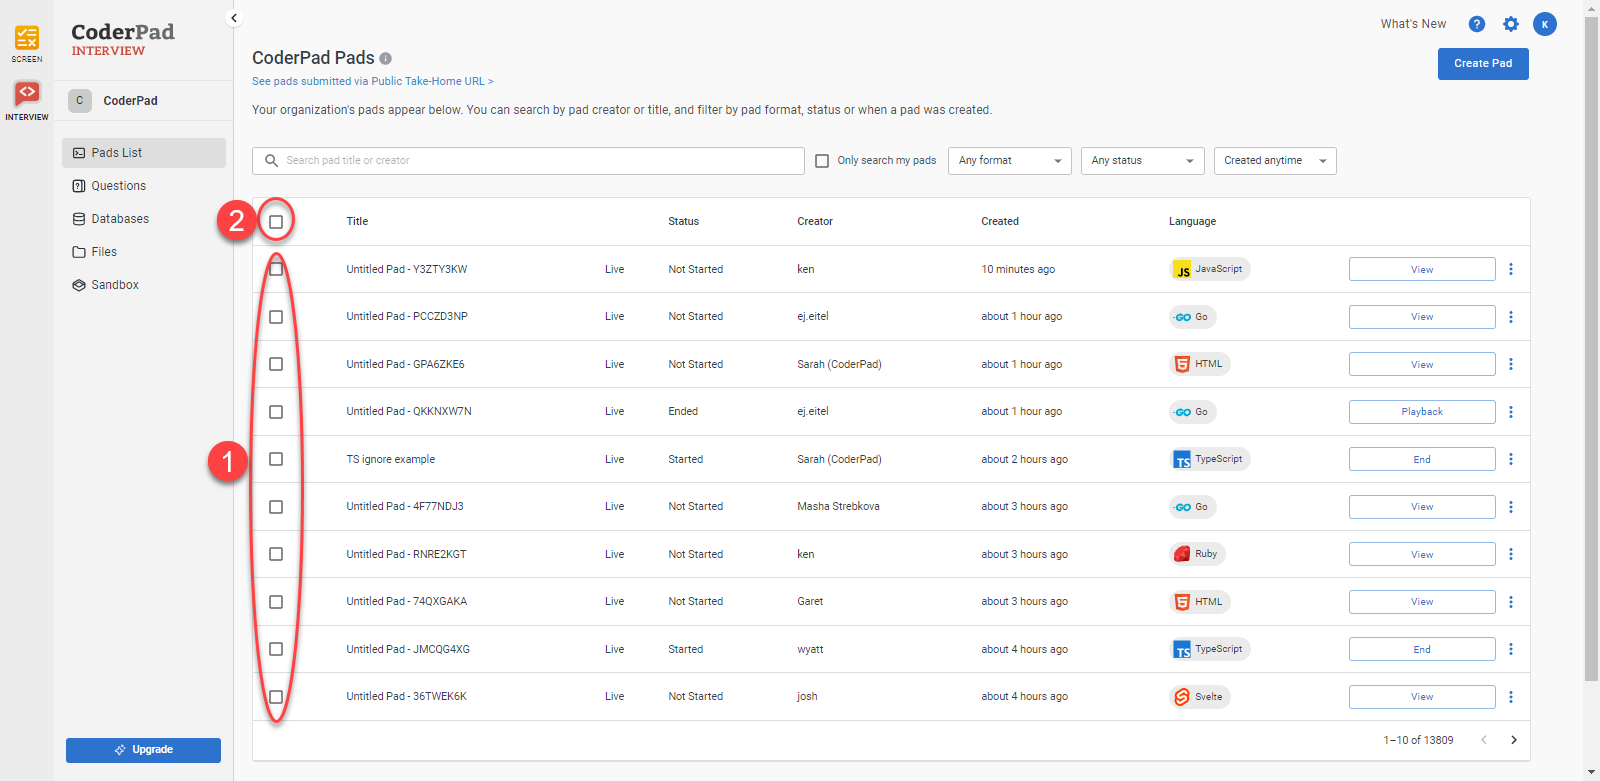
To carry out multiple pad ends or deletes, you’ll first need to navigate to the Pads List and select the pads that you want to end or remove (1). To select all the pads, select the checkbox on the header row (2).
Once you select the pads, you’ll see options to either end the pad (End Selected) or delete the pad (Delete Selected):
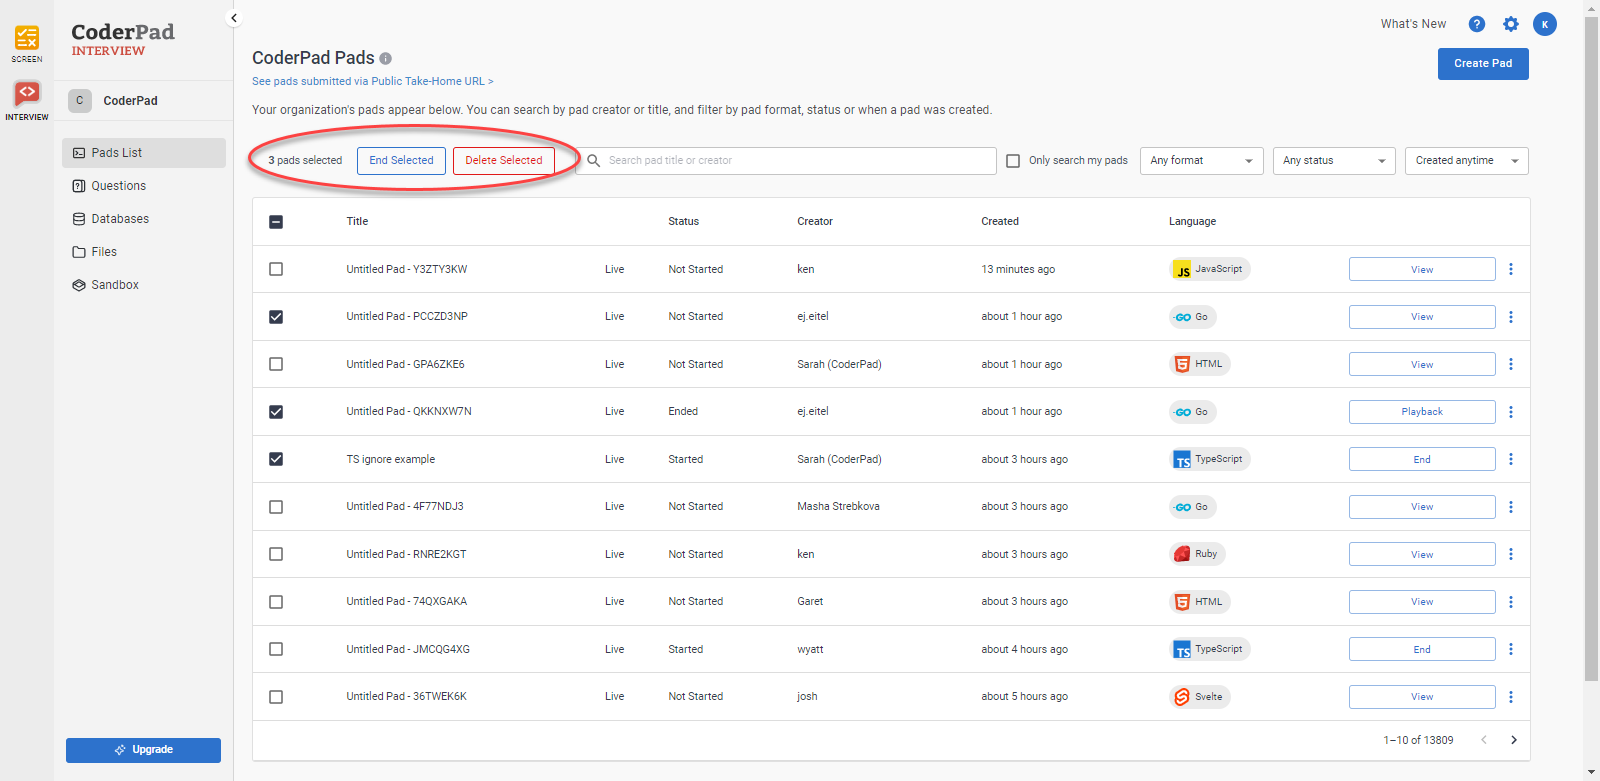
End Selected will end the pad if it has not yet been ended by the interviewer, this will enable you to view the playback and prevent candidates from working further on the assessment.
Delete Selected will remove the pad permanently from the Pad List.
You’ll then get a confirmation screen asking you if you’re sure you want to end or delete the selected pads:
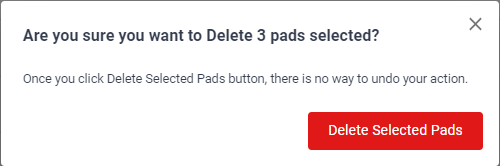 | 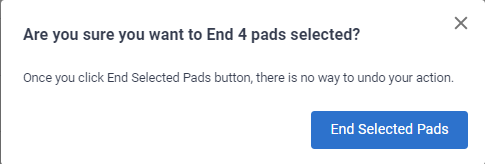 |
Once confirmed, the selected pads will be ended or deleted.
Reassign pads to a different team
If you have access to the team management feature, you can also bulk-assign pads to a specific team. You can see what team is assigned to what pad in the Team column (1). To bulk assign teams, select the desired team (2), then select Change Team (3). Select the team from the drop-down list (4), and then click Save to finish reassigning the pad.

To learn more about team management, check out the doc here.