Interview preparation guide
Last updated on • Disponible en Français
This document is for candidates who are going to be interviewed on Interview.
Interview is a platform for doing technical phone screens or remote interviews in the browser.
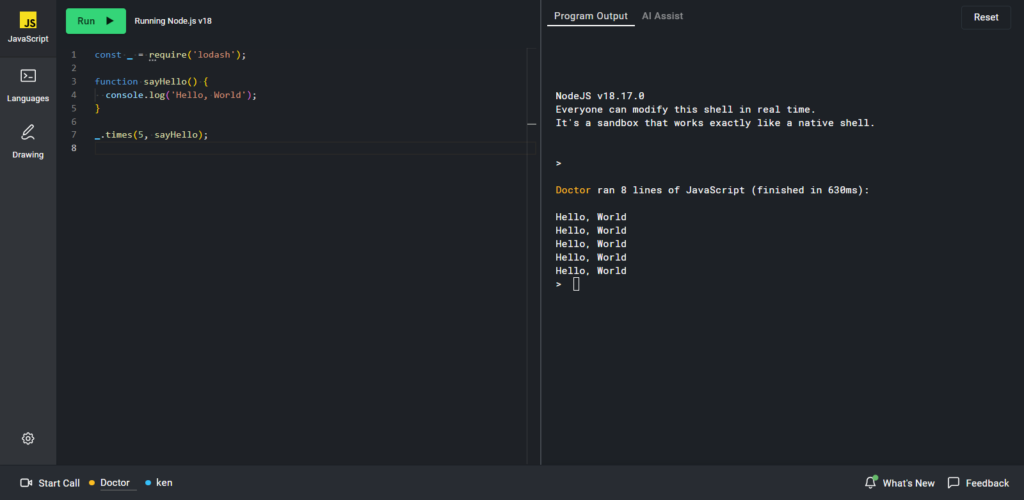
A pad is similar to common Integrated Development Environments (IDEs). You write code in the left-hand pane, run code with the ‘Run’ button, and view output in the right-hand pane. The right pane also includes an interactive Read–Evaluate–Print Loop (REPL) for some languages.
The Reset button clears the output in the right pane, while the code you’ve written in the left pane remains intact.
✅Preparation Protip: One of the best ways to prepare for an Interview is to use the sandbox environment, which you can access here.
Table of contents:
- Video overview
- Interview types
- Customizing code editor (i.e. “pad”) settings
- Programming languages and testing
- Drawing mode
- Prepare for your interview with the Interview sandbox environment
- Final tips
✅Want some coding practice to prepare for your Interview? You can access free gamified coding challenges on our CodinGame sibling site.
Video overview
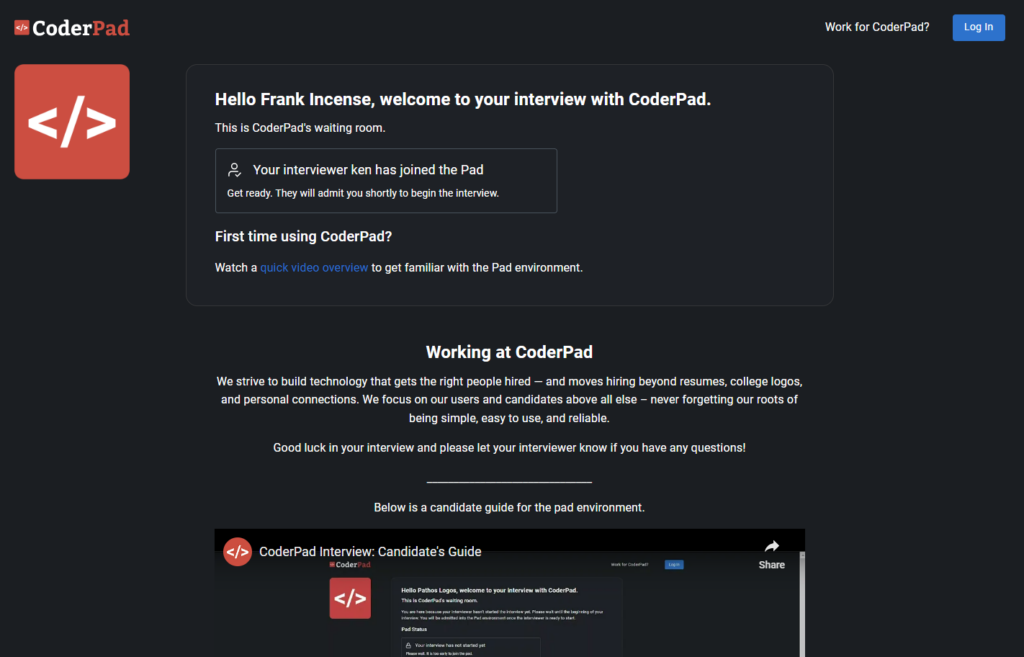
✅An interviewer has to make your pad public before you can access it. If you access the pad before this happens, you’ll see a waiting room screen similar to this:
Interview types
Interview supports two types of assessments, live interviews and asynchronous take-home projects.
Live interviews
You will receive an Interview link prior to your interview. At the scheduled time, open the link, input your name, and join the interview. Your interviewer may have you connect via a video call, which you can do by selecting the Start Call button in the bottom left corner of the pad.
Take-home projects
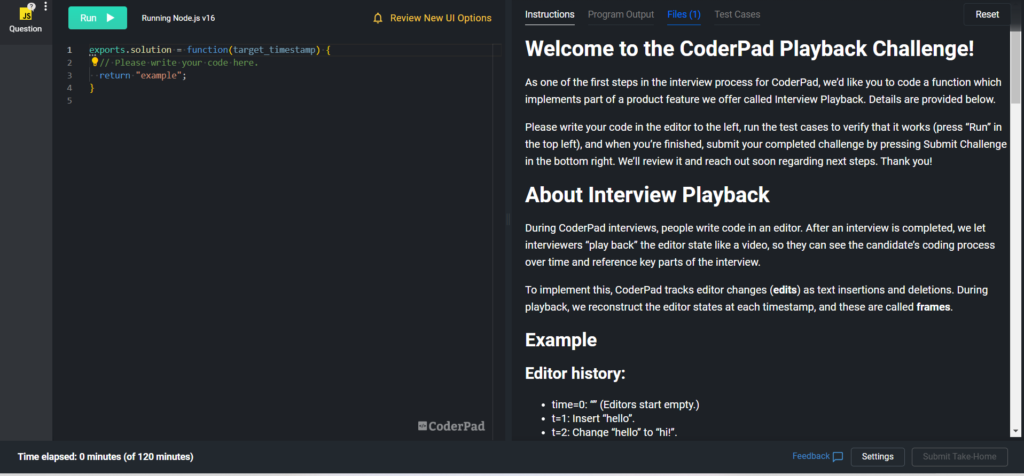
You will receive an Interview link to the project. Click on the link to see detailed instructions about the task, including the amount of time you have to complete it.
The project starts once you enter the Interview environment. You can start coding immediately. The amount of time you have left appears in the bottom left-hand corner.
When you are ready, submit your code by clicking the Submit Take Home button at the bottom right-hand corner of the screen. If you don’t complete the challenge within the allotted time, your code will be submitted when the time runs out.
Customizing editor settings
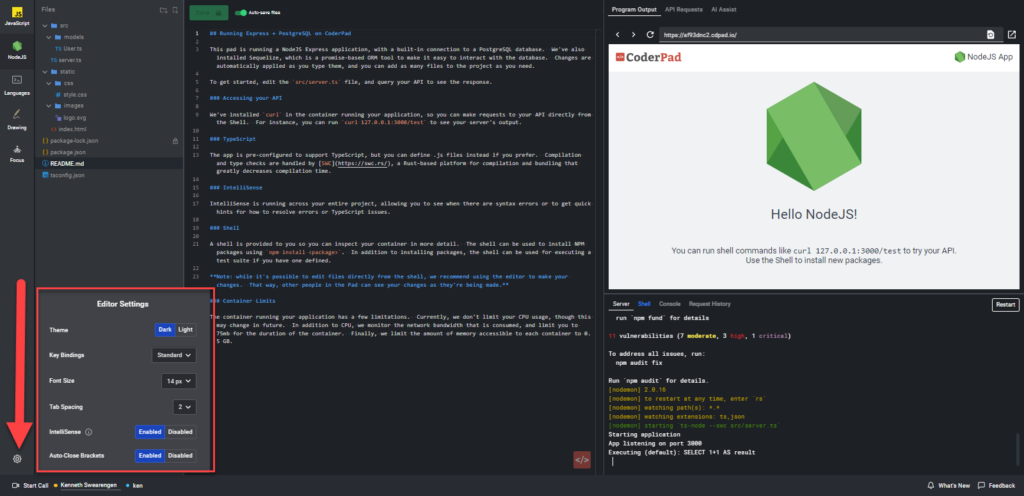
Click the Settings button in the lower-right corner to customize settings, such as auto-close brackets for supported languages, bracket auto-closure, unique tab size, larger font size, lighter color theme, and to change your key bindings from normal to Vim or Emacs.
Most settings are disabled by default. Changing your settings does not affect your interviewer’s settings.
✅ You can find the Emacs key mappings here and the Vim key mappings here. Please note that they cannot be custom mapped at this time.
Programming languages and testing
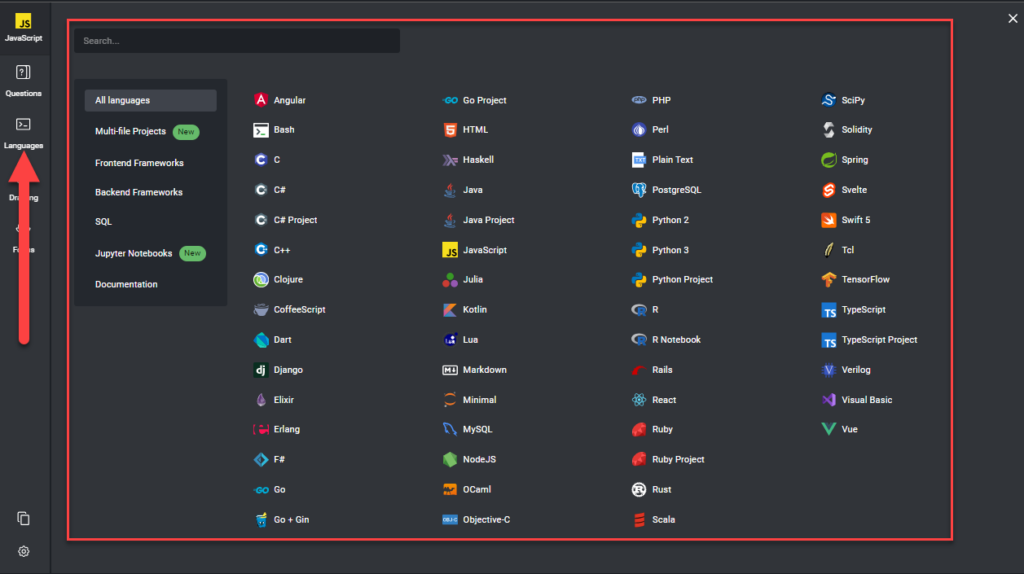
We support most programming languages, many with autocomplete functions. We also have unit testing suites and other packages and libraries. See our languages page for more details.
For the languages that support autocomplete, you may need to toggle autocomplete to “Disabled” from the Settings menu during your interview if you want to turn it off.
To add a language, simply click on the Languages button on the left side of the screen, and then select your language of choice.
For more information on a particular language, you can either view the Readme.md file in the case of frameworks or the Language Info tab that pops up when you hover over the language.
Change the default language
You may have a question presented to you in a default language. Some questions will allow you to switch languages to a language you may be more comfortable with.
To change languages, simply hover over the question, and then select your desired language from the list:
Drawing Mode
Interviewers may enable Drawing Mode in a pad to describe a system or diagram an architecture. For more detailed instructions on using Drawing Mode check out our user guide.
Pop out instructions
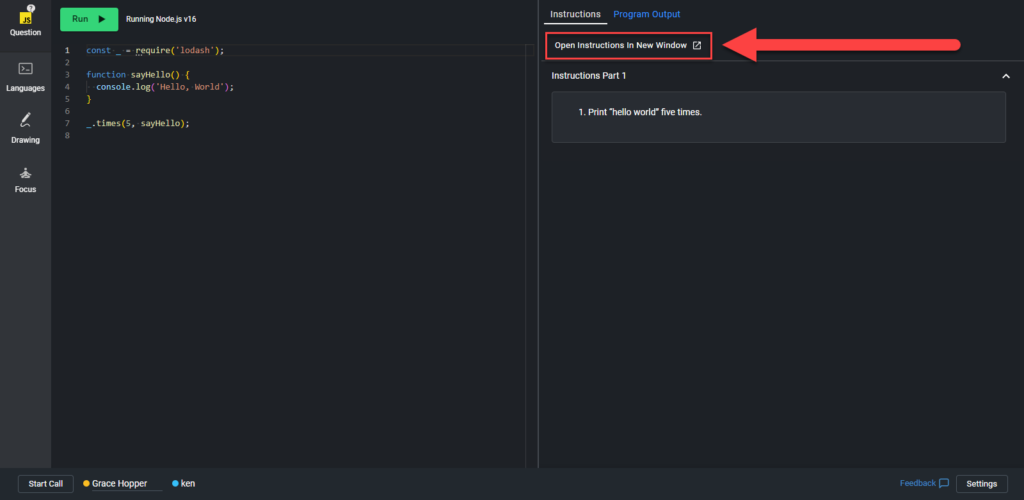
If you have a particularly complex set of instructions — or you simply want to take advantage of a two-screen set-up — you can pop out the instructions into a new window so you don’t have to constantly switch between the instructions tab and the output screen.
To pop out the instructions, simply click the Open Instructions In New Window and you’ll have the instructions open in a separate browser window.
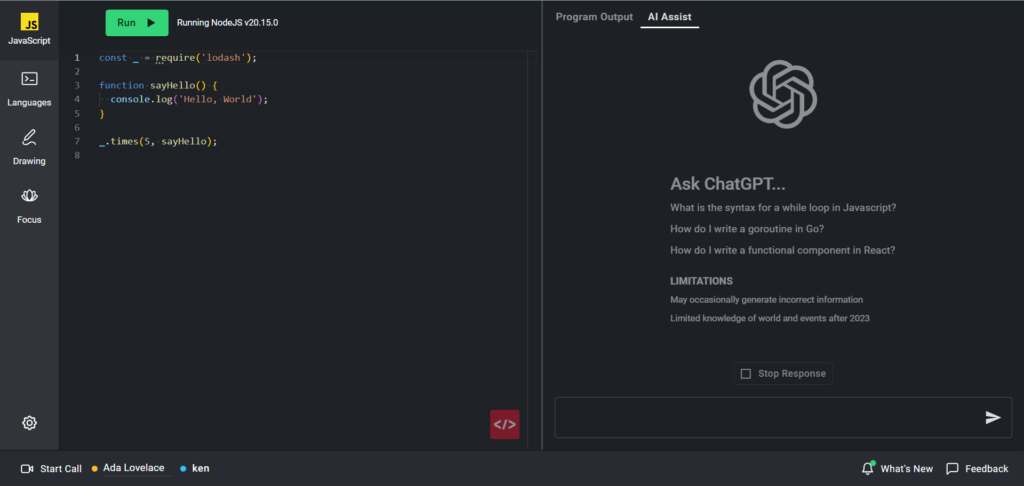
AI Assist
If your interviewer chooses to turn it on, you’ll have access to ChatGPT for use during the interview under the AI Assist tab. If it is enabled, be sure to consult with your interviewer to understand what is and is not acceptable use for the interview.
Try it out ahead of time!
You can try out Interview in this embedded sandbox:
✅ Interview supports common IDE keyboard shortcuts. The full list can be found here.
Each company creates their own interview questions, so there are no practice questions on our site.
We do encourage you to try out the sandbox environment which gives you an Interview session that is nearly identical to a real Interview session – minus the multi-user functions and the ability to save the session.
Final tips
- Interview is here to make your life easier. If you get stuck in the interview, don’t worry, just run the code and use the output for debugging.
- If you’re answering a question that has a custom database attached to it (i.e. one the interviewer made for that question), you cannot switch to a different language. If you do, you will not have access to that particular database. For example, if the interviewer has presented you with a question in MySQL, you cannot switch to PostgreSQL otherwise you will lose access to the MySQL database in the pad.
- You can learn more about supported browser versions and available technologies here.
