Creating custom questions
Last updated on • Disponible en Français
Select an item from the list for more information on custom question creation:
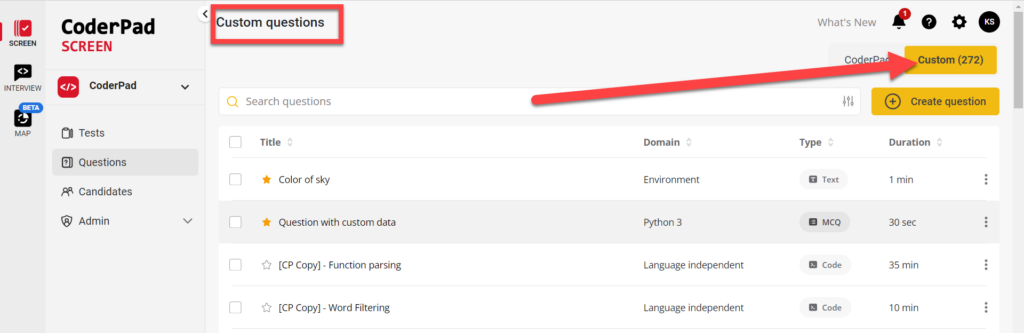
View current custom questions
To view your existing list of custom questions from your organization, select the Custom tab on the top right of the screen. This will change you over to the Custom questions tab.
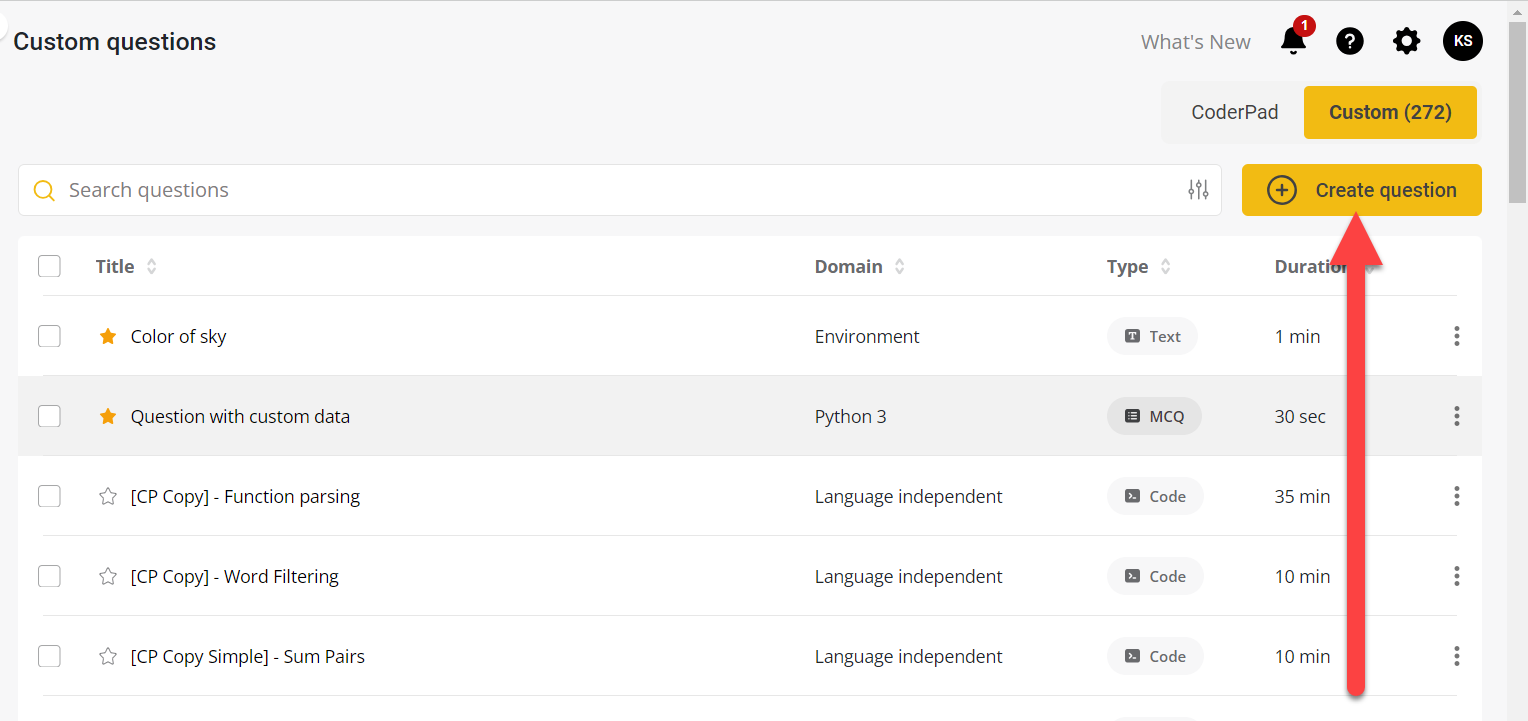
Create a custom question in the question editor
To add a new custom question, click Create question in the top right corner of the Questions list.
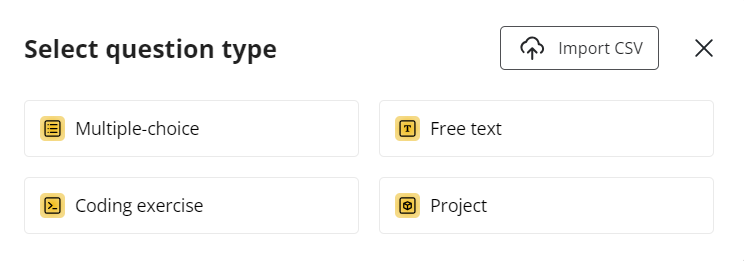
In the Select question type pop up, select a Question type. There are four primary options:
- Multiple choice question
- Free text question
- Project exercise
- Coding exercise
- Import CSV
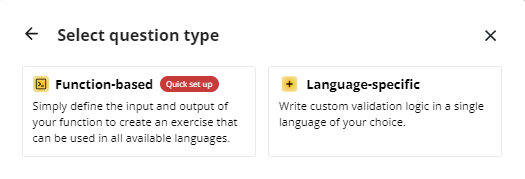
If you select Coding exercises, you’ll be able choose from Function-based or Language-specific questions.
Once you select the question type and any type-specific configurations, you’ll then need to select the question language(s) and click Create question.

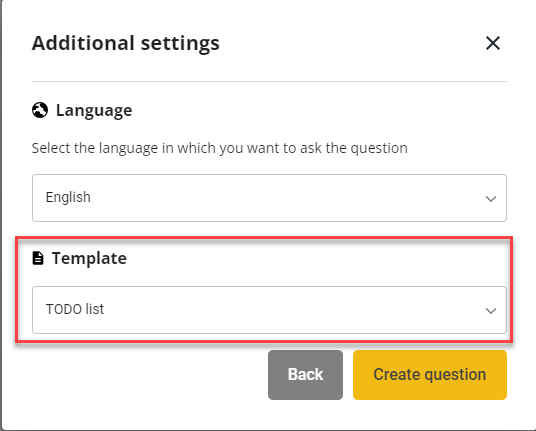
For coding exercise questions, you’ll also have the option of selecting a template that will pre-fill the question editor with a CoderPad-validated programming exercise.
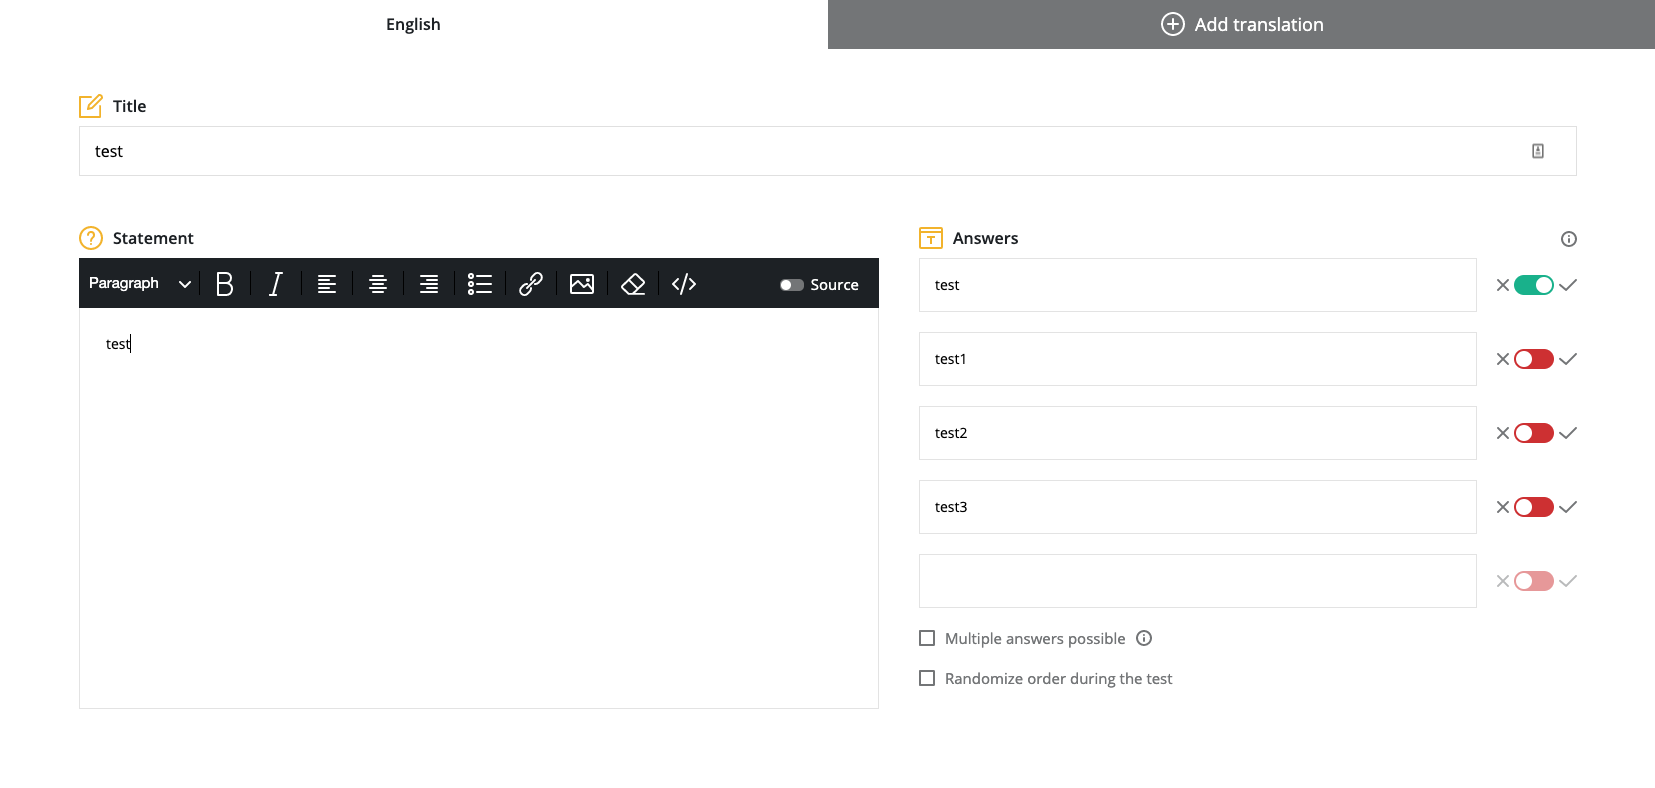
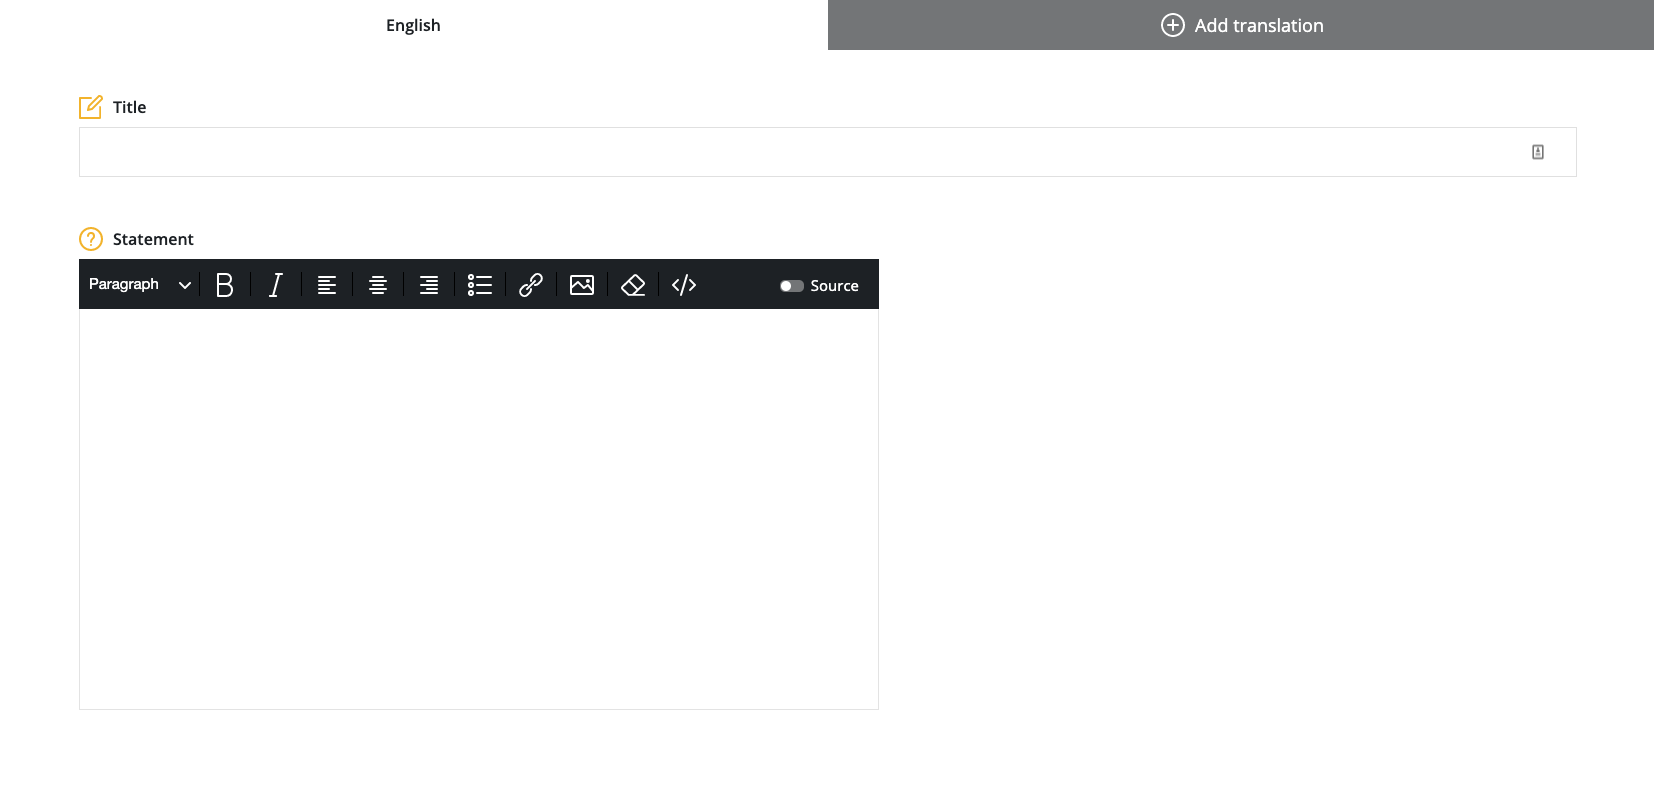
Create multiple choice questions
- Input the Title (the candidate does not see the title).
- Write out the question in the Statement box on the left.
- Text options include common styling options, code inputs, LaTeX formulas, and adding images and attachments.
- On the right, input the answer options.
- Indicate the correct answer(s) with the switch.
- Select Multiple answers possible if there is more than one answer.
- Select Randomize order during the test to randomize the answer list order if required.
- The candidate must select ALL valid answers, and no other answers, to receive the maximum points available, otherwise marks are proportional.
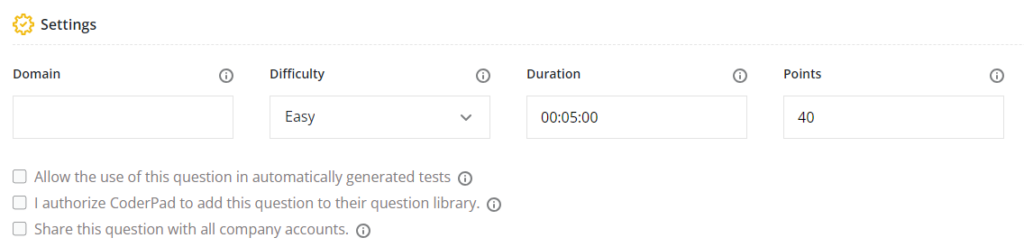
Settings
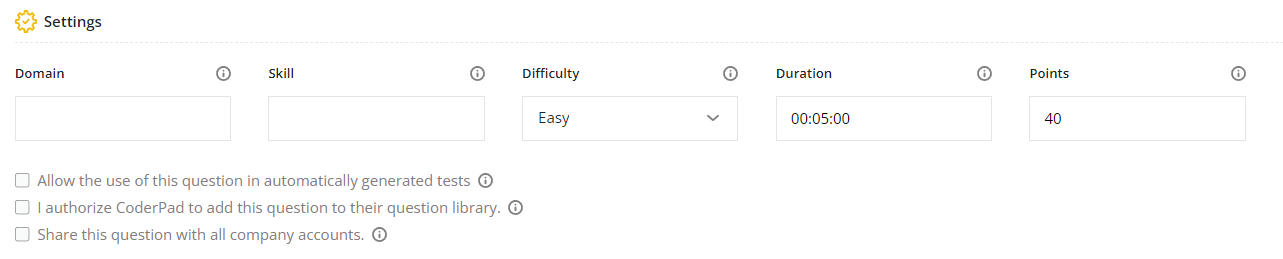
Add the following details:
- The domain (i.e. technology or programming language) of your question where you can select an existing domain or create a new domain.
- The skill to test.
- The question difficulty.
- Question time limit.
- Total points available.
- Whether to add the question to automatically generated tests.
- Whether to authorize Screen to add this question to the Screen question library.
Click SAVE to save the question.
Create free text questions
Input the Title and write out the question in the Statement box below.
Add the Settings as before.
Select (1) Automatic or (2) Manual validation in the Validation section.
1. Automatic validation
Select the skill and input the answer to the question. Candidate answers must match exactly, but are case insensitive.
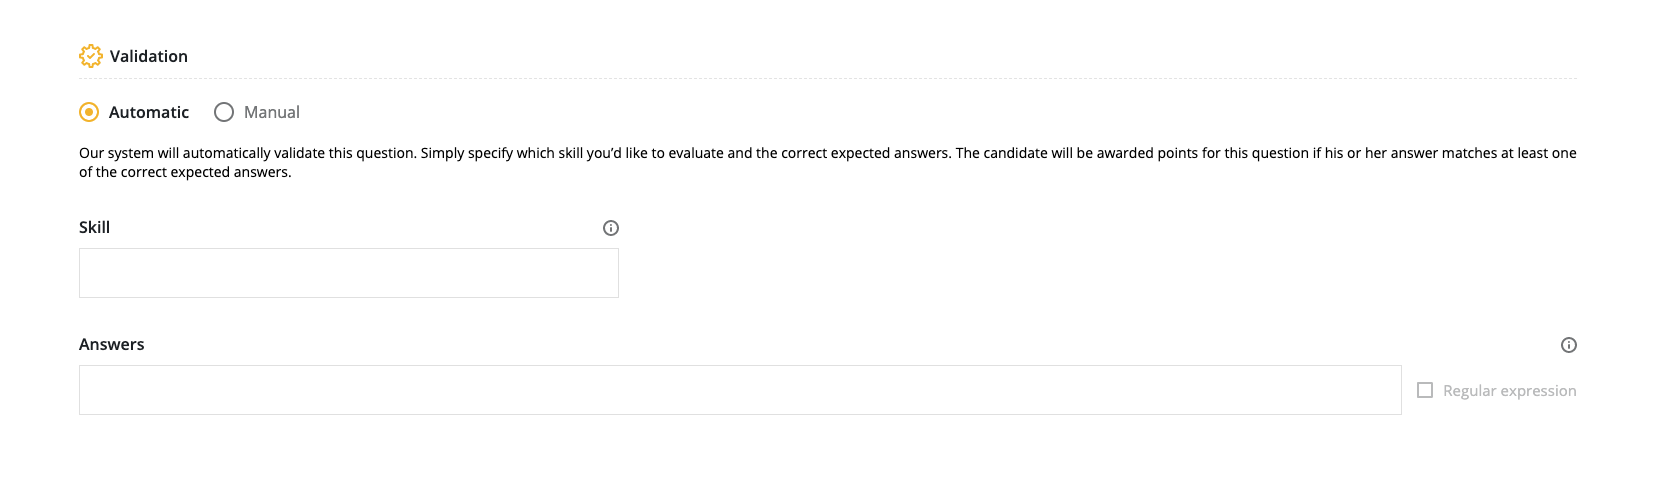
✅ Check the Regular expression box and input a regex code that allows a more flexible range of answers. Check the Oracle Java Regex description for more information.
2. Manual validation
Input a Label for the report. Select the Skill and Weight. The Points value auto-populates.
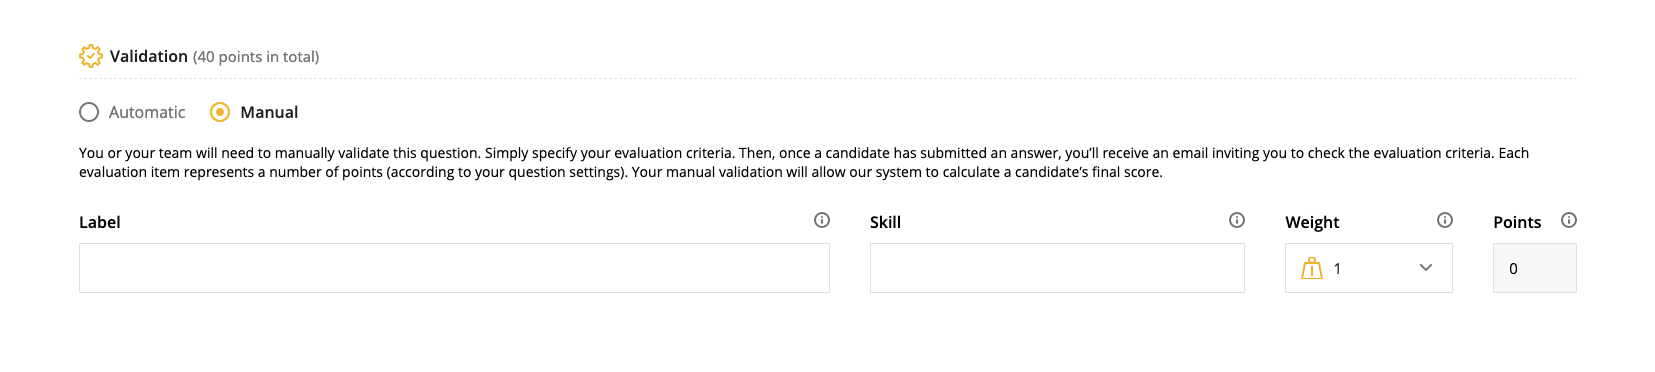
After a candidate completes a test with a question that needs manual validation, you will receive an email inviting you to manually validate the answer to the question. The system then calculates a final score.
Create language-specific exercise
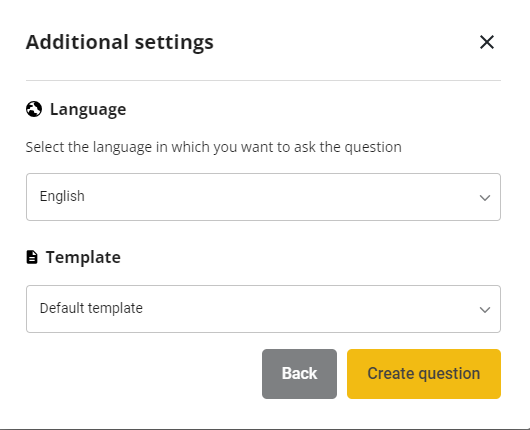
Once you’ve selected Language-specific from the Coding exercise question type menu, you’ll be taken to the language selection window.

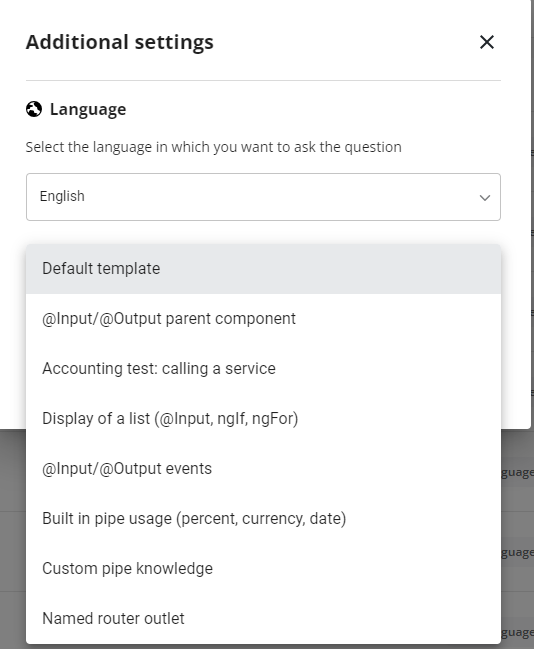
Once you select a language, you’ll be taken to additional settings. Here you can select the language for the question. Additionally, the Template dropdown contains existing Screen questions that you can use as a basis for your own.
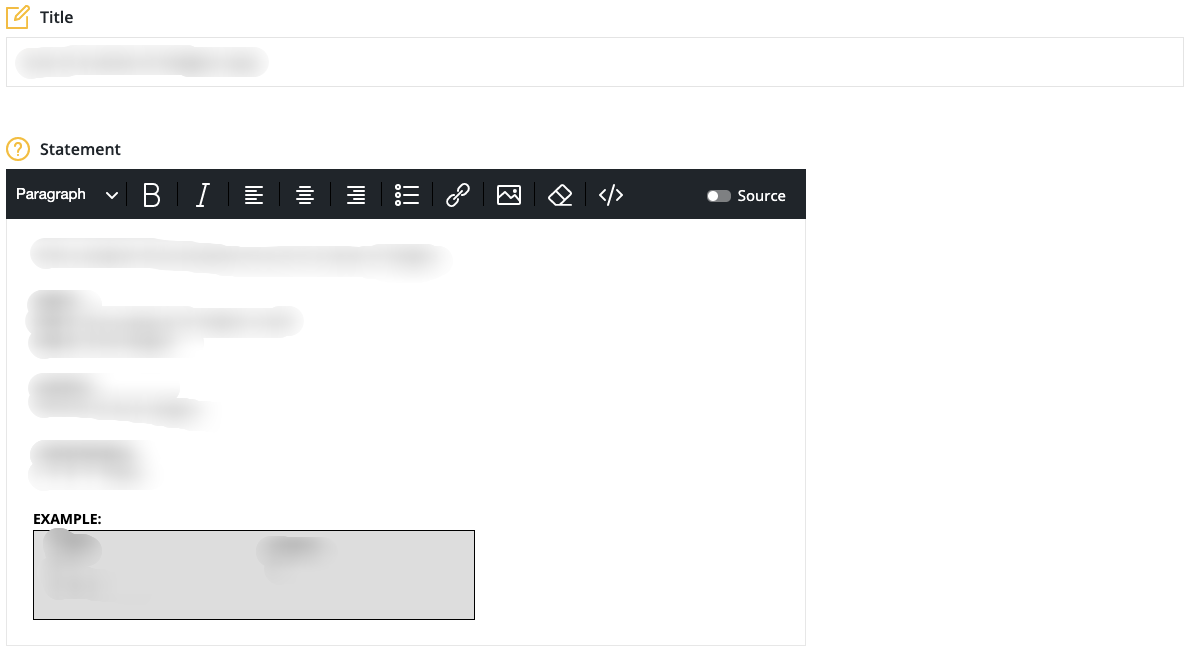
You can edit the details of the existing question, including adding a zip file, before choosing the settings.
In Settings, input the points for the question.

✅ The domain field may have more options depending on the language selected.
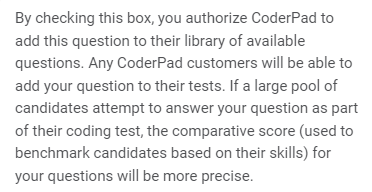
If you want, you can add your question to the Screen library by checking the authorization box. Hover over the information circle to see the details:
Next, you can set the execution time limit to focus the question on code optimization or allow extra time for long-running processes. You’ll also have the option to add custom files in the External dependency section. By clicking the Add external dependency button, you can add CSV files, text files, JSON files, or any other kind of files you’d like the candidate to work with.

⚠️ Your dependency files must be uploaded as `.zip` format.
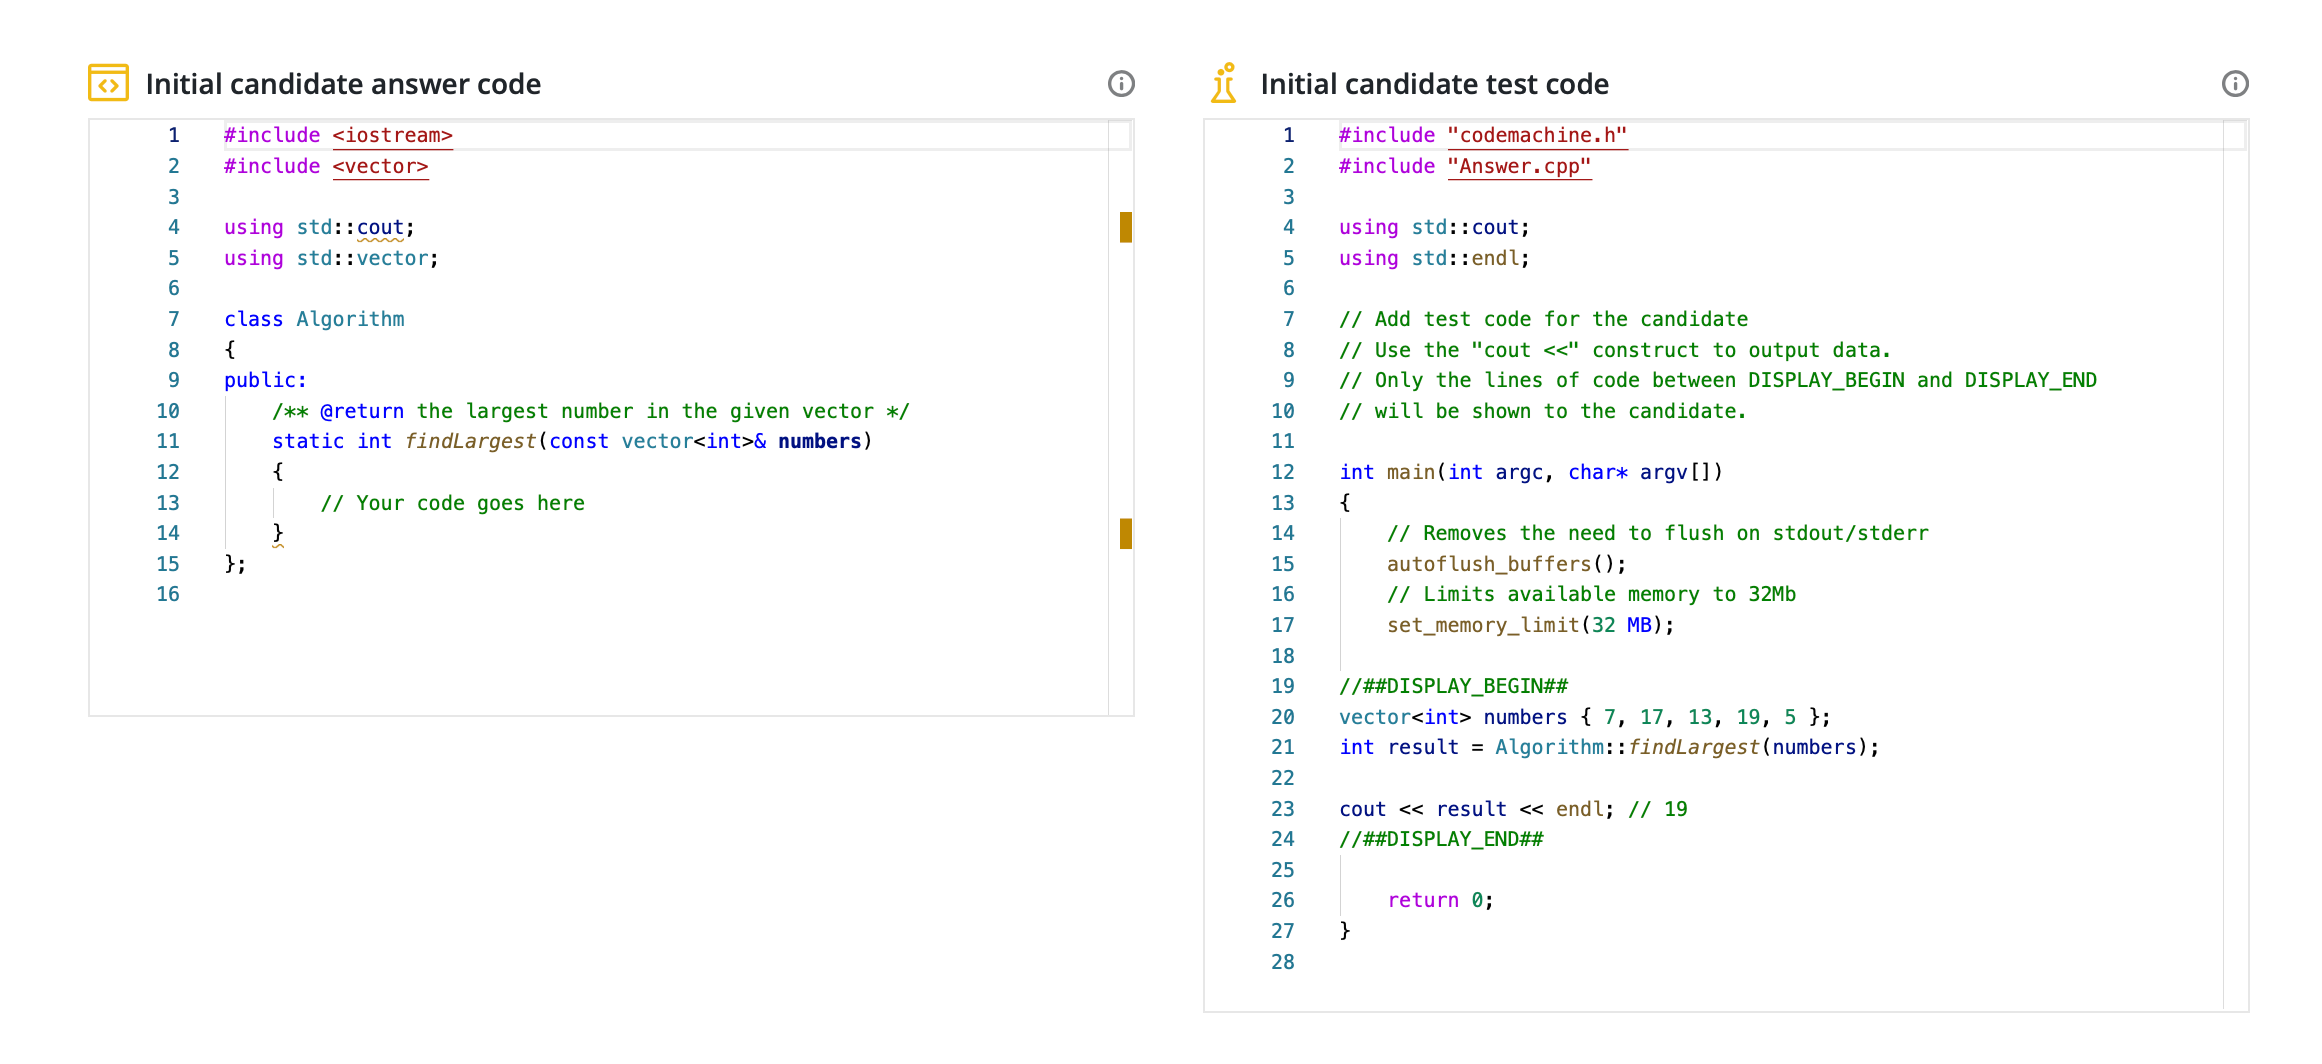
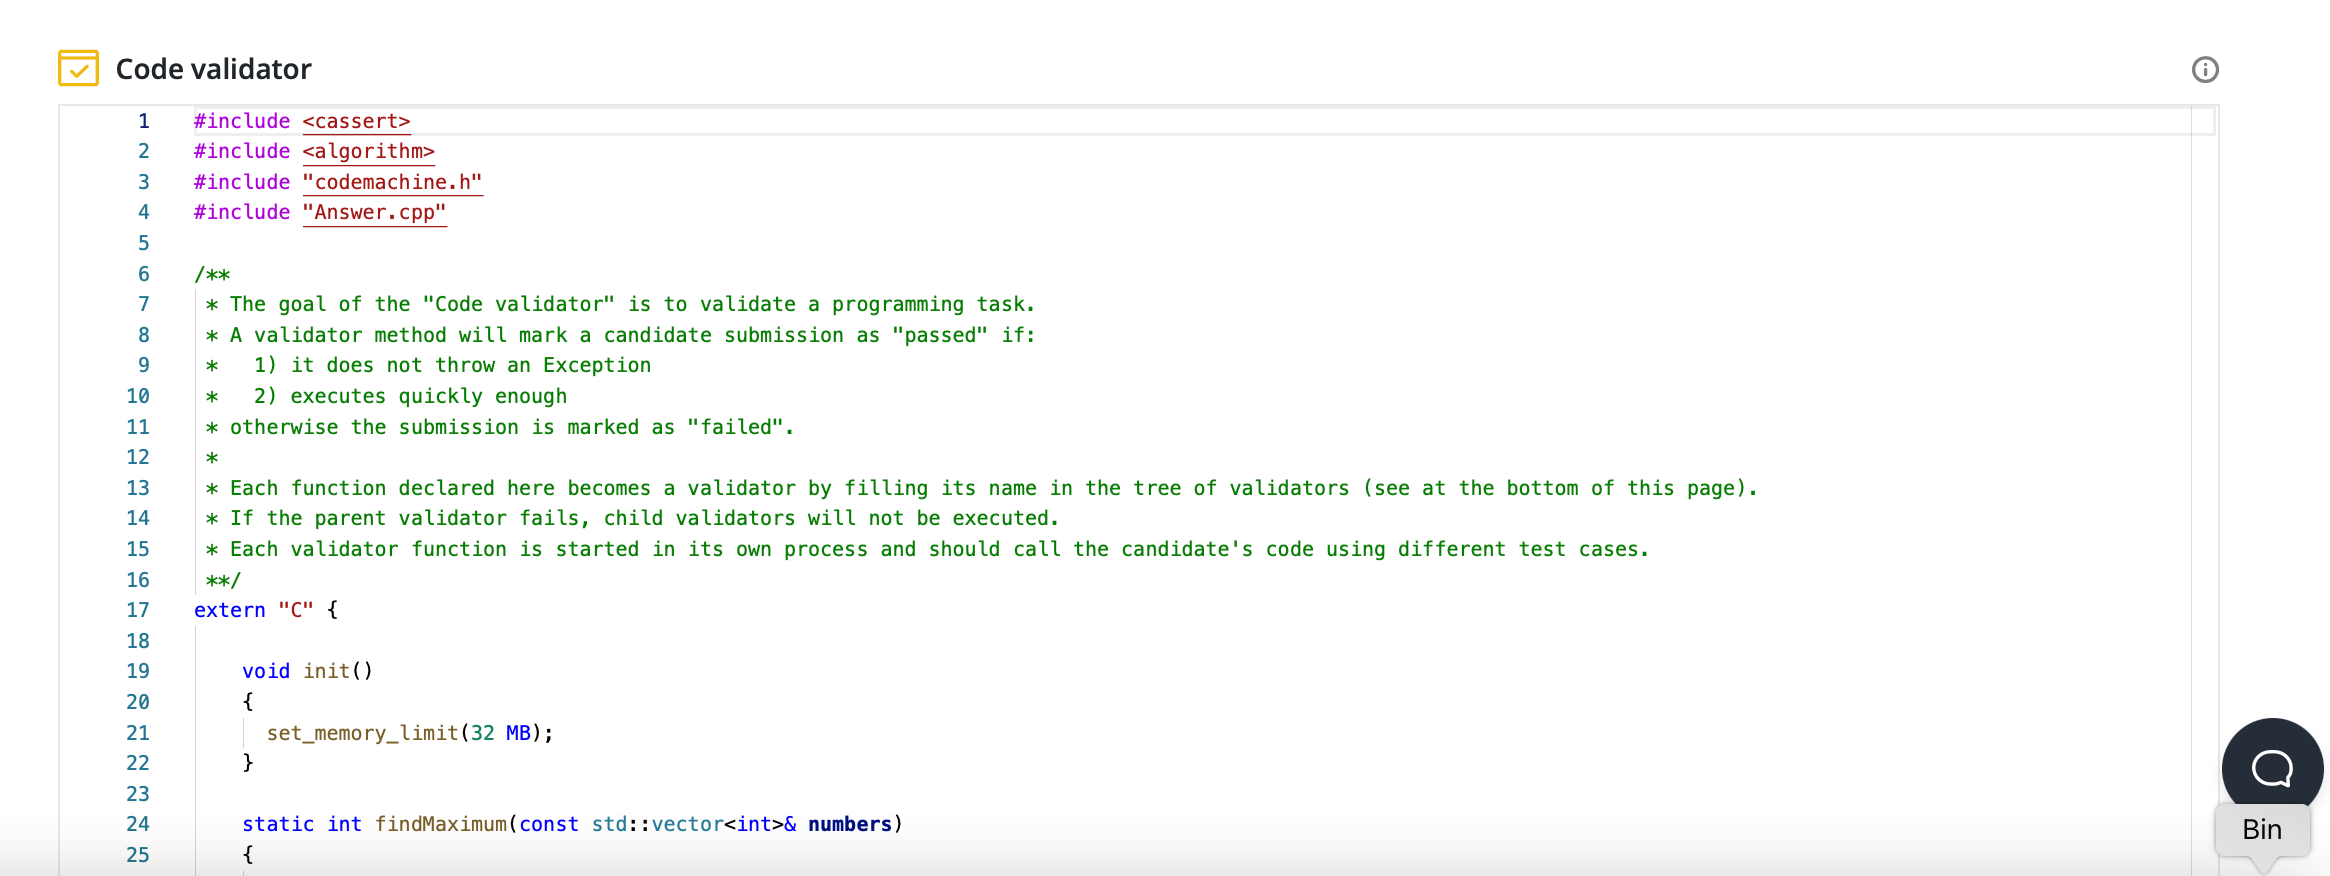
Scroll down to see the Initial candidate answer code and the Initial candidate test code input boxes. This is the editable code your candidate sees at the start of the test.
The Code validator section stores validation code which runs against the candidate’s solution in order to assess it.
Underneath the Code validator is a Validator Mapping section where you can set the criteria for validation.
In all language-specific coding exercises, there is a parent validator and possibly one or more child validators. The child validators are only evaluated if the parent validator passes — if a candidate fails the parent validator, they automatically get 0 points for that question.
ℹ️ The reason for utilizing this parent/child logic is that you may want to test specific edge cases (e.g. input is null), but you don’t want to award points if the candidate has only implemented the edge cases (if input is null then x).
If you really want to disable this logic, you can put a test that always evaluates to true in the parent validator.
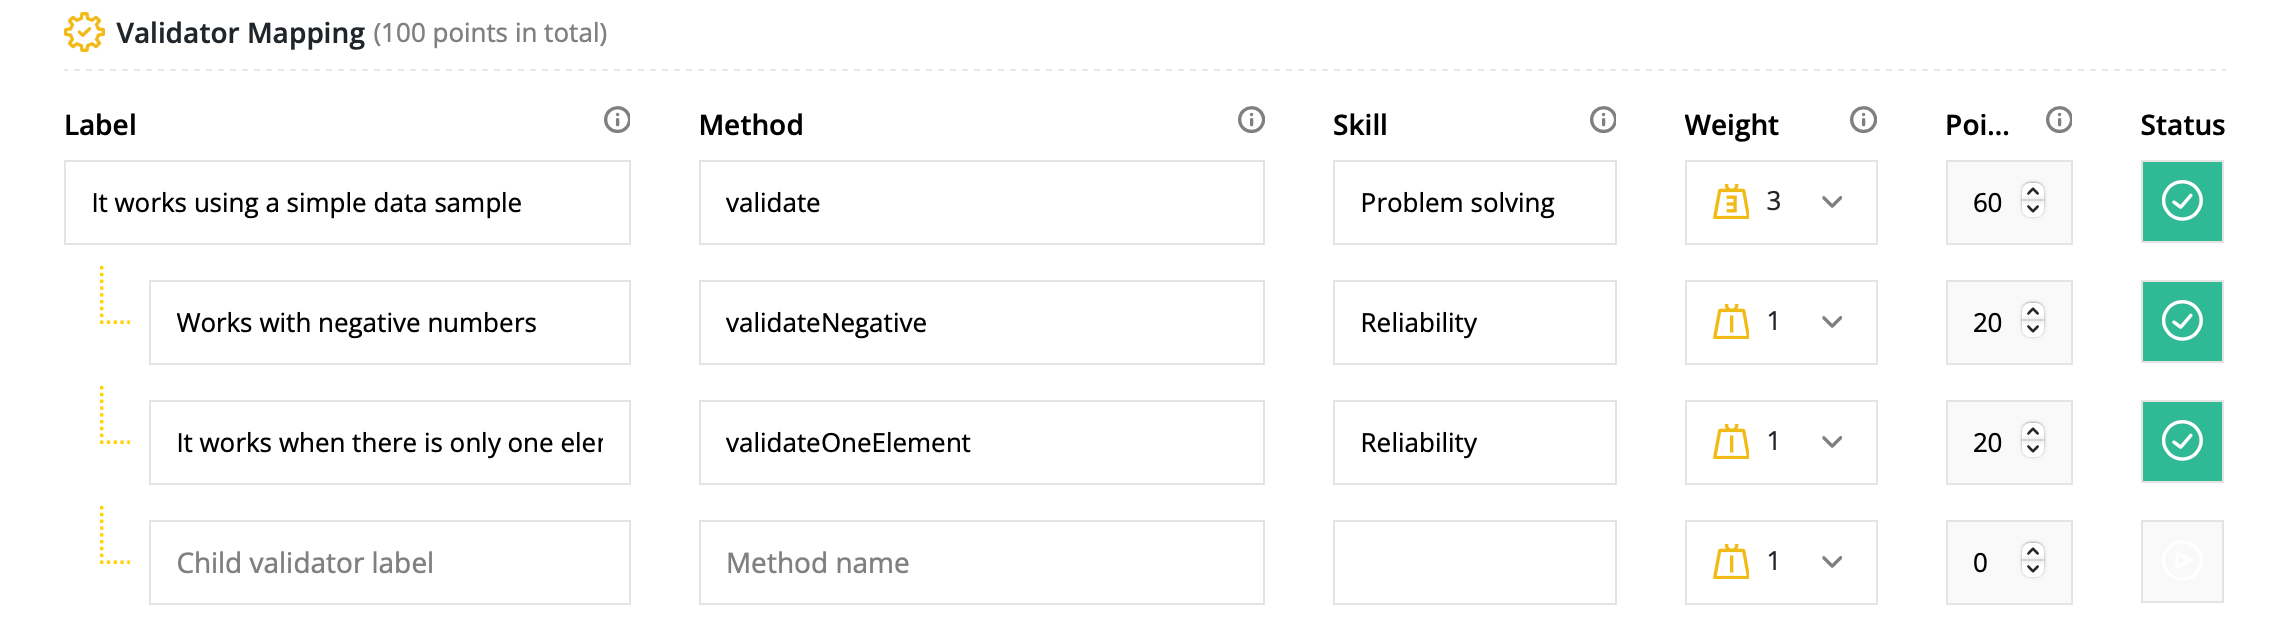
✅ The method field in the Validator Mapping must match the method name in the Code validator.
You can also try out a Possible solution and test your code. Click Preview to test the question:
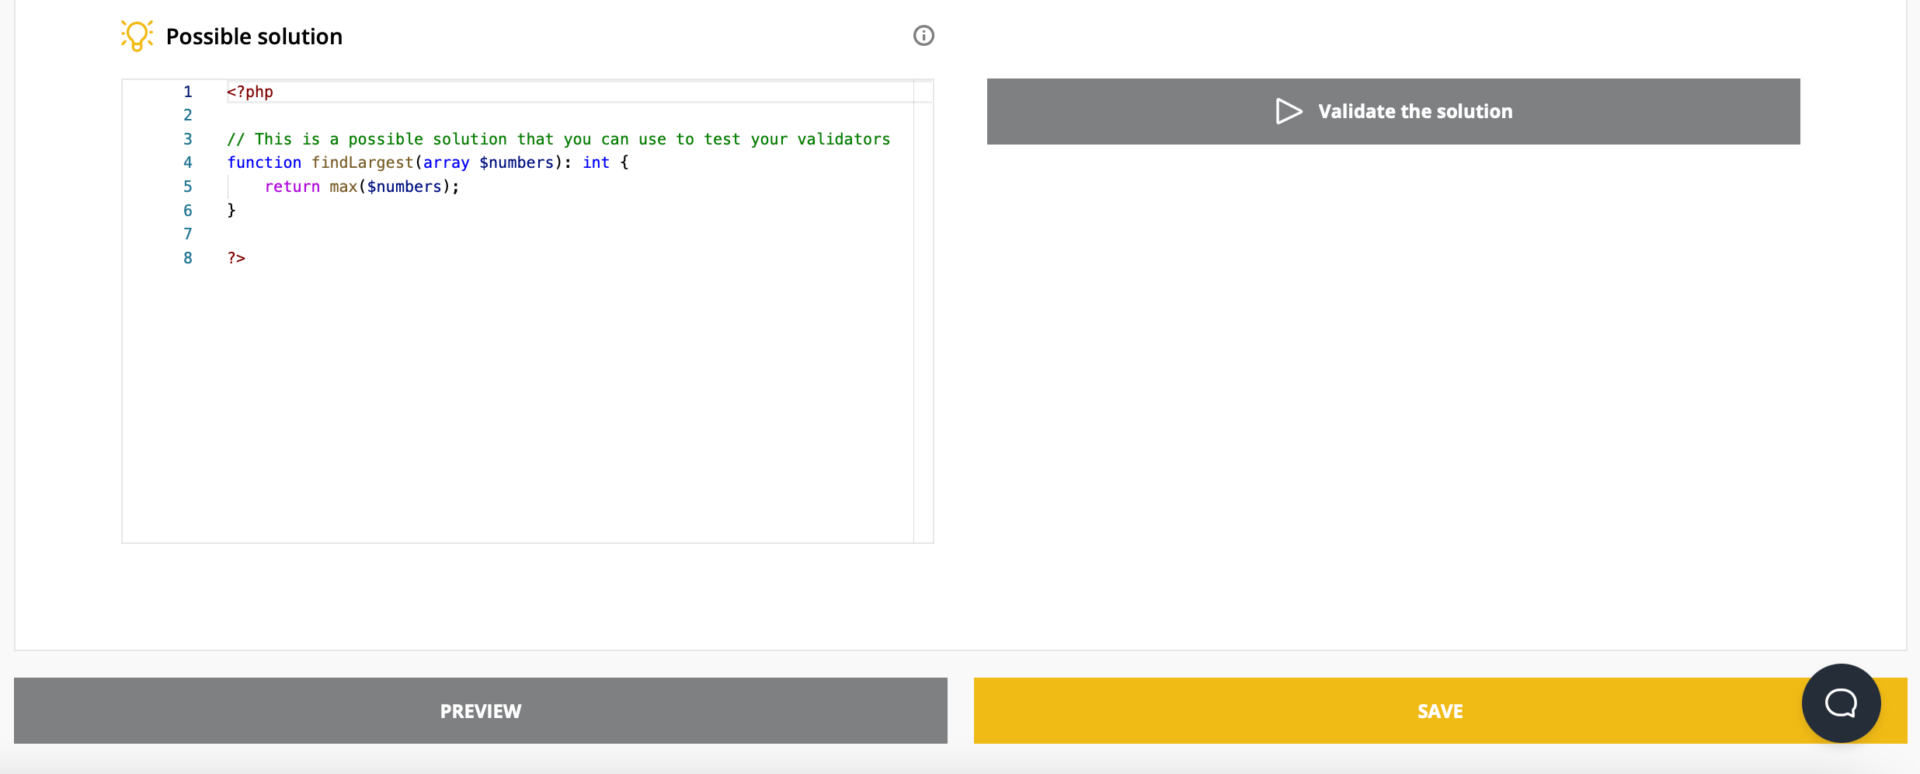
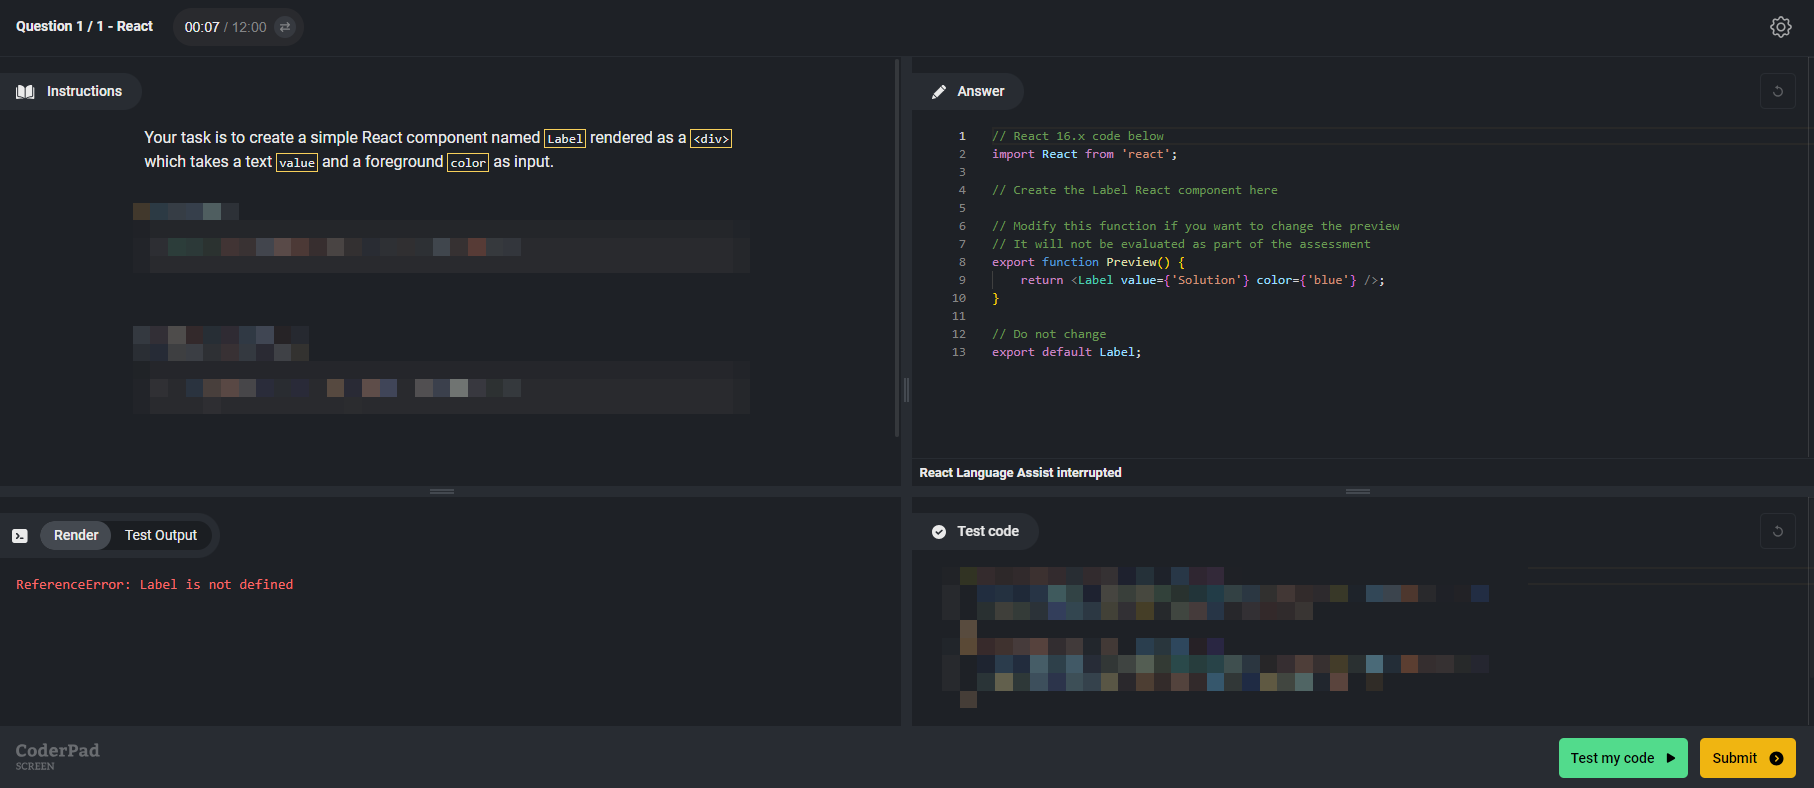
You will see the question as the candidate sees it:
After testing and submitting, click Save to save the question.
Create project exercise
Project exercises are in-depth coding questions that involve a full IDE. You can find more information on creating project questions here.
Create a function-based question
Function-based questions allow you to create language-agnostic exercises where the candidate can answer in the programming language they are most comfortable with.
Once you’ve selected Function-based from the Coding exercise question type menu and selected the questions language, you’ll be taken to the configuration page.
First, in the Instructions section, you’ll need to describe the goal of this question using the input box. You can use text, images, links, formulas — whatever you need — to describe this question to your candidates.
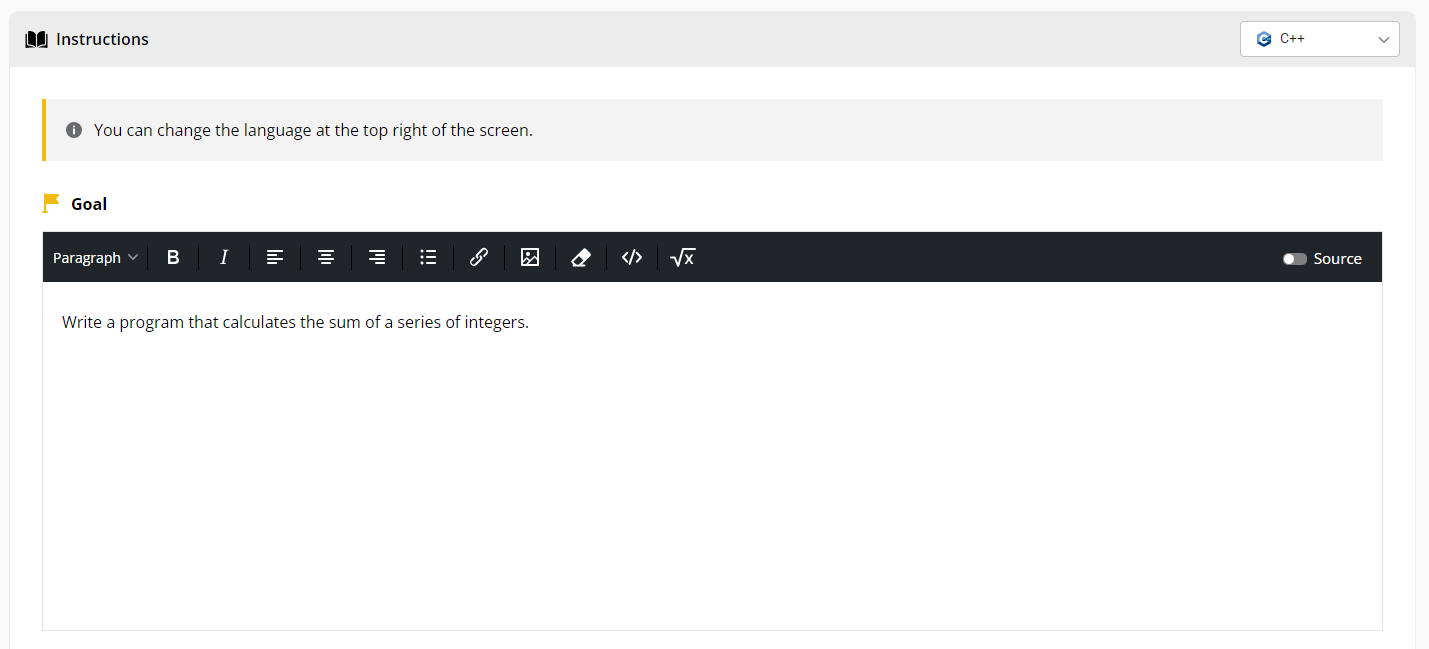
✅ You can change the language at the top right of the screen to see what the question would look like in other languages.
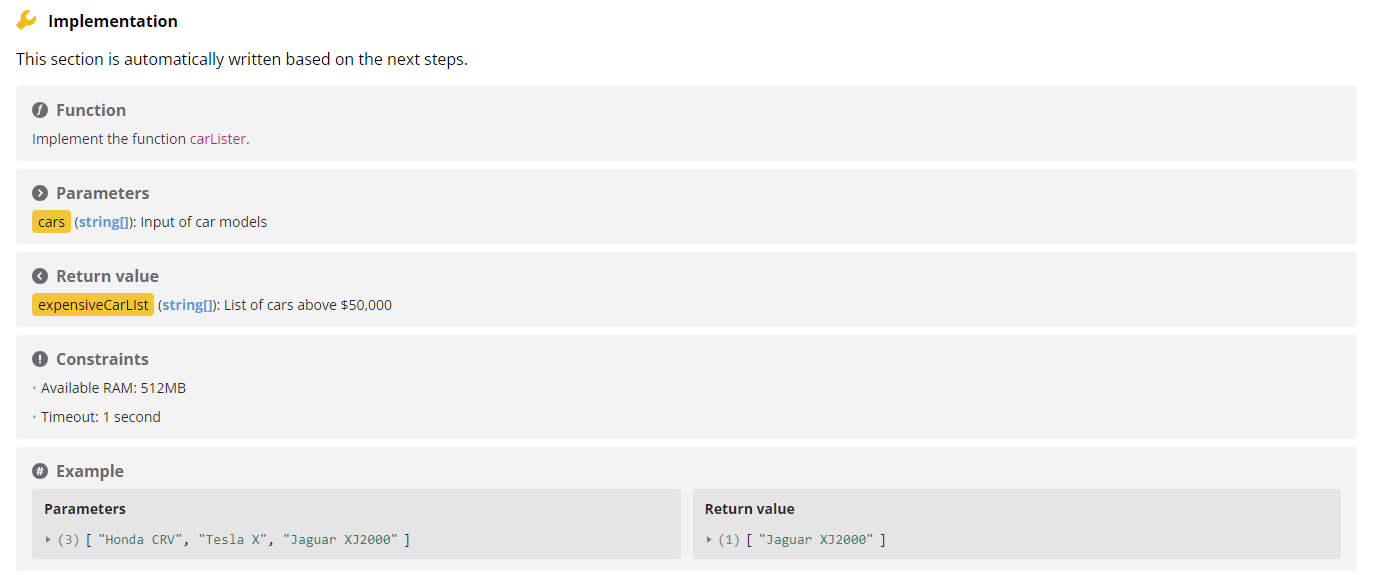
Also in the Instructions section you’ll see the Implementation of the functions. This section will be filled out automatically as you complete the rest of the steps in the question creation process.
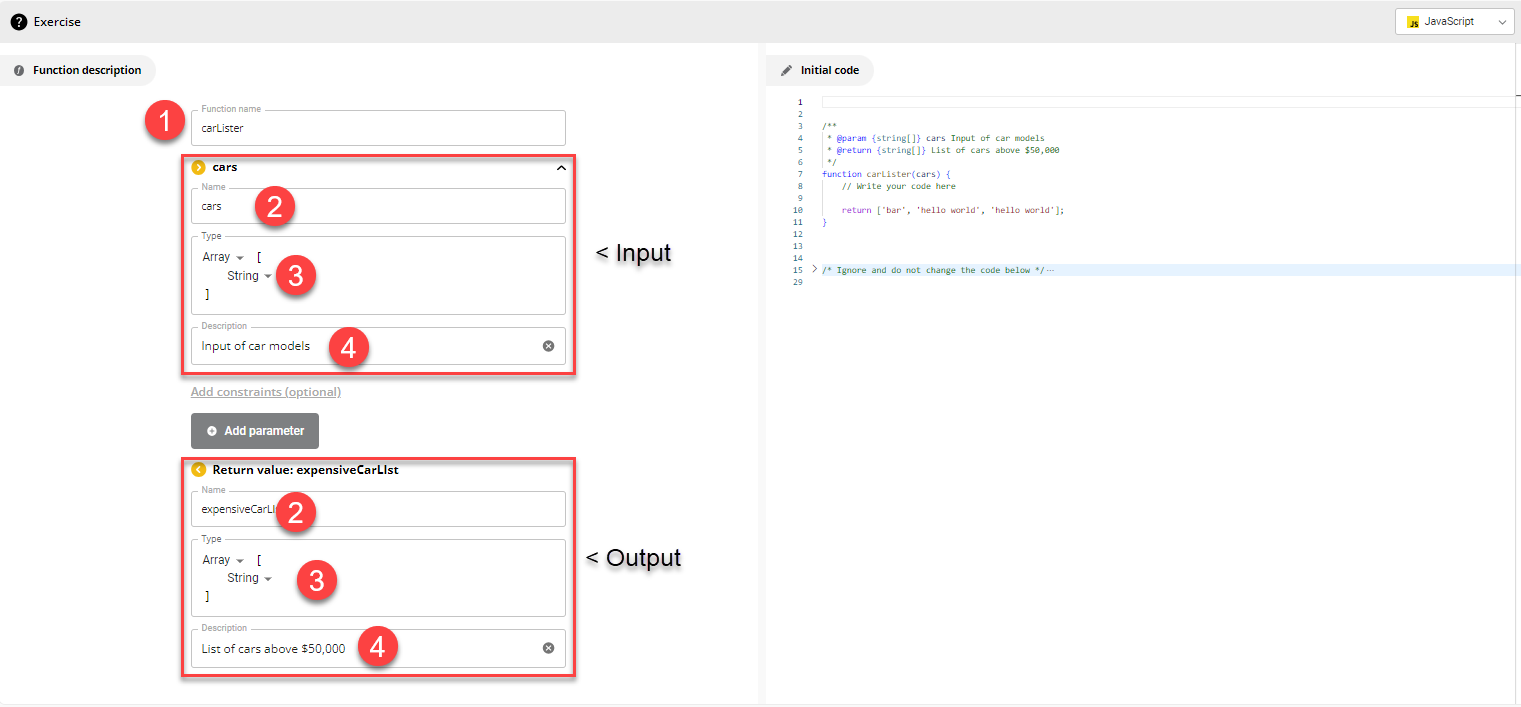
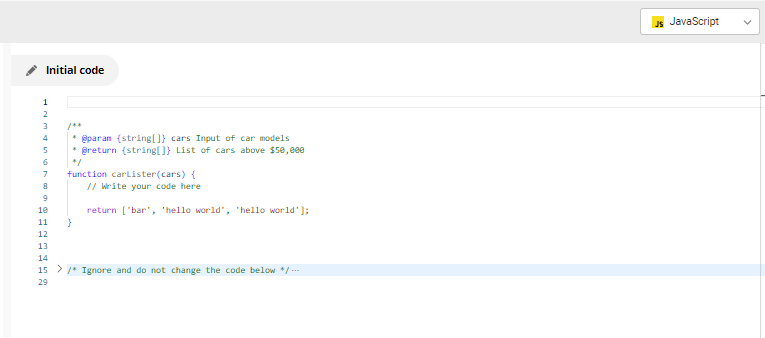
Next, you’ll fill out the inputs in the Exercise section.
You’ll add the name of the function you want the candidate to write (1), as well as the name (2), type (3), and description (4) of both the input and output parameters.
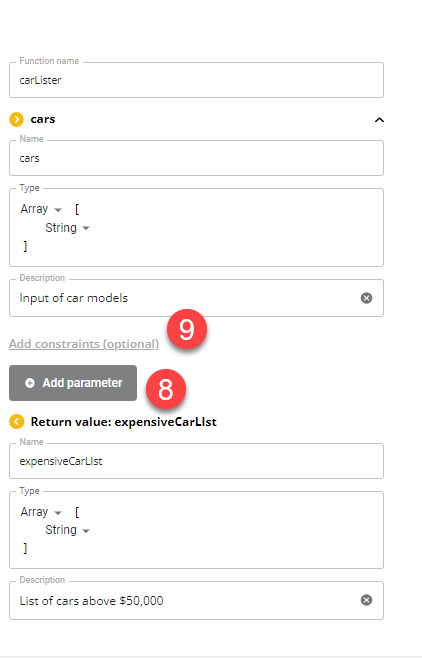
You can add more parameters by clicking Add parameter (8). Additionally, certain input data types will allow you to add constraints (9), including min values, max values, and pattern matching.
On the right side of the screen, the initial code will automatically fill out as you add the different parts of the function description.
Next, in the Validation section, you can add test cases (ungraded, for candidates’ use only) and validators (graded tests) that will run against the code to let you know if the candidate was able to solve the question.
For test cases, you simply need to select Test from the Type drop-down, add a label (test name), the input, and the expected output. If you already have a possible solution, you can click the Generate from solution button to have the correct output automatically generated from your code. To add another test, simply click Add test case.
![The image shows a screenshot of an online coding platform used to create and validate coding test cases. The interface is divided into sections:
1. **Left Panel:**
- Labeled "Test cases" with a notification in red that says, "At least one validator (visible or hidden) should be defined."
- A test case labeled "Simple test" is shown with the input "numbers" which contains the list `[1, 2, 3]`.
- The expected output for this test case is `6`.
- There is a button labeled "Add test case" at the bottom.
2. **Right Panel:**
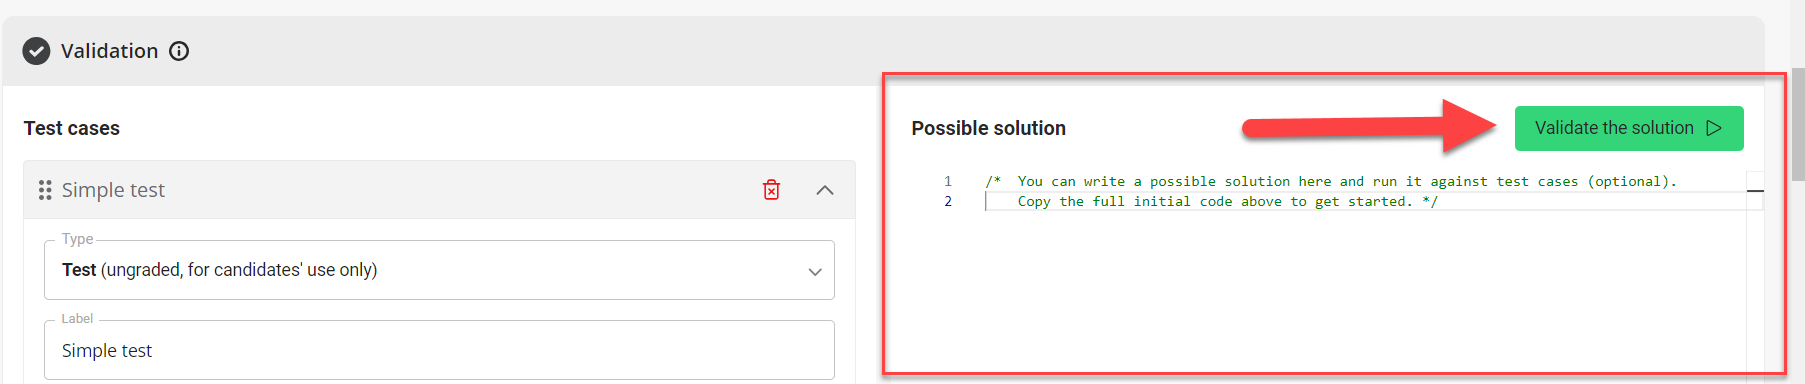
- A text area labeled "Possible solution" where a code can be written to solve the problem.
- A green button labeled "Validate the solution" is located near the top of this panel.
3. **Top Bar:**
- The top bar contains options: Instructions, Function, Validation, Settings, and Preview.
- The Validation tab is currently active.
- A dropdown menu at the top right indicates the programming language selected is Java.
- A yellow "Save" button is visible at the top right corner.
This screenshot illustrates the process of setting up a coding test case, including defining inputs, expected outputs, and writing a possible solution for validation.](https://coderpad.io/wp-content/uploads/2024/08/image-2.png)
For validators, you’ll need a select the Type (hidden or displayed to the candidate), a label (validator name), a skill that the validator is testing, and the weight of the question — the higher the weight, the more points will be awarded for passing that particular validator. If you already have a possible solution, you can click the Generate from solution button to have the correct output automatically generated from your code. To add another validator, simply click Add test case.
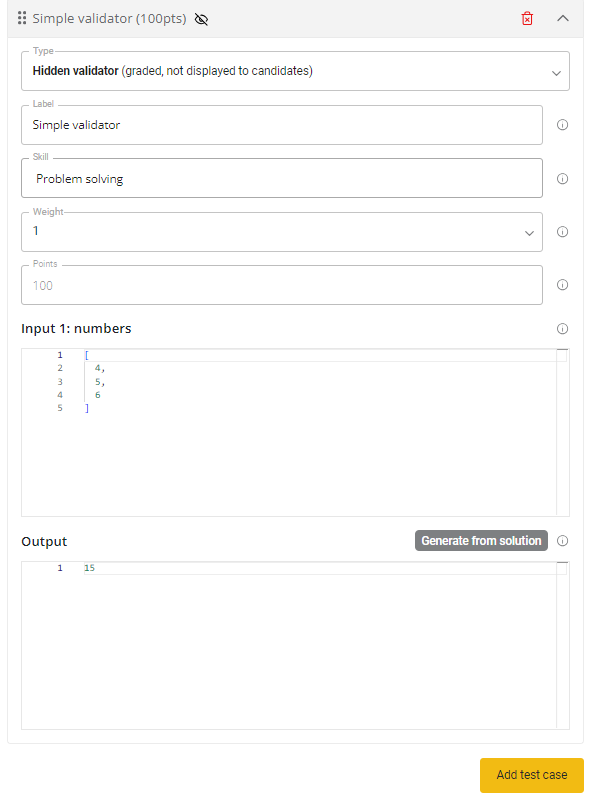
Once your possible solution is written, simply click the Validate the solution button to see the results.
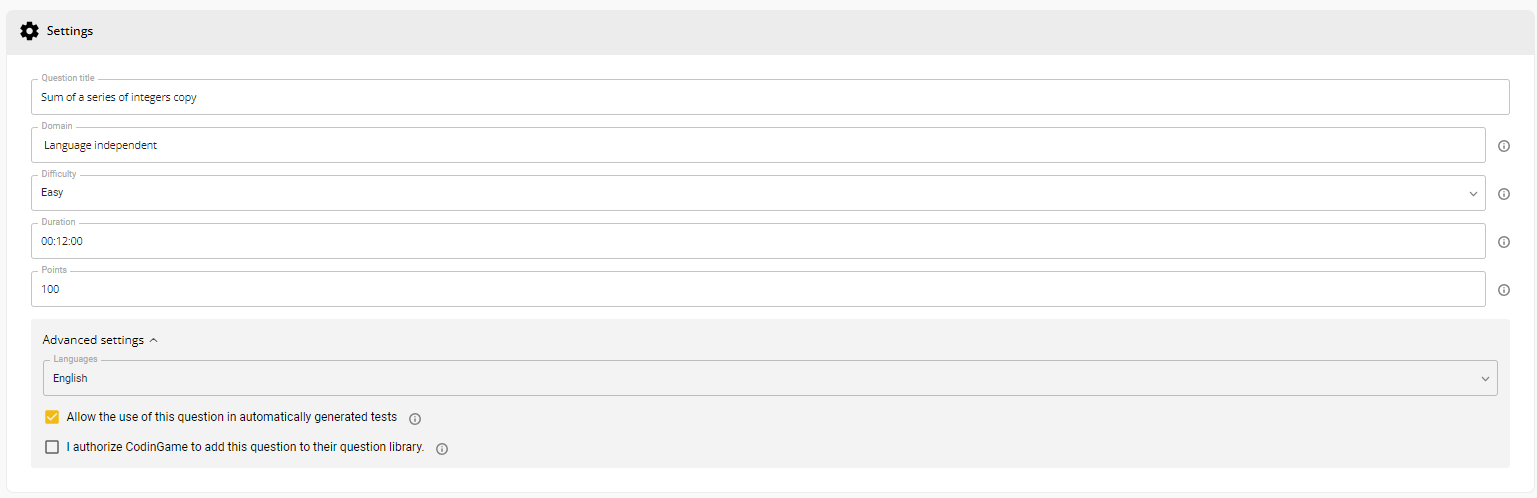
Next you’ll fill out the question settings in the Settings section. Here you can edit:
- Question title
- Question domain
- Difficulty level
- Duration
- Point value
- Language
- Allow use of the question for test generation
- Allow CoderPad to use the question for our question library
Lastly, you’ll be able to view your question from the candidate’s perspective in the Preview section at the bottom.

Create an audio or video question
Audio and video questions can be added at different stages of your hiring workflow, depending on the signals you want to capture.
Use video questions after a coding exercise
Add a short (3–5 minute) video question after a take-home or coding task when you want to:
- Confirm the candidate understands the solution they submitted
- Evaluate how they think about trade-offs (e.g., performance vs. readability)
- Assess reasoning and communication skills before investing live interview time
- Ask how they would adapt their solution under different constraints
- Reduce time spent in early technical interviews by filtering for clarity and depth
✅ Keep the prompt focused (e.g., “Walk us through your approach and the trade-offs you considered”) and limit responses to a few minutes.
Use video questions as a standalone screening step
Add a video question early in your funnel when you want to:
- Evaluate communication skills at scale
- Replace or reduce live HR pre-screen calls
- Ask structured questions about past experience
- Assess motivation and clarity of thinking before scheduling interviews
- Reduce scheduling overhead for your team
- Shorten time-to-hire in high-volume roles
✅ Use 1–2 targeted prompts (e.g., “Describe a recent technical challenge and how you approached it”) to keep the experience focused and candidate-friendly.
When video questions add the most value
Video questions are especially effective when:
- You receive a high volume of applicants
- Interview bandwidth is limited
- Communication is critical for success in the role
- You want stronger signal before committing engineering time

Still have questions about how to create video questions? Checkout this detailed guide:
Create a file upload question
File upload questions allow you to assign a project to candidates to do on their own time using their own IDE or other technologies/applications they like.
You provide any starting instructions or files they need, and then once they’ve completed the assignment they’ll upload their results for you to review.

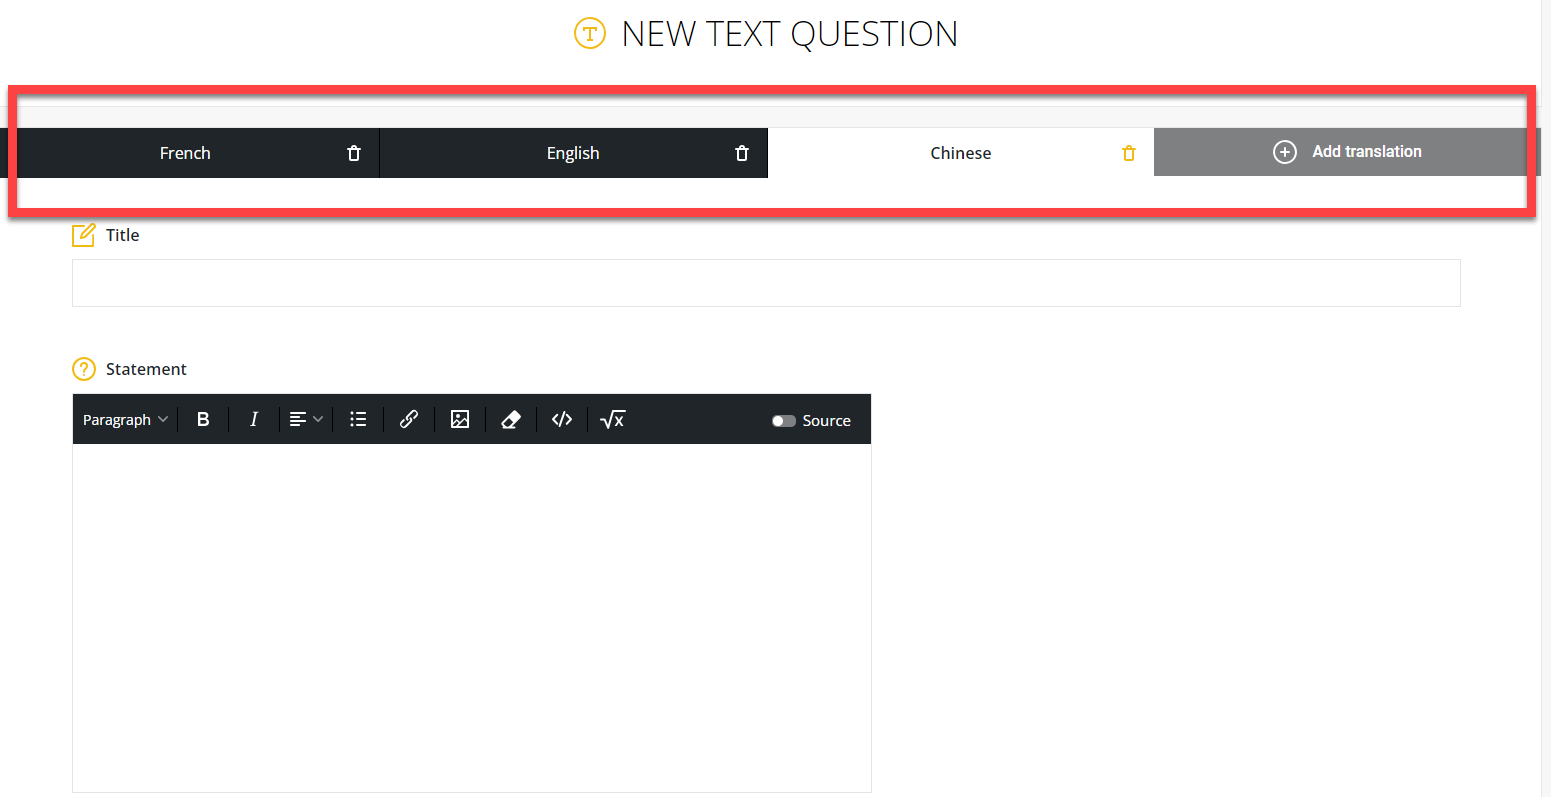
Add translations
Whenever you create a new question, if you select more than one language, you will find tabbed areas for inputting the text in other languages.
Custom question video tutorial
For more information on creating custom questions, check out this Creating custom question with CoderPad Screen tutorial video: