How to Maximize Your CoderPad Trial
Welcome to your free CoderPad trial!
CoderPad is the leading coding interview platform for development teams. It enables a quick, accurate read on a candidate’s skills.
CoderPad works like an IDE to help candidates easily share their skills and ensure you understand how they work. Through both collaborative coding interviews and take-home projects, CoderPad is with you at every stage of the hiring process.
There is a lot you can do with CoderPad in a week-long trial. In this article, we’ll share the best steps for you to ensure you’re getting the most out of your time spent in the free trial.
KEY STEPS
Step 1: Create a Pad
The first step, and maybe most important, is creating a Live Pad – which is a shared technical IDE for the interviewer and candidate. It will show you how CoderPad works as an online coding interview tool to enable collaboration and effective evaluation.
To create a live pad, the fastest way is:
- Login to your account and go to the dashboard page.
- Click on the “Create Pad” button located on the upper right hand side of the page.

That’s it! Simply copy the pad URL, or pad link, for both interviewer(s) and the candidate to use to access for their live interview.
Step 2: Run Code
What’s the point of writing code unless you run it? Execute (and debug) code together with your candidate to gain perspective on their abilities.
- In order to execute code in any language, simply hit the “Run” button in the top left hand corner of a pad. We also give a handy keyboard shortcut if you don’t want to take your hands off the keyboard:
Mac:
command + enter OR CTRL + S
Windows
CTRL + enter OR CTRL + S

Step 3: Try Out a Few Different Programming Languages
With 30+ languages, CoderPad has a wide breadth of code language choice with native libraries (e.g., Java, React, and SQL) and superior runtimes.
How to try different languages:
- In the CoderPad app, open the Pad you created.
- In the upper right hand corner of the IDE, you will find a dropdown list of all available languages, packages and info on each language.
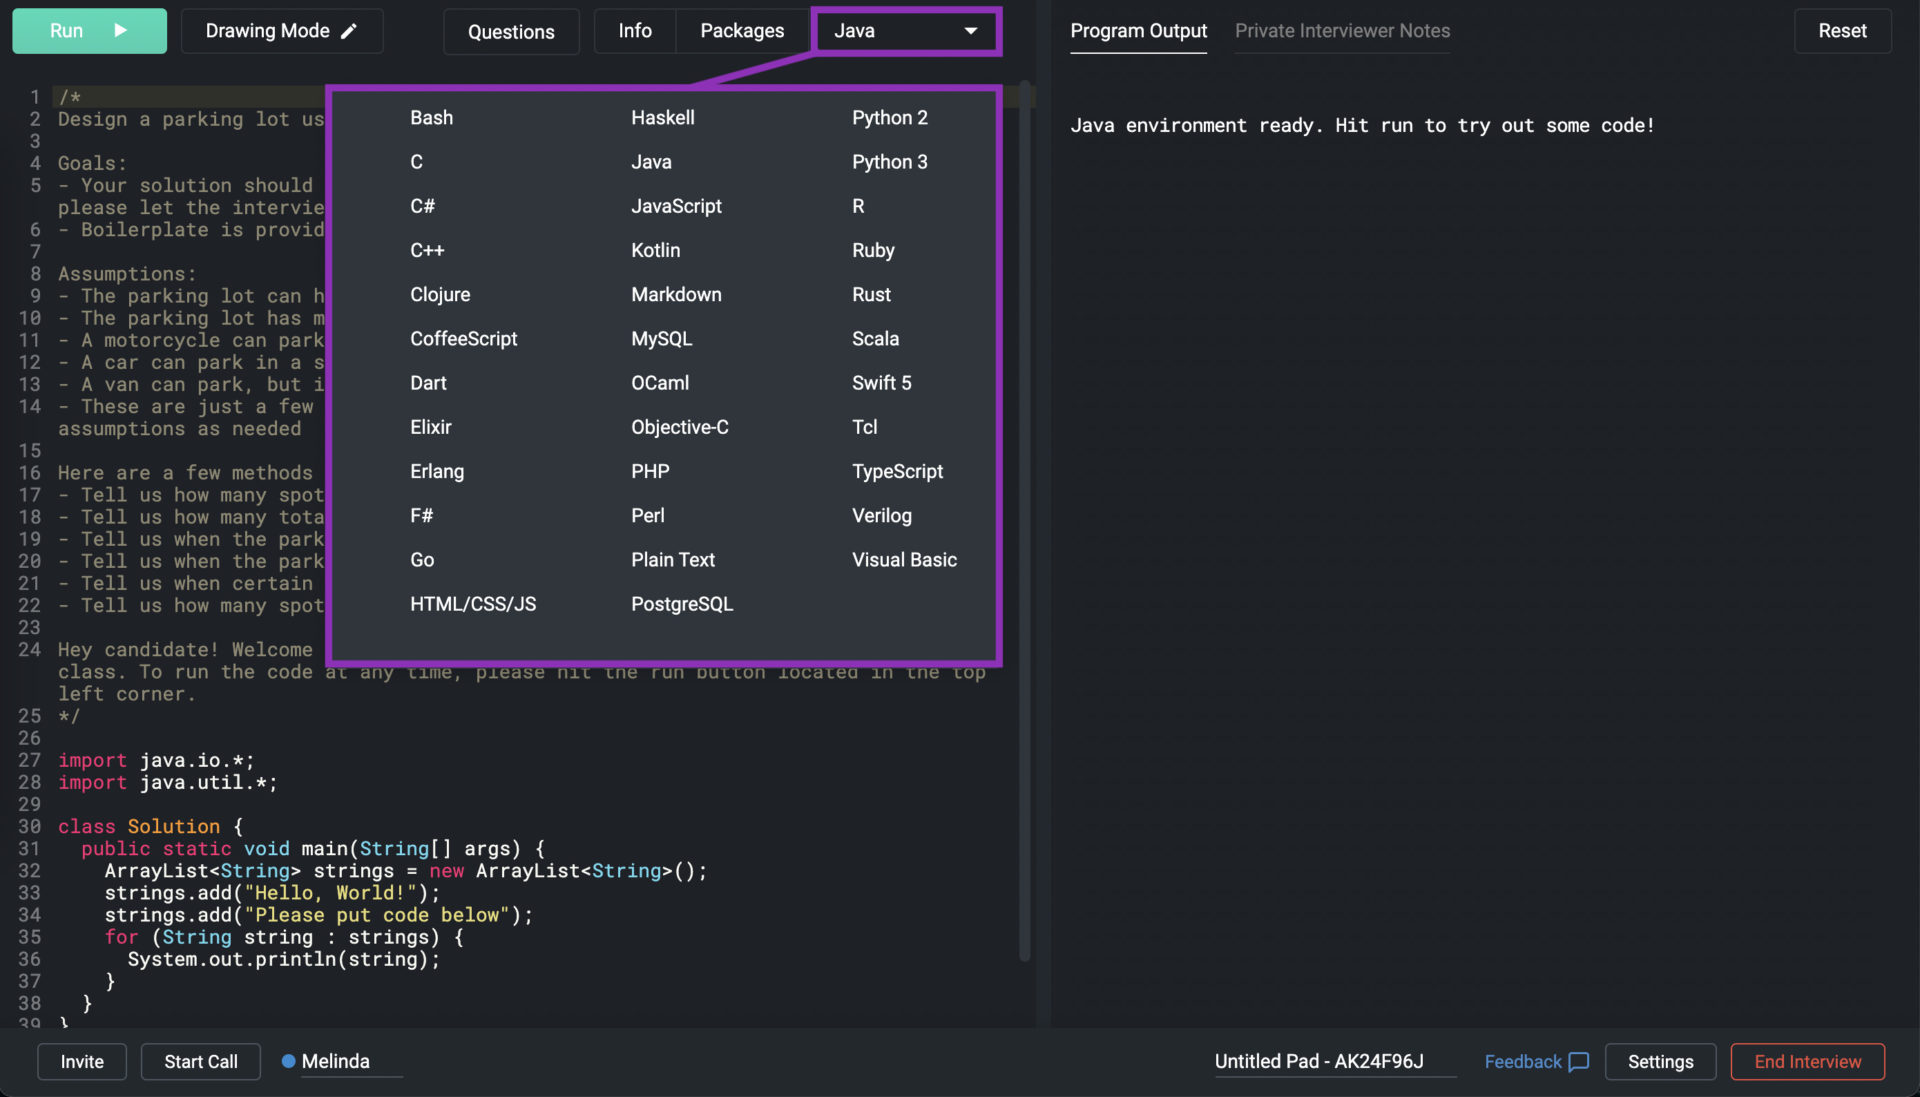
- Try out a few – don’t forget to hit “Run
CoderPad supports a wide variety of programming languages. Quite a few have supplementary libraries that you might want to use.
Check out our languages overview and click on the language you’re interested in for more information on the version, autocompletion and libraries included.
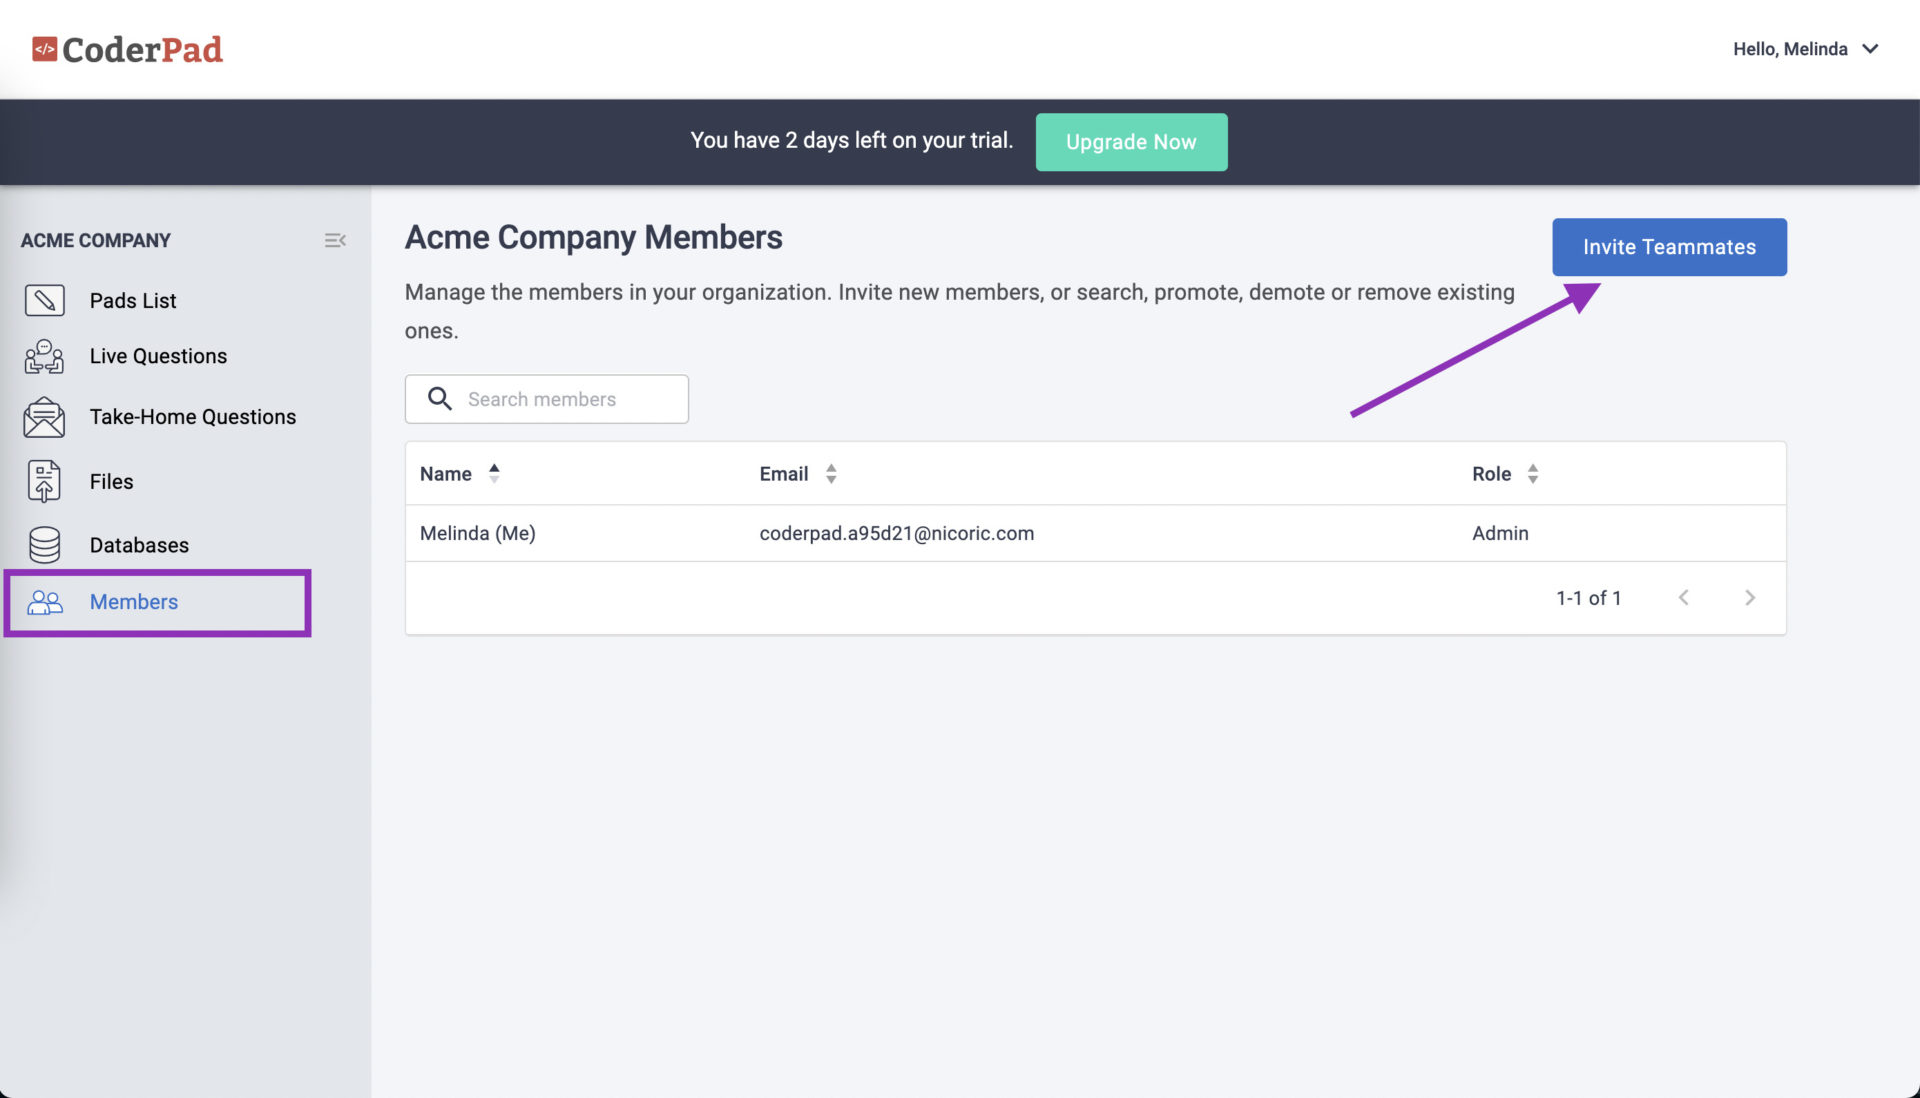
Step 4: Invite Your Team
Check out how simple it is to collaborate with other technical interviewers, graders, recruiting coordinators and other HR partners in CoderPad.
- Click on the “Members” button on the left-hand side navigation.
- Once on the Members page, click on the “Invite Teammates” button. You will be taken to a page to input your teammates emails and invite them.
- Once your team member has accepted their invitation, they will be added to your account as a member.
Pro Tip: To upgrade them to an admin, simply go to the members page, search for the specific member and click on the “Promote to Admin” button. Admins have full permissions in the account including access to things like billing and integrations. Whereas members only have access to create and participate in pads, create questions and review interviews.
Step 5: Conduct or Simulate an Interview
Now that you’re familiar with the key aspects of CoderPad, you’re ready to see it in action. You can use your free trial of CoderPad to hold a live interview or simulate one with a co-worker. This is a great way to ensure this technical interview platform will work for you and your team. Not sure how to get started with technical interviews? Check out our Doc Setting Up a Live Interview.