Logging in Django
The most difficult part of fixing a problem is identifying it. This statement is exceptionally true when it comes to debugging. While running your application, you may encounter errors, that need to be identified to enable you to fix them, in an instance where it is a large project, it becomes more difficult to identify the cause of the error or what type of error it is. Logging provides a solution to this!
Logging is an essential method for diagnosing problems or understanding an occurrence in your application.
Most developers would ask, “Why not just use the standard print statement for debugging?”
Well, I am guilty as well. There is nothing inherently wrong with using the standard print statement as long as you are working on a small program. Using the standard print statement is not ideal practice if you are working on a more complex project or deploying a tool to a remote system that requires you to record the execution that occurs within your program.
In this tutorial, we will guide you through:
- Understanding logging in Django.
- How logging works in a Django project.
- Implementing logging for debugging in Django.
Let’s dive in!
What is logging?
Logging is a tracking method that allows you to monitor events and requests in an application while it is running. During the execution of the application, it indicates that certain events have taken place and sends an alert about the event.
For example, when an error occurs, it sends log messages that provide details about the error and where the error occurred.
Logging allows you to leave a trail of breadcrumbs that you can follow to determine what requests and actions have taken place in your application.
Instead of writing a bunch of print statements in your program, you can replace this with a consistent log that will store all the data in your program and categorize messages according to the different levels of logs.
How logging works in Django
Developers, primarily use Django for building scalable applications, and logging is an excellent feature of the Django framework. Logging in Django incorporates the Python built-in logging module that allows you to interact with a robust framework and send log messages from your application.
The Python logging module consists of four main parts. Which includes:
- Loggers
- Handlers
- Formatters
- Filters
Loggers
“Logger is an entry point to the logging system…. “ They are best understood as a function that provides detailed information when they are called or invoked. The logger specifies the exact message or information output when an event occurs.
Events have a level of importance assigned to them known as “logging levels”. The logging levels represent the severity of the logs the logger will handle
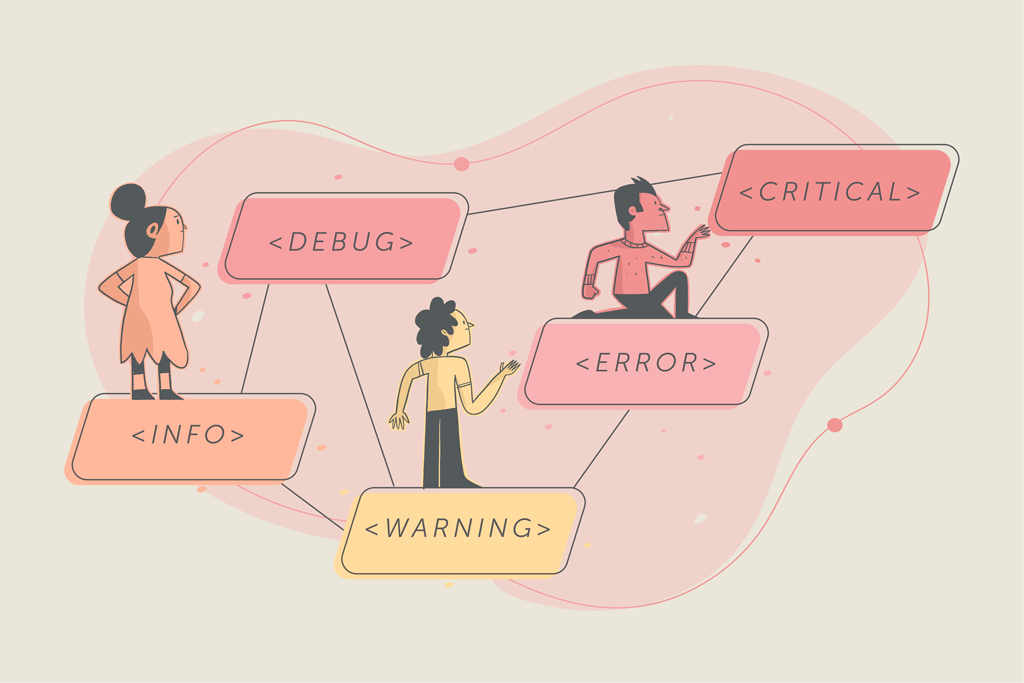
There are five standard logging levels. According to severity, log levels include:
- DEBUG: This provides detailed information relevant to diagnosing problems.
- INFO: This confirms that everything is working as expected.
- WARNING: This indicates that something unexpected happened or that a problem may likely occur.
- ERROR: This indicates that a more serious issue has prevented the software from performing a task.
- CRITICAL: A critical error that indicates the program may be unable to execute.
Handlers
Handlers determine the destination for each log message. When the logger receives a message, it forwards it to the handler, the handler receives it, defines its behavior, and sends the logs to the appropriate location or destination.
There are different types of handlers, such as StreamHandler and FileHandler. The StreamHandler sends the logs to your terminal; the Filehandler sends the logs to a file.
A logger can have multiple handlers, each with a different log level. This way, it is possible to provide different log messages based on the importance of a message.
Formatters
By default, log messages sent by handlers in a file or console are not rendered as a Python data type or a text. Therefore, they have to be converted into a format (Python data type) before they are sent as output.
Formatters are used to specify the format of the output and configure the format of the log messages. Simply put, formatters define how our log messages are displayed.
In Django, log messages are displayed using the default “Log Record format”:
<LEVEL>:<LOGGER>:<MESSAGE>Code language: HTML, XML (xml)However, you can also modify the log message output to display the information you want to receive by setting a list of attributes to be included in the output.
For example, you can specify if you want the output to be in a format where the logging level or the file name, time, etc., are displayed.
Filters
Filters are the final component of the logging module. Filters decide which log messages get set to a particular destination. A filter can be placed between a logger and a handler. Not all log messages given by the logger are sent or received by the handler; as the name implies, the filter filters the log messages received by the handler. Any log message that meets log-level requirements will automatically be processed. However, the filter can also pass other log information before it is sent to the handlers. Take an example: the logger sends a DEBUG log level to the handler. If we add a filter that removes debug, the handler will not receive this debug level, but it may receive other levels or higher logging levels.
Filters work with both loggers and handlers.
These methods become clearer when we go into practical logging in Django.
Shall we?
Logging module
The first step in working with logging in Django is starting with the Python logging module. We will begin with importing the module into our application.
ℹ️ The
logginglibrary is part of the Python standard library.
In views.py, add the following:
import logging
def index(request):
# This creates or gets a Python logging object.
    logger = logging.getLogger(__name__)
    logger.error("Test application")Code language: Python (python)
Above, we first imported the logging module. Next, we instantiated the getlogger method to get a logging instance and added the built-in variable, __name__ which evaluates the name of the current module.
Lastly, we used the logger.error function to generate our log message.
Restart your web server by running:
$ python manage.py runserverRefresh the page to view our log message in the console window.
Watching for file changes with StatReloader
Performing system checks...

System check identified no issues (0 silenced).
December 22, 2022 - 11:26:45
Django version 4.0.5, using settings 'ecommerceApi.settings'
Starting development server at <http://127.0.0.1:8000/>
Quit the server with CONTROL-C.
Test applicationCode language: JavaScript (javascript)
We received the logging message in our console. However, you will notice that the logging system we have in place only works within the file to which we added the logger. This means that, even when we add a handler, formatter, and other logging methods, we would have to repeat this setup process in every file and function.
To fix this, we add logging configurations to the Django application using the Python logging built-in system.
Logging configuration
Python’s logging module provides a built-in system that centralizes log configurations using the logging.config.dictConfig function. This helps us avoid repeating the same setup process in every file. Django integrates this built-in function for configuring logging handlers, filters, and formatters in the settings.py file.
Let us walk through a basic logging configuration. Navigate to the settings.py file and add these lines of code.
LOGGING = {
'version': 1,
    'loggers': {
    },
    'handlers': {
    },
    'formatters': {
    }
}Code language: Python (python)
The logging configuration has four parts: logger, handler, formatted, and filter. In the code above, we will be defining the first three. Subsequently, filter configurations will be added.
We will be defining the logging methods accordingly.
Defining loggers configuration
By default, Django comes with some built-in loggers such as the standard django, django.request, django.server, django.template, django.db.backends, and django.security.
Each of these loggers has a different purpose and performs a specific function. See the Django documentation for more details.
For this tutorial, we will be using the standard Django logger.
LOGGING = {
    'version': 1,
    'loggers': {
        'django':{
            'handlers':['console'],
            'level':'DEBUG'
        }
    },
    'handlers': {
    },
    'formatters': {
    }
}Code language: JSON / JSON with Comments (json)
Here we defined the Django logger and added the handler type we want to use for this logger, as discussed earlier, and we set the log level to DEBUG and above.
Defining handler configuration
Similarly, we will define a handler by adding a handler configuration within the LOGGING dictionary. To define a handler, add the following code:
'handlers': {
        'console': {
            'level':'DEBUG',
            'class':'logging.StreamHandler'
        }
    },Code language: JSON / JSON with Comments (json)
Configuring handlers in the code above. First, we defined the handler name, console. You can set any name for the handler. Next, within the handler, we defined the handler configurations:
The level is set to the minimum level of DEBUG and above. In an instance where we set a different log level in the logger and handler. For example, the log level of DEBUG in the logger and INFO in the handler. The handler will filter the log and pick whatever log level comes above INFO.
Lastly, the class is set to console, which is a streamHandler.
Defining formatter configuration
Now let’s define a formatter by adding the following formatter configurations within the LOGGING dictionary.
'formatters':{
        'custom': {
            'format':  '{name} {asctime} {levelname} :: {message}',
            'style': '{',
        }
    }
}Code language: JSON / JSON with Comments (json)
In the code above, we added configurations to the formatter as well. First, we defined, the formatter name, custom. Next, we added some attributes to the format, such as the name of the logger, human-readable time, level name, and the logged message. There are other formats attributes that can be added based on the output information you want to receive. Lastly, we defined the style using the curly braces style. The default style for the Python logging module is the percentage mark. However, there are other styles, such as curly braces and dollar signs. For this tutorial, we will use curly braces to refer to the log message attributes using curly brackets.
Before we proceed to test out our log so far. Let’s add formatters to the handler. Remember, the formatter sets the output’s format before the handler sends it.
To assign a format to the handler, add the formatter name to the handler configuration.
'handlers': {
        'console': {
            'level':'DEBUG',
            'class':'logging.StreamHandler',
            'formatter': 'custom',

        }
    },Code language: JSON / JSON with Comments (json)
Great job so far!
Now, let us restart our web server to receive the log output. Run the python manage.py runserver command.
django.utils.autoreload 2022-12-22 15:52:17,442 DEBUG :: File /Users/anitaachu/env/lib/python3.9/site-packages/rest_framework/locale/sl/LC_MESSAGES/django.mo first seen with mtime 1656608015.9422102

django.utils.autoreload 2022-12-22 15:52:17,442 DEBUG :: File /Users/anitaachu/env/lib/python3.9/site-packages/rest_framework/locale/sk/LC_MESSAGES/django.mo first seen with mtime 1656608015.9418566

django.utils.autoreload 2022-12-22 15:52:17,442 DEBUG :: File /Users/anitaachu/env/lib/python3.9/site-packages/rest_framework/locale/pl/LC_MESSAGES/django.mo first seen with mtime 1656608015.9386454

django.utils.autoreload 2022-12-22 15:52:17,442 DEBUG :: File /Users/anitaachu/env/lib/python3.9/site-packages/rest_framework/locale/vi/LC_MESSAGES/django.mo first seen with mtime 1656608015.9461572Code language: JavaScript (javascript)
We got the logs for our project from DEBUG and below, according to the format we set.
Now, let us try out another scenario where the log level in the handler is set to INFO and the log level in the logger remains DEBUG.
Restart the server to see the output.
django.utils.autoreload 2022-12-22 18:47:04,227 INFO :: /Users/anitaachu/Django-E-commerce-RESTAPI/api/views.py changed, reloading.
django.utils.autoreload 2022-12-22 18:47:05,143 INFO :: Watching for file changes with StatReloaderCode language: JavaScript (javascript)
Implementing logging for debugging
We have learned the logging methods and how they are used. In addition to this tutorial, we will use this logging method to debug a simple Python script. The essence of this is to see how logging helps us debug.
Below is an example:
import logging

logger = logging.getLogger('django')

def divide(a, b):
    try:
        result = a / b
    except ZeroDivisionError:
        logger.exception ("Division by zero error")
    else:
        return result

logger.debug("Divide {a} / {b} = {c}".format(a=10, b=0,    c=divide(10,0)))Code language: Python (python)
In the code snippet, we replaced the built-in variable __name__ with the logger name Django, which we set earlier in the settings.py file.
Next, we introduced the logger.exception method, which is very useful in debugging. It provides the ERROR line and traceback information without setting any flags.
In the event of an error, trackback information is made available.
We also added the try and except method, which will catch a division by zero error.
Lastly, we added our logger.
Let’s test this out. Run your Django server to see the result in your console.
The code should produce an output like this:
django 2022-12-22 19:52:19,566 ERROR :: Division by zero error
Traceback (most recent call last):
  File "/Users/anitaachu/Django-E-commerce-RESTAPI/api/views.py", line 19, in divide
    result = a / b
ZeroDivisionError: division by zeroCode language: JavaScript (javascript)
Implement your own logger in the Django sandbox below:
Wrapping up
Logging is an efficient method of debugging. A good logging method helps you in the development of your application, improves the end-user experience, and, when properly implemented, saves you from a lot of difficulties encountered while debugging.
Django which is a Python framework, inherits the Python logging system, which is easy to implement and considered very flexible. If you haven’t implemented logging in your Django project, this is an excellent moment to get started.
I hope this tutorial has provided you with the essential information to help you understand logging in Django and how it works. Refer to the Django official documentation for more information on logging in Django.
Happy Coding!🙂
Anita Achu is a software developer and technical writer passionate about creating technical content to aid developers to learn about software development tools and how to use these tools in building and providing solutions to problems.