Drawing mode
Last updated on • Disponible en Français
During technical interviews you may need to sketch out a system or describe technical architecture, which you can do within the pad with Drawing Mode. You can conduct the interview entirely in Drawing Mode or toggle between the IDE and Drawing Mode as needed.
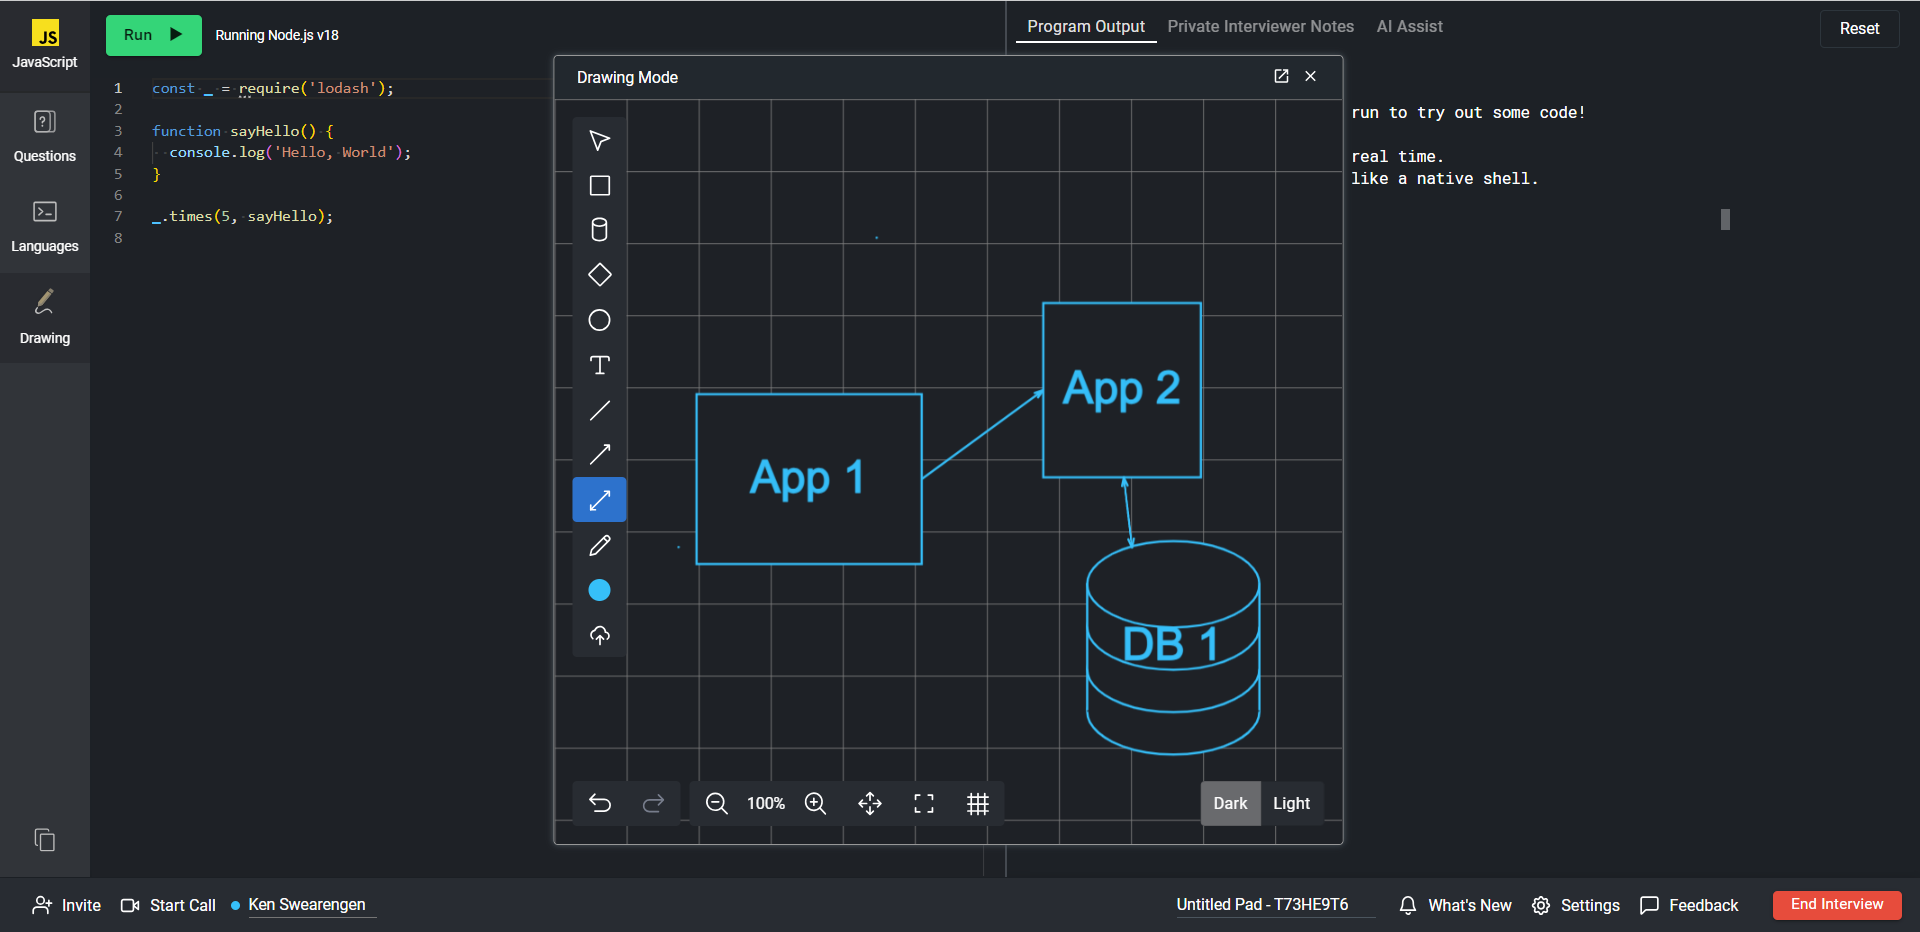
Drawing Mode allows you to join a virtual whiteboard alongside a candidate. Drawing Mode can be used for a variety of use-cases, but mostly it will be used for asking questions based around:
- Technical diagramming
- Database design
- UI/UX Mockups
The goal of Drawing Mode is to allow you to collaborate with the candidate to see how they think about certain questions that you ask them during an interview.
✅Tired of creating the same diagram over and over again for every interview? You can use the Include starter drawing toggle in the question creation wizard to attach a diagram or drawing to your commonly used interview questions.
We advise giving the candidate a heads up if there will be a Drawing Mode session during your interview. That way it gives the candidate a chance to come to Interview ahead of time, play around with Drawing Mode and become familiar/more comfortable.
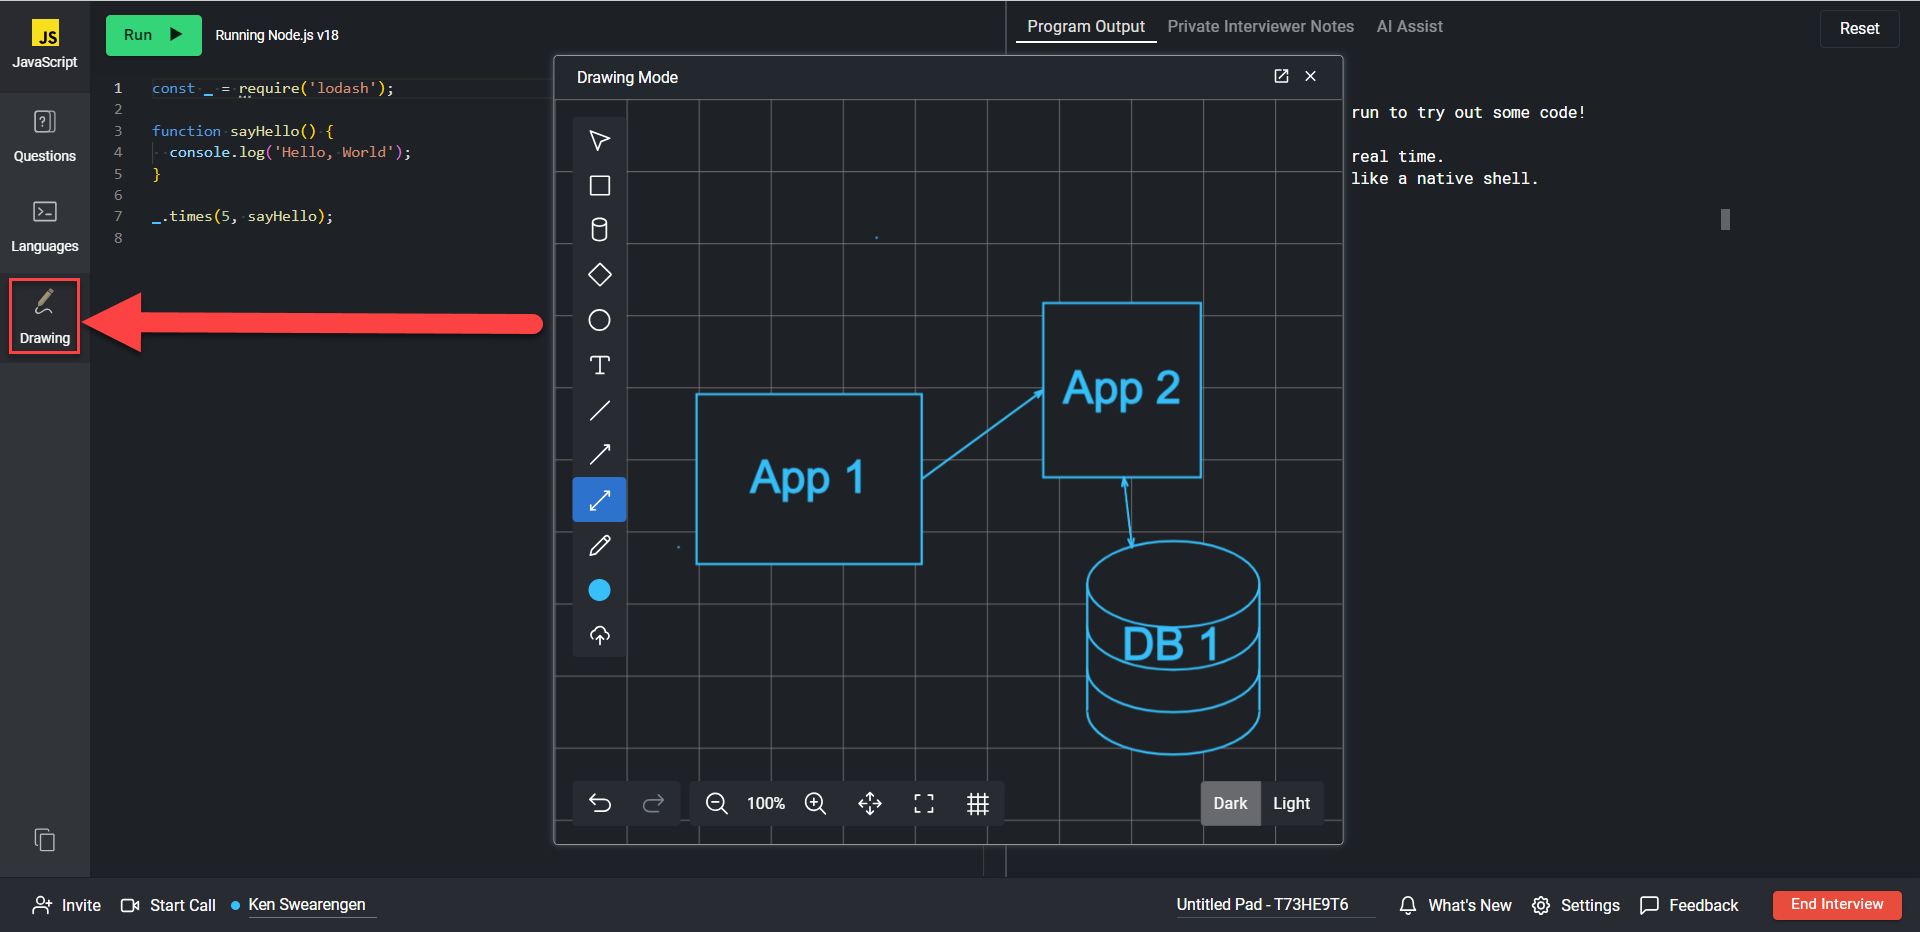
Accessing Drawing Mode
You can access Drawing Mode inside any live-interview pad. To open, click the Drawing Mode button located in the top left hand corner.
As soon as you click on the button, Drawing Mode will open and be ready for use.
☝️ Want to use a tablet or phone to draw diagrams? Simply send yourself a link to the pad and open it up on your device and draw away. You’ll probably also want to have the pad open on your desktop or laptop so you can easily access the other features while you draw.
Using Drawing Mode inside a pad
Once you open Drawing Mode, you can move the drawing container around. For most interviews, it’s always good to have your code in the left hand side of the screen, and drawing mode sitting just to the right of it.
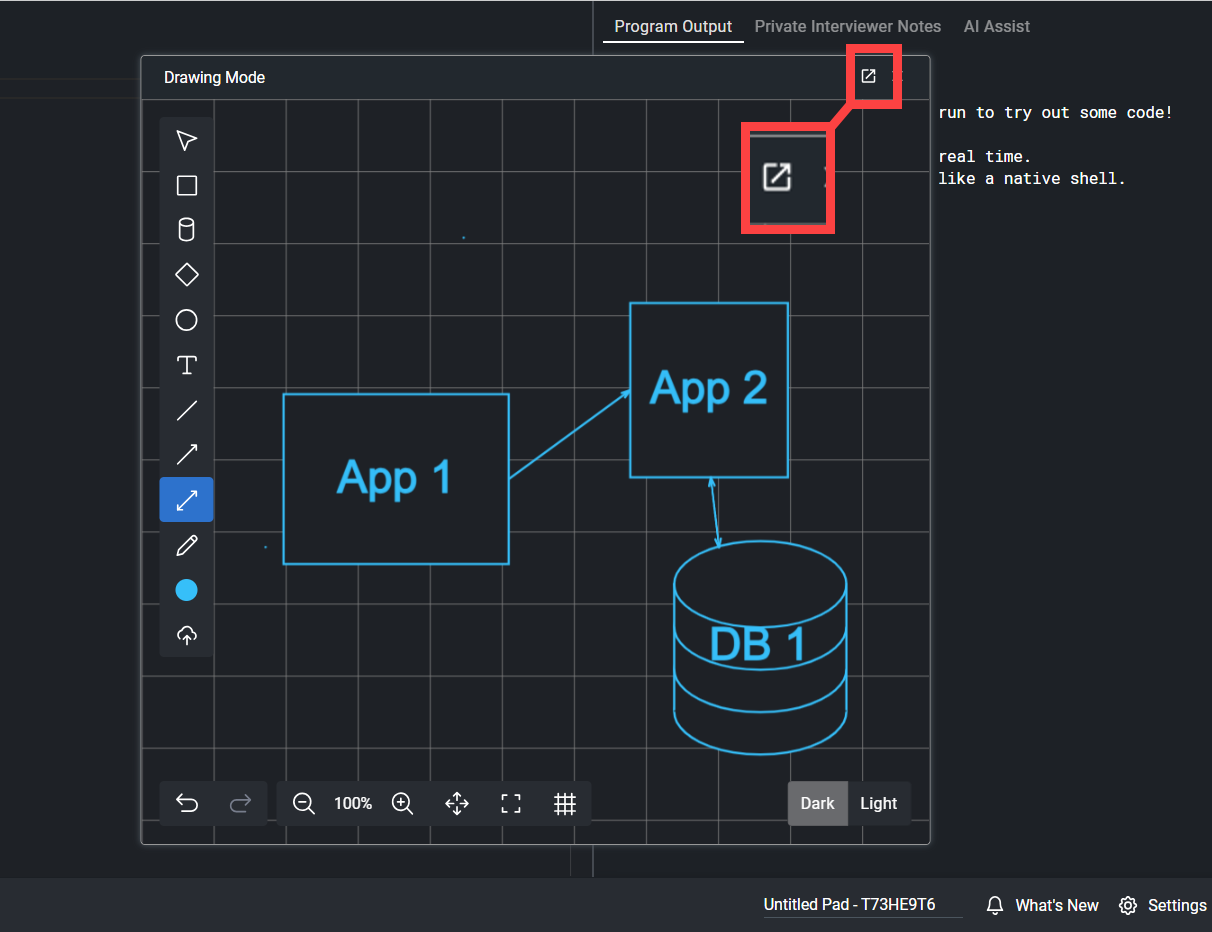
Opening Drawing Mode in a new window
You also have the option to open Drawing Mode in an entirely new window. To do this, click on the icon located in the top right hand corner of Drawing Mode. This is beneficial if you have a larger screen.
Interviewer and candidate access
Both the interviewer and the candidate have access to open/close Drawing Mode at any time during the interview. Each participant has control of their own environment, meaning when an interviewer opens up Drawing Mode, it will not open for the candidate. If you decide to close Drawing Mode, the contents of all participants will still be accessible upon re-opening.
In other words, the drawing window contents are always synced between ALL pad users, but each pad user controls whether or not their drawing window itself is open or closed at any moment.
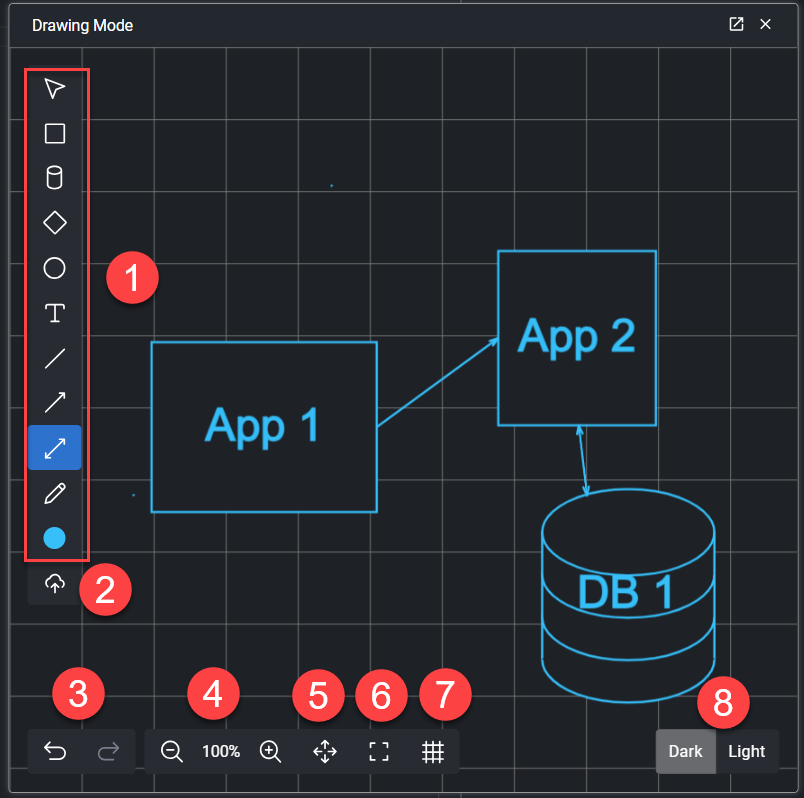
Drawing Mode tools
In Drawing Mode, you have access to different tools. You’ll see options like adding shapes, lines, text, and more (1). There is also the ability to:
- Upload your own images (2)
- Un-do and re-do (3)
- Zoom in and out (4)
- Pan around the window (5)
- Fit the window to the pane (6)
- Toggle the grid pattern (7)
- Toggle between dark and light modes (8)
✅Need to delete an object? Simply click on the object and hit the
Deletebutton on your keyboard.
Playback and after the interview
You will be able to see the final state of the drawing as part of the pad playback for review. If Drawing Mode was enabled during the pad session, there will be a tab on the right side of the editor to review the drawing – labeled “Drawing”. If Drawing Mode was not enabled during the pad session, the tab will not appear.