Before you get started interviewing candidates with the Interview platform, there are a few things we recommend that you do — and don’t do — to make the process as smooth as possible for both you and your candidate.
👍 Do…
✅ Do prepare candidates for the interview.
Utilizing a new IDE while under pressure during an interview can be stressful, so we recommend highlighting the IDE and language options available to them before the interview.
✔️If you plan on using Drawing Mode in the interview, let them know that this is something else the candidate can explore in the sandbox environment.
✅ Do use Interview’s audio and visual capabilities.
Our in-pad audio and video features are the smoothest way to communicate during a live interview. No additional Zoom links or settings to navigate here. You and the candidate just need the pad link to conduct the entire interview.
The “Start Call” feature can be found on the bottom left-hand corner of the pad.
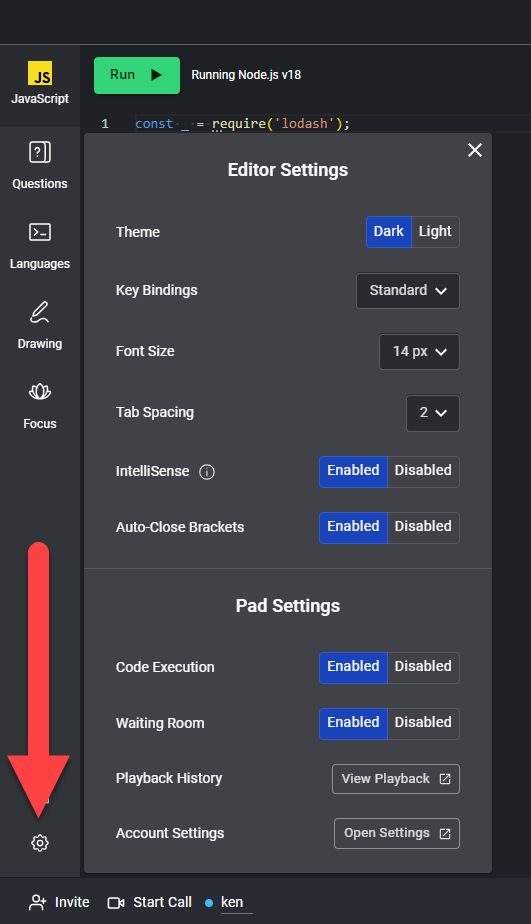
✅ Do take advantage of interviewer settings.
You can change your own pad settings to set up the pad and the IDE in a way that works best for you. Note that your Editor Settings won’t affect the Editor Settings that the candidate has chosen for themselves. The Pad Settings are only available to you as the interviewer.
✔️If you’re more interested in a candidate’s general coding or problem-solving skills rather than their proficiency in a particular language, we recommend setting the pad language to Plain Text when you first create it. This way, they won’t feel pressured to try and code in the default language you selected initially, AND they can start writing pseudo-code if needed to collect their thoughts. They can then quickly switch to a language they’re proficient in.
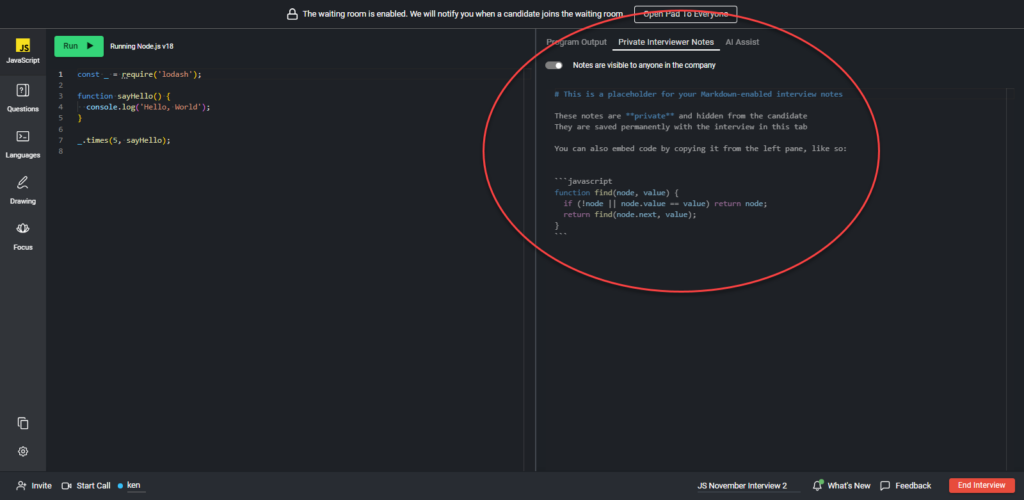
✅ Do use interviewer notes to capture real-time feedback.
Jot down your thoughts on how the interview is progressing and the candidate’s performance during the live interview in this section. The candidate cannot see them.
The interviewer notes stay with the pad, which can be helpful if others are reviewing the pad after the interview concludes.
Use the private interview notes by clicking the tab on the top right side of your pad
✅ Do enable Focus Time for candidates in live interviews.
Activating the Focus Time feature blurs the interviewer’s screen for a few minutes and allows the candidate to have a moment to collect their thoughts in the pad. Studies show that performing while having an interviewer watch you is stressful and can decrease performance. You may be unintentionally eliminating great candidates that need a few minutes to collect their thoughts before they start coding. Focus Time gives candidates those few minutes they need to mentally prepare themselves to “wow” you in the interview.
✔️The Focus Time feature is currently only available if your organization requests to enable it.
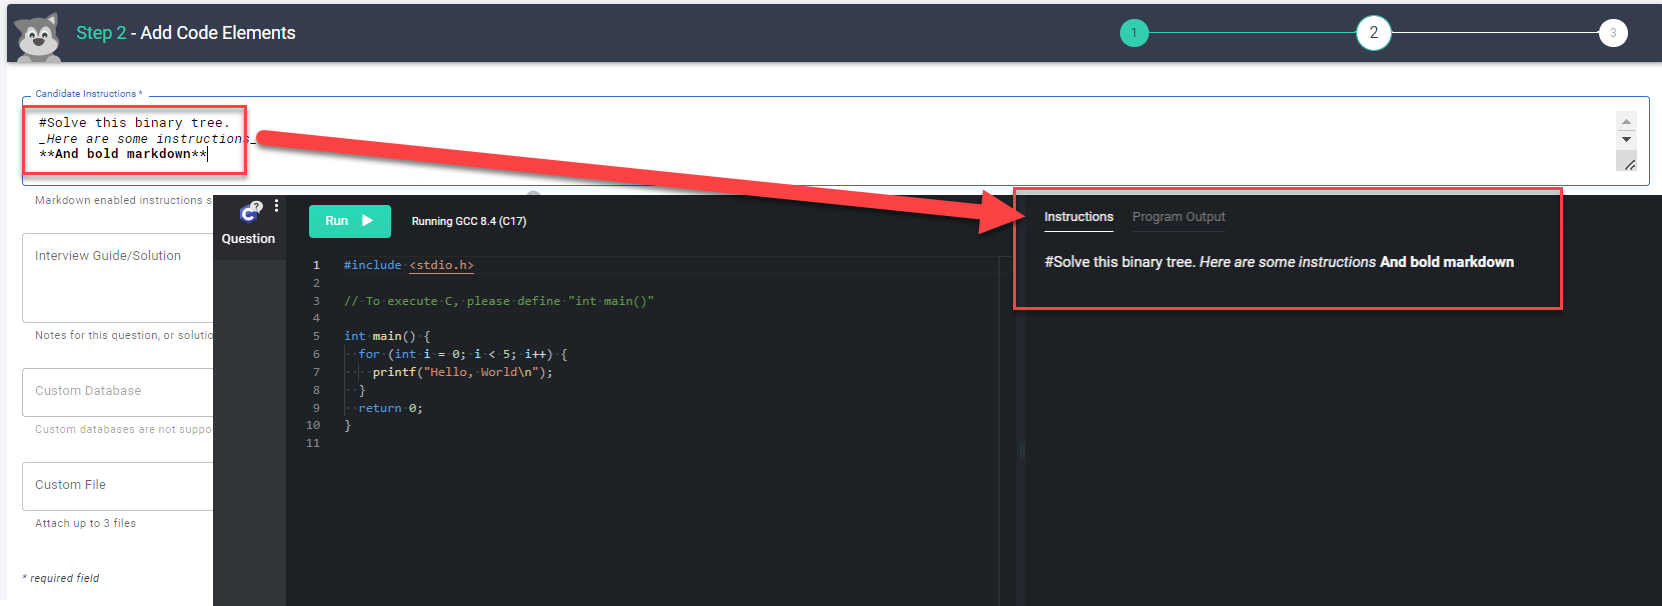
✅ Do use the “Candidate Instructions” box to persist instruction text across different languages
When you use the Candidate Instructions box in the Question Bank, the candidate will be able to see the instructions no matter what language they chose to answer the question in.
The candidate instructions will persist in the Instructions tab no matter what language is selected.
✅ Note that Interview does not currently support creating custom multi-language questions, but we do support language agnostic questions. Using the Candidate Instructions and setting the default question language to “Plain Text” as mentioned above is the best way to create language agnostic questions.
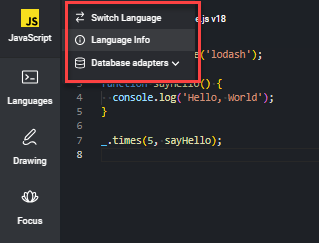
✅ Do advise candidates to utilize pad resources
Candidates can access language information, switch question languages, and load database adapters (when applicable) by hovering over the language or question and selecting their desired resources or question language.
👎 Don’t…
❌ Don’t forget to end the interview.
You can only end the interview by clicking the End Interview button at the bottom right-hand corner of the pad – it won’t end if you exit out of your browser.
You won’t have access to the playback for live interviews until you hit the End Interview button. Leaving the pad open also means the candidate can go in and continue to edit their code even after the interview has concluded.
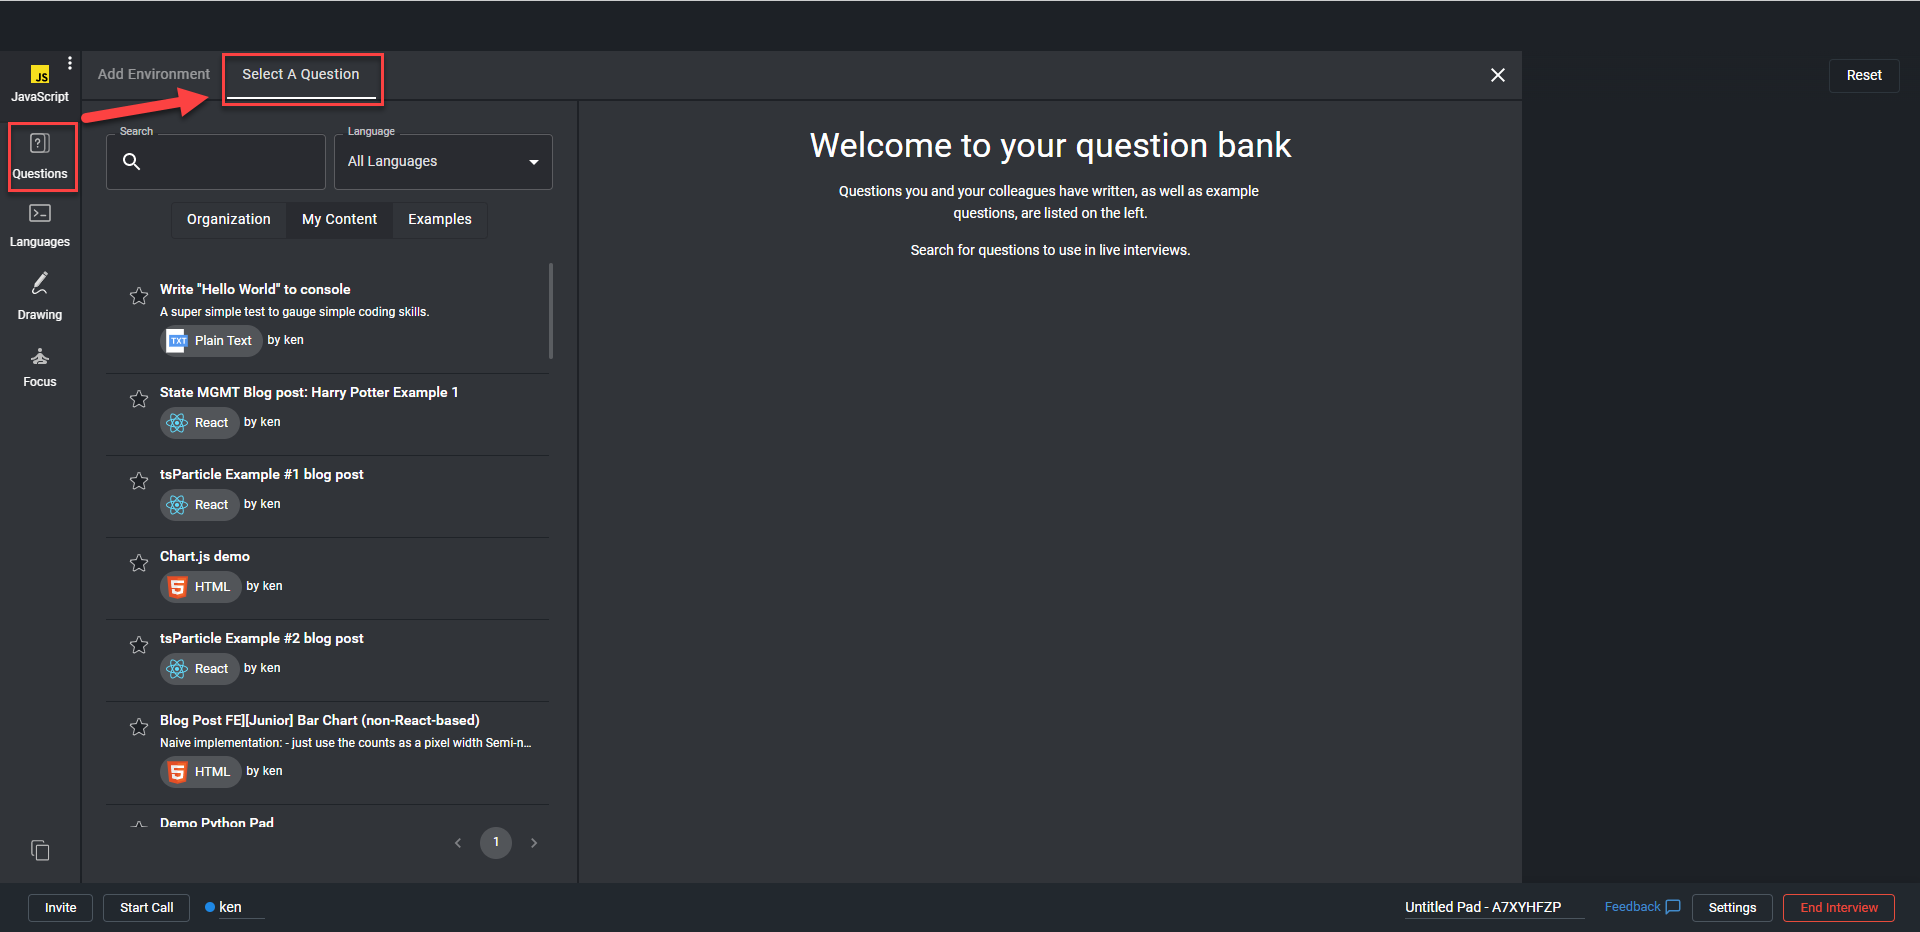
❌ Don’t create questions at the last minute.
Define good questions ahead of time and add them to your question bank – and use them during the interview! Not only will it save you time during the interview, but it’s an excellent way to be consistent and reduce bias. Note that candidates won’t be able to see the question until after you’ve selected it.
✔️If you want to learn more about the attributes of a great technical interview question, you can read up on it here.
❌ Don’t use stale questions.
Make sure you refresh your questions regularly, as more often than not they’ll find their way to the internet where potential candidates will be able to see – and prepare for – them.
❌ Don’t use the default pad name.
When you first create a pad, the pad name will be something like “Untitled Pad – 7CCKBB9M”. If you’re creating pads as part of a team, this can quickly become disorganized or confusing. We recommend having a standard naming format to help make it easier to find the pad for playback and evaluation – something like [CandidateName]-[Date]-[TestName].
✔️ If you leverage one of our ATS or schedule integrations, the ATS or schedule platform will automatically name the pad for you.
You can edit the name of the pad on the bottom right hand side of the screen.
Further Reading on Interview Best Practices
For more information on improving the overall hiring experience for you candidates, check out these articles: